
TL;DR
A closet setup for recording is less about absolute soundproofing and more about managing reflections, low-frequency buildup, and strategic placement. Proper treatment, ventilation, and placement make your closet a surprisingly effective vocal booth or workspace.
Ever wondered if your closet could double as a decent vocal booth? It can, with the right approach. The secret isn’t just foam or blankets, but understanding how sound behaves in tight spaces and how to position your gear for the best results.
Many folks focus only on absorbing sound with foam, but that’s just the start. Moving the rig into a closet is a game-changer—distance, placement, and materials matter more than fancy acoustic panels. This guide will show you how to turn a small closet into a high-quality recording spot without breaking the bank.
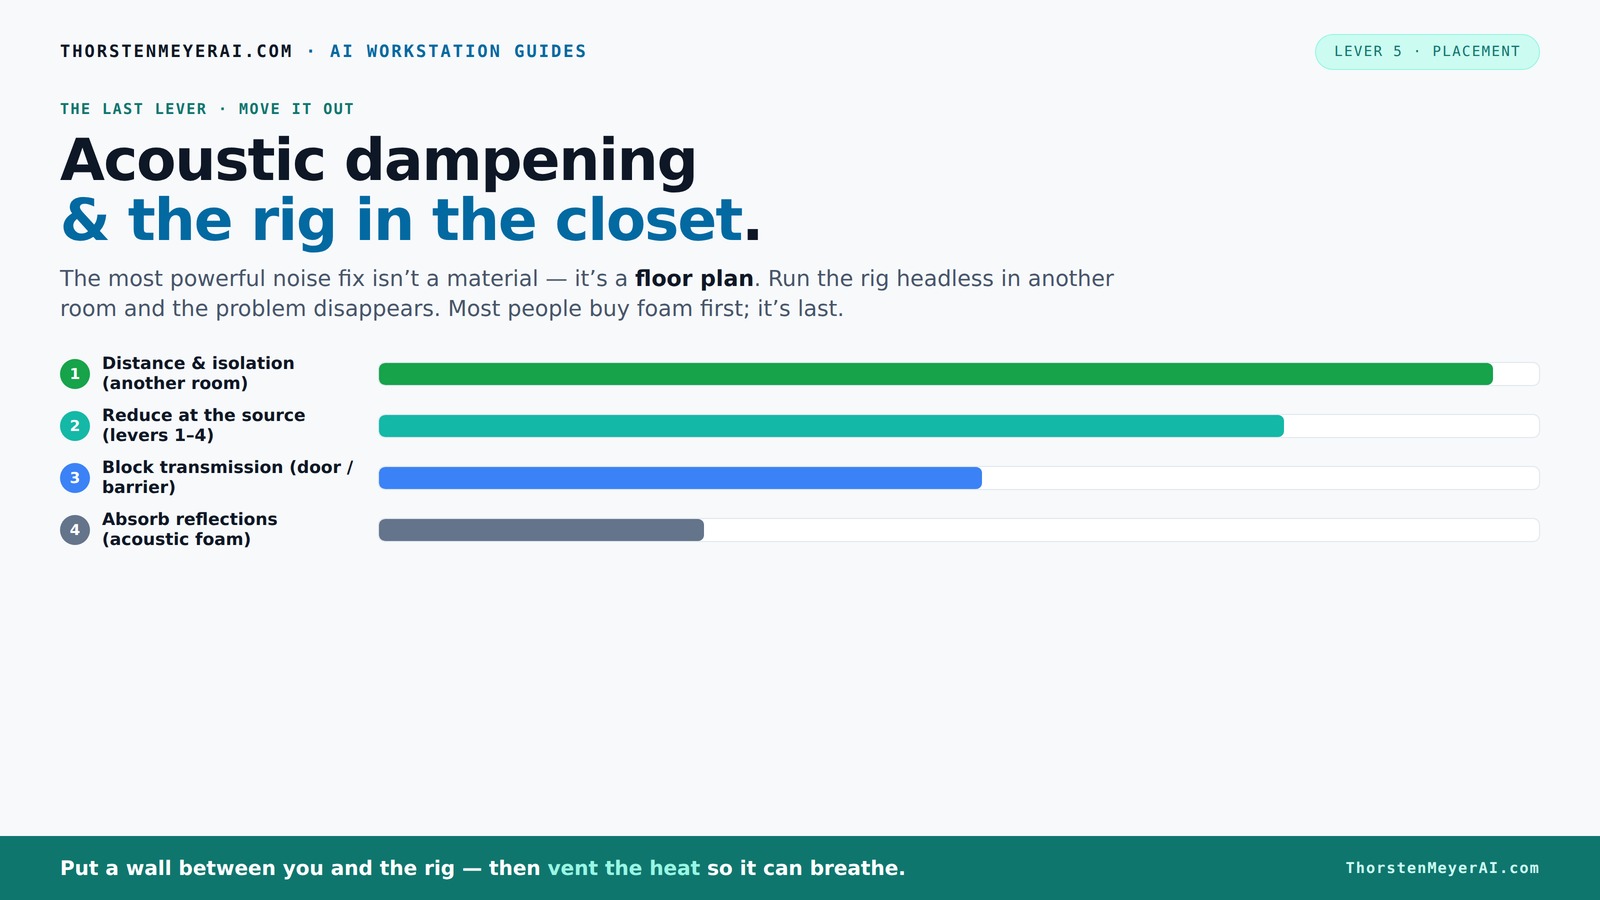
Acoustic dampening
& the rig in the closet.
The most powerful noise fix isn’t a material — it’s a floor plan. A rig you can’t hear because it’s in another room beats any amount of foam. Tap the approaches in Part 1 to see what actually works.
(another room)
(levers 1–4)
(door / barrier)
(acoustic foam)
Contain the noise, not the heat
Key Takeaways
- Distance your rig from your workspace to massively cut noise without extra effort.
- Treat large reflective surfaces—walls, ceiling, and door—to tame echoes inside the closet.
- Use gap-sealing and acoustic barriers at the door to prevent sound leakage.
- In small spaces, add bass traps in corners to control low-frequency buildup.
- Proper ventilation is essential when placing a hot, high-power rig in an enclosed closet.

Focusound 52 Pack Acoustic Foam Panels 1" x 12" x 12" Sound Proof Foam Panles Soundproofing Noise Cancelling Wedge Panels for Home Office Recoding Studio with 300PCS Double-Side Adhesive
Soundproofing - Acoustic foam panels triangular grooves structure for better noise absorption, helps to reduce and absorb unwanted...
As an affiliate, we earn on qualifying purchases.
As an affiliate, we earn on qualifying purchases.
Why Distance Is Your Best Weapon Against Noise
Distance is the simplest, most effective way to quiet your rig. When you put your computer or audio gear in another room—say, a basement or closet—you cut down the noise dramatically. It’s like turning down the volume at the source, instead of fighting it with foam.
Imagine you’re trying to record vocals. Your mic picks up everything—the fan noise, GPU hum, even the faint whirr of hard drives. If your rig lives across the hall or in the closet, the sound barely reaches your mic, making post-production easier and faster.
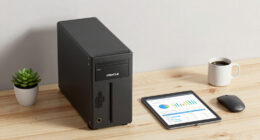
This setup is perfect for AI workstations, where your machine doesn’t need to be right next to you. You just SSH in and keep your workspace silent while the noisy hardware roars in a distant room.

2 PCS Extra Large Sound Dampening Blanket,96"x 80" Sound Absorbing Studio Blanket Panel with Grommets for Wall Hanging,Noise Cancelling Studio Acoustic Curtain/Light Blocker/Soundproof Moving Blanket
Studio Sound Dampening Blanket: Aodyow portable extra large size sound blanket covers about 96 x 80 inches can...
As an affiliate, we earn on qualifying purchases.
As an affiliate, we earn on qualifying purchases.
The 'Rig in the Closet' Setup — The One Big Caveat You Must Know
Putting your machine in a closet sounds ideal—quiet, out of sight, out of mind. But here’s the catch: heat. A sealed space traps heat, and high-powered rigs generate hundreds of watts of heat. Without proper ventilation, your gear overheats fast.
Think of it like a sauna for your PC. If you don’t vent hot air out, temperatures climb, fans spin louder, and your system throttles, defeating the purpose.
To avoid this, you need active ventilation—passive vents with a small exhaust fan work well. For more sophisticated setups, consider a soundproof cabinet with built-in cooling and temperature controls. Check out this [guide on cooling](https://thorstenmeyerai.com/reduce-heat-noise-ai-workstation/) for ideas.

Portable Recording Booth for Home Studio, Foldable Sound Isolation Vocal Shield with Floor Stand, High-Density Acoustic Blanket Enclosure for Singing, Voiceover & Podcast, Includes Phone Holder
INSTANT STUDIO-QUALITY "DRY" SOUND: Transform any noisy room into a professional vocal booth instantly. Engineered with high-density acoustic...
As an affiliate, we earn on qualifying purchases.
As an affiliate, we earn on qualifying purchases.
Acoustic Dampening vs. Soundproofing: What’s the Real Difference?
Acoustic dampening and soundproofing are often confused, but they serve different purposes. Dampening reduces echoes and reflections inside a room by absorbing sound waves, making recordings clearer and reducing unwanted reverberations. Soundproofing, on the other hand, aims to prevent sound from escaping or entering a space by adding mass and sealing gaps, which is crucial if you’re trying to avoid disturbing neighbors or block external noise.
In a closet, dampening materials like foam or blankets are essential to control the internal sound environment. They help tame the harsh reflections that make voice recordings muddy or hollow. Soundproofing is more about sealing the space—adding weatherstripping around the door, sealing gaps, and possibly adding dense barriers—to prevent noise leakage. Both are important, but they address different issues. Prioritizing dampening inside the closet improves recording quality, while soundproofing prevents noise from disturbing others and vice versa. Combining both strategies yields the best results, but understanding their distinct roles helps you allocate your resources efficiently.
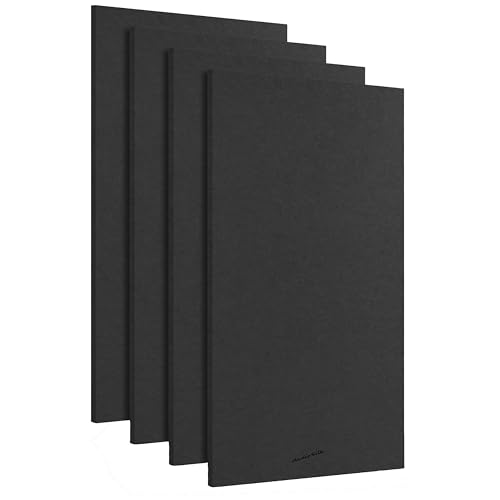
AudioSilk Acoustic Panels, 4 Pack ROOM KIT, Large, 46" x 23", Black
REDUCE NOISE: Struggling with poor acoustics in your recording/rehearsal space? AudioSilk panels give you professional, studio grade sound...
As an affiliate, we earn on qualifying purchases.
As an affiliate, we earn on qualifying purchases.
Where to Place Treatment Materials for Best Results
The most effective way to treat a closet is to target the biggest, most reflective surfaces—walls, ceiling, and door. Place foam panels or blankets on these to soften echoes and reduce harsh reflections.
Imagine standing in your closet, speaking or singing. The sound reflects off flat surfaces. Covering these with acoustic panels or hanging blankets at reflection points makes a big difference.
For example, hanging blankets a few inches off the wall creates an air gap that enhances absorption. Focus on the front wall behind your mic and the ceiling—these are prime reflection points. Use a mirror trick: position a mirror along the walls and ceiling, and where you see your microphone’s reflection, those are your key reflection points that need treatment. This ensures you’re treating the surfaces that contribute most to unwanted reflections.
Here's a quick tip: avoid leaving flat, untreated surfaces near the door, as sound can bounce right through gaps and cracks. Seal gaps with weatherstripping to prevent leakage.
How to Reduce Low-Frequency Buildup in Small Closets
Low frequencies—think deep bass—are a common problem in small, sealed spaces like closets. They cause standing waves, which make your recordings muddy and boomy. These standing waves occur when low-frequency sound waves reflect and reinforce each other in confined spaces, creating peaks and nulls that distort your sound.
To tame this, add bass traps into corners where these waves tend to collect. These traps are dense, thick panels that absorb low-end frequencies, preventing the buildup of resonance that causes muddiness or boominess. Proper placement is key—install bass traps in the corners and along any surfaces where low-frequency energy tends to concentrate. This targeted approach reduces phase cancellations and uneven frequency response, resulting in clearer, more balanced recordings.
In small spaces, low frequencies tend to build up because of the limited volume and reflective surfaces. Without addressing these, recordings can sound muffled or overly boomy, especially on bass-heavy instruments or vocals. Bass traps help absorb these problematic frequencies at their source, preventing the formation of standing waves that cause phase cancellations and muddy sound. By strategically placing bass traps in corners and along reflective surfaces, you can achieve a more neutral and accurate sound profile, making your recordings clearer and more professional. Remember, the goal is not to eliminate all bass, but to tame excessive low-end buildup that skews your mix. Check out this [bass trap guide](https://thorstenmeyerai.com/low-noise-pc-cases-airflow/) for details on effective placement and materials.
Floor Treatment: Why Your Rug or Carpet Matters
Hard floors bounce sound around, making reflections worse. A simple rug or carpet can absorb some of that, making your closet sound warmer and clearer.
Picture yourself recording vocals—standing on a soft rug reduces harshness and prevents sound bouncing off a tile or wood floor.
This is especially helpful if you notice your recordings have an unnatural echo or if your closet’s floor is hard concrete or wood. Adding a rug or fabric mat is cheap, easy, and surprisingly effective.
Choosing the Right Microphone for a Closet Setup
In a small, treated space like a closet, microphone choice is critical. Condenser mics are sensitive and pick up more room reflections, while dynamic mics tend to reject background noise better.
For tight spaces, a dynamic mic like the Shure SM58 or SM57 can minimize room sound pickup. If you want clarity and detail, a cardioid condenser with proper placement can work—just be prepared to treat reflections carefully.
One creator recommends trying a shotgun mic or a small-lavalier for maximum rejection of room reflections. It’s about matching your mic to your space’s acoustics.
Common Mistakes to Avoid When Turning a Closet Into a Studio
Don’t treat only the corners—walls and ceiling matter just as much. Relying solely on foam panels without sealing gaps or addressing low frequencies is a recipe for muddy sound.
Avoid flat, untreated surfaces near the door. And never forget: air gaps and cracks let sound leak out or in, defeating your efforts. Seal everything with weatherstripping, acoustic sealant, or door blockers.
Finally, don’t overdo it. Too much absorption can make your space sound unnatural—aim for a balanced approach with coverage on reflection points and some bass trapping.
Frequently Asked Questions
Can a closet really work as a vocal booth?
Yes, with proper treatment and placement, a closet can serve as a decent vocal booth. Focus on reflection points, door sealing, and low-frequency control to improve sound quality significantly.
What is the difference between acoustic dampening, absorption, and soundproofing?
Acoustic dampening reduces echoes and reflections inside a space. Absorption materials like foam or blankets soak up sound waves. Soundproofing blocks sound from escaping or entering, usually with dense, sealed barriers.
Where should I place foam, blankets, or panels in a closet?
Place them on large reflective surfaces—walls, ceiling, and door. Focus on reflection points behind your mic and avoid flat, untreated surfaces near gaps or cracks. Hanging blankets a few inches off walls boosts absorption.
Do I need to treat the door, or just the walls?
Both are important. Sealing the door with weatherstripping prevents sound leaks. Treat the door surface with absorbent materials, especially if it’s flat and hard, to reduce sound transmission.
How thick should acoustic panels be for a small closet?
Generally, 2-4 inches thick panels work well. Thicker panels absorb lower frequencies better, but for most small closets, 2-3 inches provide a good balance of absorption and size.
Conclusion
Turning your closet into a quiet, functional studio is less about high-tech foam and more about smart placement, sealing gaps, and managing heat. Think of it as creating a cozy cave—soft materials and strategic positioning make all the difference.
Remember, noise reduction isn’t just about absorbing sound; it’s about controlling how sound travels, reflects, and leaks. With the right setup, your closet can become a surprisingly professional-sounding space—quiet, efficient, and ready for action.