
To make a light box for testing that beats window light, build a sturdy frame with matte, non-reflective surfaces and line it with diffusing materials like frosted acrylic or white fabric. Install adjustable LED lights at 45-degree angles to guarantee even, soft illumination. This setup blocks external shadows, reduces glare, and provides consistent color accuracy, regardless of outside weather. Keep exploring to discover step-by-step instructions and expert tips for perfecting your light box.
Key Takeaways
- Use consistent, daylight-balanced LED lighting to mimic natural light and ensure accurate color testing.
- Incorporate diffusing materials to create soft, even illumination and minimize shadows and hotspots.
- Build a sturdy, non-reflective frame that blocks external environmental interference.
- Position lights at 45-degree angles for balanced coverage and adjust for glare or reflections.
- Regularly calibrate and fine-tune lighting conditions using color standards and test photos.

NEEWER 13" LED Video Light Panel Kit, 2 Pack Bi Color Dimmable with Tripod Stand, 4000mAh Battery, 3200K-5600K CRI97+, USB, for Studio/Streaming/YouTube, Black, NL-192AI
【Bi Color LED Panel Light】 The video light features 192 LEDs (96 warm and 96 cool), 3200K to…
As an affiliate, we earn on qualifying purchases.
As an affiliate, we earn on qualifying purchases.
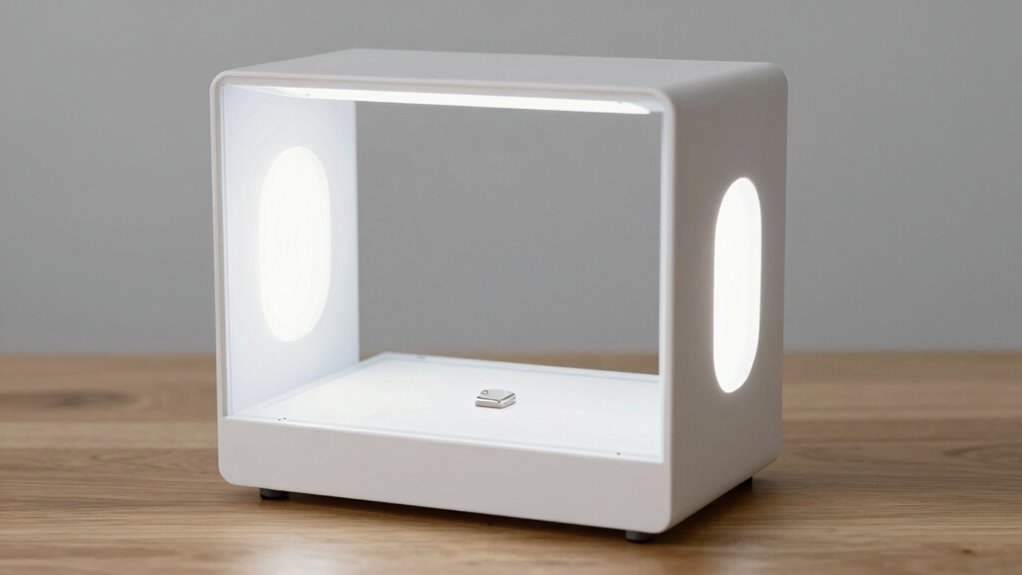
Why You Should Make a Light Box for Testing

A light box is an essential tool for testing because it provides consistent, even illumination that reveals the true colors and details of your materials. When choosing or building a light box, pay attention to its color temperature—ideally around 5000K—to mimic natural daylight and guarantee accurate color representation. A proper light box also helps manage power consumption efficiently; LED lights are a great choice because they use less energy while delivering bright, uniform light. This controlled environment eliminates shadows and glare, making your tests more reliable. By customizing your light box, you gain control over lighting conditions, which reduces errors and simplifies color matching. Overall, investing in a well-designed light box improves testing accuracy and saves energy over time. Additionally, keeping clean piercings in mind can enhance your focus by minimizing distractions during the testing process. Incorporating airless paint spraying techniques into your workflow can further enhance the quality of your projects. Furthermore, using the right performance upgrades can dramatically improve the efficiency of your lighting setup. Moreover, using a light box aligns with the goal of exploring new frontiers in digital content creation, allowing for innovative approaches to testing and presentation. This investment not only boosts the quality of your work but also promotes work-life harmony by enabling more effective and efficient testing processes.

Milky White Acrylic 2 Sheets of 12"x12"White Translucent Acrylic 1/8" Thickness Cast Plexiglass with Protective Paper for Making Light Boxes, Signs,Lamps,DIY Display Projects, Craft
High light transmittance: Milky white plexiglass can transmit up to 60% of visible light, which is higher than…
As an affiliate, we earn on qualifying purchases.
As an affiliate, we earn on qualifying purchases.
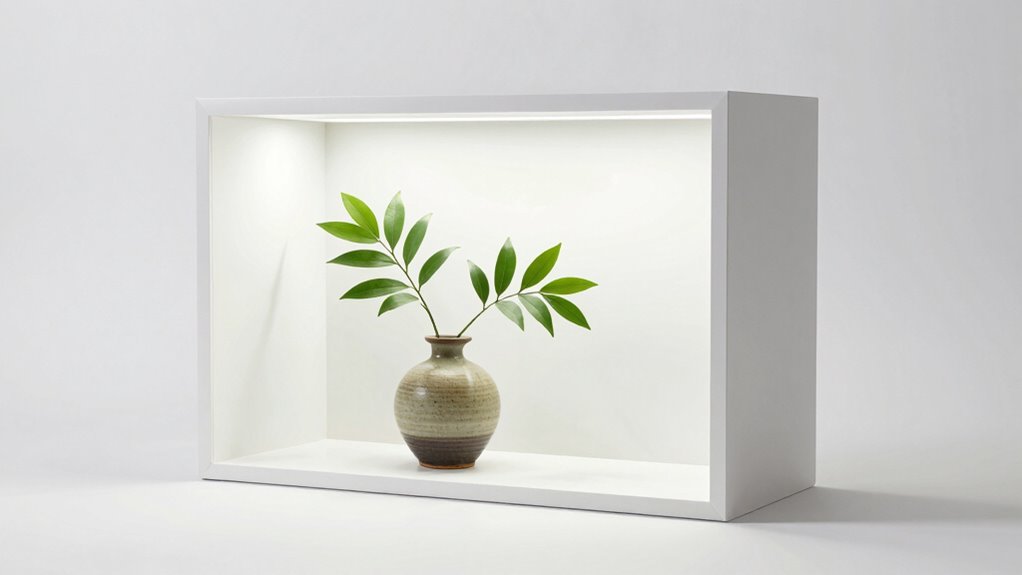
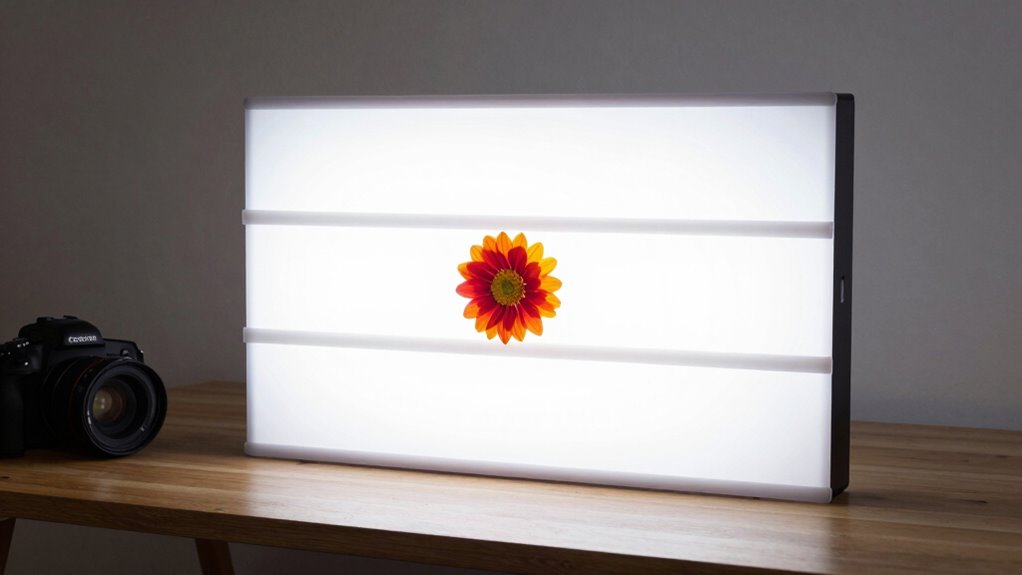
The Benefits of Using a DIY Light Box Over Window Light

Using a DIY light box gives you consistent lighting conditions, so your tests stay reliable regardless of the time of day. It also minimizes environmental interference like nearby windows or weather changes that can affect your results. Overall, it offers a more controlled and stable setup compared to relying on window light.
Consistent Lighting Conditions
Have you ever noticed how inconsistent lighting from windows can ruin the quality of your photos? A DIY light box provides stable, controlled lighting conditions, ensuring your images are consistent every time. With a light box, the color temperature remains steady, preventing unwanted shifts that can distort colors. This consistency helps you accurately compare products or test materials without worrying about changing natural light. Additionally, light diffusion inside the box softens shadows and reduces glare, creating even illumination across your subject. These factors help you achieve professional-looking results, regardless of the time of day or weather outside. By eliminating fluctuations in lighting, your testing process becomes more reliable, saving you time and frustration while improving overall image quality. Furthermore, using a light box allows you to maintain consistent performance in your testing, similar to how a high contrast ratio enhances clarity in projected images. Maintaining ergonomic setups can also significantly enhance your comfort and reduce strain during extended photography sessions. Moreover, ensuring cable safety in your light box setup helps prevent overheating and potential hazards during prolonged use.
Reduced Environmental Interference
Sure! Here’s the modified content following your directions:
—
Natural window light is unpredictable and easily influenced by environmental factors, which can interfere with the accuracy and consistency of your tests. External shadows from passing clouds or nearby objects cause fluctuations, while ambient noise can distract or disrupt your setup. A DIY light box minimizes these issues by providing consistent, controlled lighting. It blocks out external shadows and reduces ambient noise, creating a stable environment for testing. This stability helps you avoid inaccuracies caused by sudden changes in light or background disturbances, ensuring your results are reliable. Using a light box, you gain control over your environment, making your testing process more precise and less susceptible to external interference. Additionally, employing goal setting strategies can help you define specific objectives for your testing process. An airless paint sprayer’s smooth finish can further enhance your creative projects by ensuring even application.
| Factor | Impact | Solution |
|---|---|---|
| External shadows | Causes inconsistent lighting | Light box blocks shadows |
| Ambient noise | Disrupts focus and setup | Isolated, noise-free environment |
| Fluctuating light | Reduces test accuracy | Continuous, steady lighting |
| Environmental changes | Introduces variability | Controlled testing space |
| Unpredictable factors | Skews results | Reliable, enclosed setup |
—
Let me know if you need any further adjustments!

Photo Light Box, 12/16/20/24/32 Inch Photography Light Box with CRI>95 120 Light Beads. Dimmable Shooting Tent Kit with White and Warm Light. 6 Color Backdrops Photo Booth for Studio Products Display
Adjustable Brightness and High Color Rendering Index: 12"x12"(30x30cm)Photo light box Built in 120 high-quality LED beads, with a…
As an affiliate, we earn on qualifying purchases.
As an affiliate, we earn on qualifying purchases.
Essential Materials for Building Your Light Box

To build an effective light box, you need to choose the right materials, like sturdy cardboard or wood for the frame. You’ll also want to select ideal lighting components, such as LED strips or bulbs that provide even, flicker-free illumination. Picking the right combination guarantees your light box is durable and produces consistent lighting for accurate testing. Consider incorporating LED strips for ambient lighting to enhance the overall setup. Additionally, ensuring that your setup minimizes auditory processing challenges can create a more focused testing environment. A well-lit space can also help improve your fitness performance, making it easier to stay motivated during your testing sessions. Moreover, using weatherproof storage for your light box can protect it from environmental factors that may affect its performance. Remember, effective leadership in any project can significantly influence team dynamics, fostering a collaborative spirit that drives success.
Key Material Choices
Choosing the right materials is essential for building an effective light box. You want options that balance material durability with aesthetic appeal, guaranteeing your setup lasts and looks professional. For the frame, lightweight yet sturdy materials like aluminum or thick plastic work well, resisting warping over time. The interior walls should be made of reflective, non-toxic surfaces such as white acrylic or foam board, which enhance light diffusion. For the diffuser, consider frosted acrylic or parchment paper—these materials provide a soft, even glow while maintaining durability. Avoid flimsy or easily damaged components that could compromise your testing consistency. Selecting high-quality, durable materials ensures your light box stays reliable, while a clean, attractive appearance helps you focus on your work without distraction.
Optimal Lighting Components
What are the best lighting components to guarantee your light box produces consistent, high-quality illumination? You need reliable, adjustable lights with the right color temperature and power options. Aim for LED strips or bulbs with a color temperature around 5500K for daylight-like brightness, as this mimics natural light conditions. Using ethical consumer choices in your lighting components can further enhance your photography setup. Additionally, considering the environmental impact of your materials can contribute to sustainable practices in your photography endeavors. Choose power options like USB, AC adapters, or batteries for flexibility. Consistent illumination reduces shadows and color shifts. Additionally, using consistent illumination techniques can help enhance your photography results. The benefits of using pediatric sleep specialists can also apply to creating an optimal environment for focused work and creativity.
| Component | Features | Power Options |
|---|---|---|
| LED Strip Lights | Adjustable brightness, color temperature | USB, AC, Battery |
| Softbox Diffusers | Even light distribution | N/A |
| Adjustable Mounts | Precise positioning | N/A |
| Power Supplies | Reliable, compatible with chosen lights | USB, AC adapters |
| Dimmer Switches | Fine-tune light intensity | Compatible with LEDs |

Photography Light Reflector Cloth 55×39.3in Reflective Fabric for Lighting Softbox, Light Box Tents, Panel
Reflective fabrics are used to make softboxes, reflective panels, flag boards, product photo booths.
As an affiliate, we earn on qualifying purchases.
As an affiliate, we earn on qualifying purchases.
Step-by-Step Guide to Setting Up Your Light Box

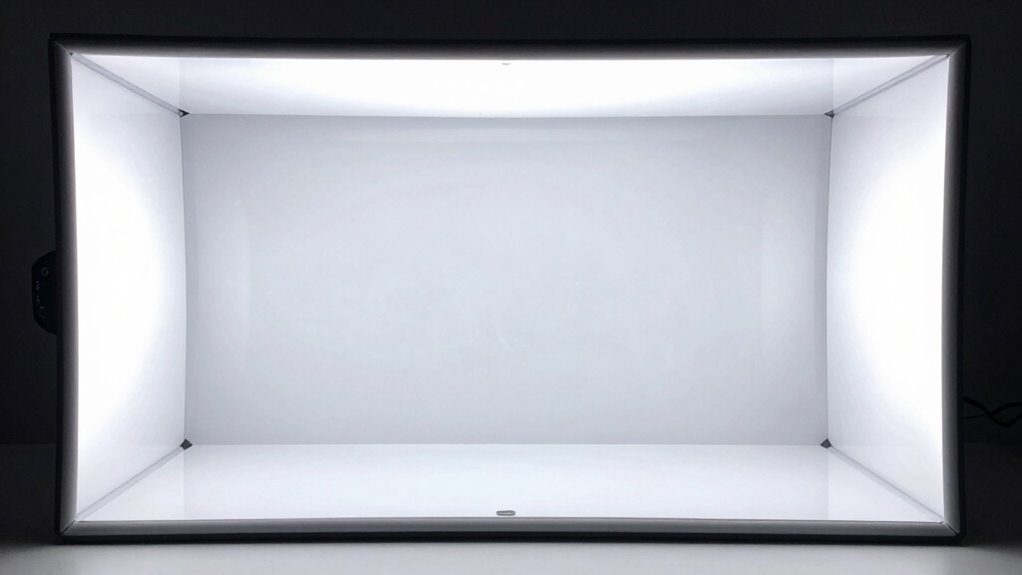
Setting up your light box is a straightforward process that guarantees consistent and even lighting for testing your objects. Begin by assembling the frame with sturdy, durable materials to assure long-lasting use and maintain material durability over time. Use a large, opaque box or construct one with thick, reflective sides to promote creative lighting techniques and minimize shadows. Attach seamless, diffused light sources—like LED strips or softboxes—inside the box to provide uniform illumination. Line the interior with matte, non-reflective surfaces to prevent glare and enhance light diffusion. Secure the lighting components firmly, avoiding loose connections that could disrupt lighting consistency. Test the setup by placing objects inside and adjusting until the lighting appears balanced and free of harsh shadows.
How to Position Lights Inside Your Light Box for Optimal Results

Properly positioning the lights inside your light box guarantees you achieve even, balanced illumination that highlights your objects without unwanted shadows or glare. Focus on adjusting light angles to avoid harsh shadows and assure even coverage. Keep the color temperature consistent across all light sources for accurate color rendering. To optimize setup:
- Position lights at 45-degree angles on either side of the object for balanced coverage.
- Adjust light angles to minimize reflections and glare, especially on shiny surfaces.
- Use lights with adjustable color temperature to maintain consistent hue and avoid color cast issues. Additionally, understanding fundamentals for first-time players can enhance your overall lighting setup and object presentation.
Achieving Soft, Even Lighting in Your Light Box
To get soft, even lighting, you need to diffuse your light sources effectively so the light spreads uniformly. Choosing the right materials, like diffusing fabrics or translucent plastics, helps eliminate harsh shadows. Consistent light distribution across your box guarantees your tests are accurate and reliable. Additionally, consider using natural filtration systems to mimic the softer qualities of outdoor light, enhancing the overall effect. Embracing inclusive casting in fashion photography can further improve how products are showcased, making them appealing to a broader audience.
Diffusing Light Effectively
Achieving Soft, Even Lighting in Your Light Box
Achieving soft, even lighting in your light box hinges on effective diffusion. Proper diffusion guarantees consistent color temperature and minimizes harsh shadows, creating a natural look. To improve your setup, consider these methods:
- Use diffusing materials like translucent acrylic or white fabric to scatter light evenly across your subject.
- Incorporate multiple light sources with adjustable intensity to balance lighting and reduce hotspots.
- Regularly monitor and adjust the position of your diffusion materials to maintain uniform light spread and control light diffusion.
Additionally, sound therapy can enhance your focus and creativity while working in your light box, making the process even more enjoyable. The principles of light diffusion are fundamental in photography and can significantly impact the quality of your images.
Choosing the Right Materials
Choosing the right materials is essential to creating a light box that produces soft, even lighting. Start with a diffuser material that’s durable and maintains its integrity over time, such as high-quality acrylic or tempered glass. These materials resist scratches and warping, ensuring consistent light diffusion. Consider the color temperature of your light sources; a neutral, daylight-balanced bulb (around 5500K) helps achieve accurate color rendering. The interior surfaces should be coated with matte, non-reflective materials to prevent glare and hotspots. Durability is key—invest in sturdy, fade-resistant fabrics or plastics that can withstand frequent use without degrading. By selecting materials that balance durability and ideal light diffusion, you set the foundation for a reliable, professional-quality light box.
Consistent Light Distribution
How can you guarantee your light box produces uniform, soft illumination across the entire surface? First, make sure your light sources have a consistent color temperature to prevent color shifts that can affect your test results. Second, distribute the light evenly by using diffusers or reflective materials, which help scatter light and eliminate hotspots. Third, monitor the power consumption to maintain stable brightness levels; fluctuations can cause uneven lighting. By controlling these factors, you create a setup that delivers soft, even lighting. Proper diffusion minimizes harsh shadows, while balanced color temperature ensures accurate color representation. Consistent power consumption keeps the light steady, providing reliable testing conditions. This approach results in a light box that’s both efficient and effective for precise, uniform illumination.
Using Backgrounds and Colors to Enhance Your Product Photos
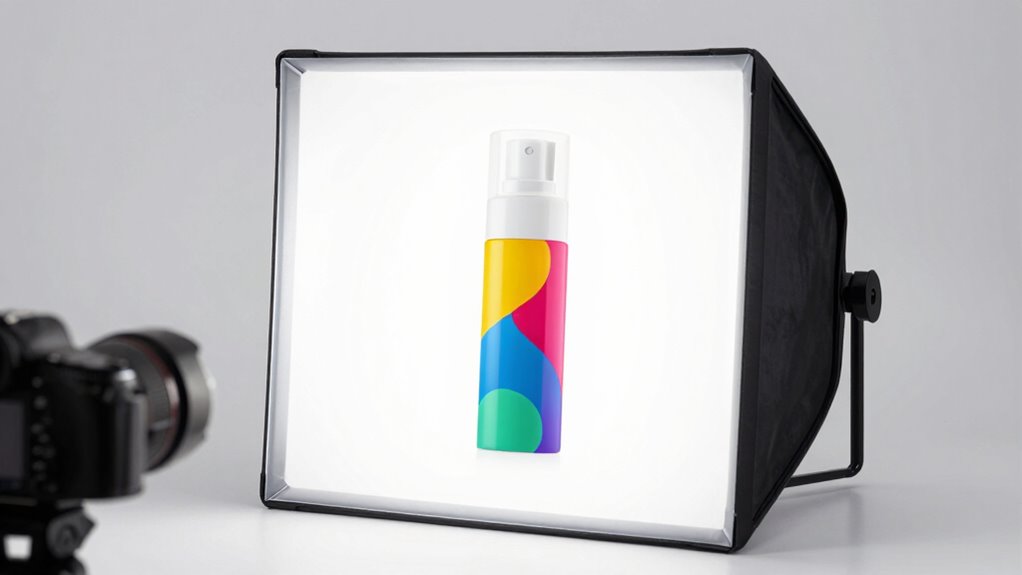
The right background and color choices can make your product photos stand out and look more professional. Selecting the right color palettes helps convey your brand’s message and sets the mood, whether you prefer neutral tones or bold contrasts. Background textures also play an essential role; smooth surfaces create a clean, minimal look, while textured backgrounds add depth and interest. Keep your backgrounds simple to avoid distracting from the product, but don’t be afraid to experiment with subtle patterns or materials that complement your item’s style. Consistency in color schemes and textures across your photos creates a cohesive visual story. By carefully choosing backgrounds and colors, you highlight your product’s best features and make your images more appealing to potential customers.
Common Mistakes to Avoid When Making a Light Box

While selecting the right backgrounds and colors can elevate your product photos, making a light box involves specific steps where mistakes are easy to overlook. One common error is ignoring the importance of consistent color temperature, which affects how true colors appear. Using inconsistent or overly warm/cool lights can distort your product’s look. Another mistake is choosing lights with high power consumption, which can lead to overheating and unnecessary energy use. Finally, neglecting proper light placement can cause uneven illumination, creating shadows or hotspots. To avoid these pitfalls, ensure your light sources have adjustable color temperature settings, opt for energy-efficient LEDs, and position your lights to achieve even, balanced lighting. These steps help produce professional, accurate product images.
How to Test and Adjust Your Light Box for Better Photos
To guarantee your light box produces ideal photos, you need to test and adjust it carefully. Begin by checking color calibration; confirm the lighting produces accurate, consistent colors by comparing your photos to known standards or color charts. Adjust the light sources or diffusion materials if colors appear off. Reflection control is equally important—eliminate unwanted glare or hotspots by repositioning lights or adding diffusers. Use a neutral gray background to observe how light interacts within your box, making adjustments to minimize reflections and shadows. Regularly review your test photos under different angles and lighting conditions, tweaking your setup as needed. Fine-tuning these elements ensures your light box delivers balanced, true-to-life images every time.
Comparing DIY Light Boxes to Commercial Lighting Solutions
DIY light boxes offer a budget-friendly and customizable option for photographers, allowing you to tailor the setup to your specific needs without spending a lot. When comparing them to commercial lighting solutions, consider these factors:
- Color temperature: DIY boxes often have variable light sources, so *guaranteeing* consistent color temperature can be challenging, whereas commercial options are calibrated for accuracy.
- Light diffusion: Commercial lights usually feature built-in diffusion panels for even light spread, while DIY setups rely on materials you choose, affecting the softness and uniformity.
- Adjustability: Commercial solutions often offer adjustable brightness and color controls, making fine-tuning easier compared to DIY boxes that may require manual modifications.
Ultimately, while DIY boxes excel in affordability and customization, commercial options ensure consistency and precision in your lighting conditions.
Frequently Asked Questions
How Long Does It Take to Build a Functional Light Box?
It takes about 1 to 3 hours to build a functional light box, depending on your experience and material choices. You’ll want durable materials like sturdy cardboard or plastic, which can withstand repeated use. Consider cost factors too; simple setups with basic materials are budget-friendly and quick to assemble. With proper planning, you can create an effective testing light box efficiently, ensuring reliable results while keeping costs manageable.
What Are the Best Lighting Bulbs for a DIY Light Box?
You should choose LED bulbs with a color temperature around 5500K for your DIY light box, as they mimic natural daylight, providing consistent, true-to-life colors. Look for bulbs with a long lifespan, ideally over 25,000 hours, to guarantee durability and fewer replacements. Avoid colored or warm-toned bulbs, and opt for daylight-balanced LEDs to achieve the best lighting conditions for your testing setup.
Can I Customize the Size of My Light Box Easily?
Yes, you can customize the size of your light box easily. Imagine tailoring your setup perfectly—adjusting the dimensions to fit your specific needs. With flexible materials and DIY techniques, you can modify the light box dimensions or explore custom size options, ensuring ideal lighting for your projects. This way, your light box becomes a precise tool, designed exactly how you want, enhancing your work effortlessly.
How Do I Clean and Maintain My Light Box?
To keep your light box in top shape, follow a simple cleaning routine and maintenance tips. Dust the interior and exterior regularly with a soft cloth, avoiding harsh cleaners that could damage surfaces. Check the light sources periodically and replace any flickering or dim bulbs promptly. Keep the vents clear for proper airflow, and store it in a dry, cool place when not in use. Regular upkeep guarantees consistent, high-quality testing results.
Is a Light Box Suitable for Photographing All Product Types?
A light box is like a chameleon, adapting to showcase a variety of products, thanks to its controlled environment. It provides consistent lighting, ensuring your images remain uniform and sharp. While it works well for small to medium items like jewelry or electronics, larger or irregularly shaped products may need custom solutions. Overall, a light box offers great product versatility, making your photography predictable and professional, no matter what you’re shooting.
Conclusion
Now that you’ve built your own light box, you’re ready to capture stunning product shots that outshine window light. With a little patience and some tweaks, your setup can produce professional-quality images faster than a squire in a joust. Remember, even Leonardo da Vinci relied on tools and experimentation—so don’t be afraid to test, adjust, and perfect your light box. Your photos will look so good, even the Mona Lisa would be impressed!