Creating a DIY plant growth chamber with adjustable LEDs lets you finely control light spectrum, temperature, and humidity, tailoring conditions to your plants’ needs. Use programmable timers and sensors to automate lighting and climate control, ensuring peak growth environments for different plant stages. Proper positioning of LEDs and insulation enhances energy efficiency and uniform light distribution. If you keep exploring, you’ll find tips to optimize your setup and grow healthier, more productive plants indoors.
Key Takeaways
- Select and install adjustable full-spectrum LEDs to tailor light conditions for different plant growth stages.
- Incorporate dimmable controls or smart timers to automate lighting schedules and spectrum adjustments.
- Design a sealed, insulated enclosure with proper ventilation and temperature sensors for stable environmental control.
- Integrate reliable heating and cooling systems, such as fans or heating pads, with thermostats for precise temperature regulation.
- Use adjustable mounts and positioning to ensure even light distribution and optimize plant exposure within the chamber.
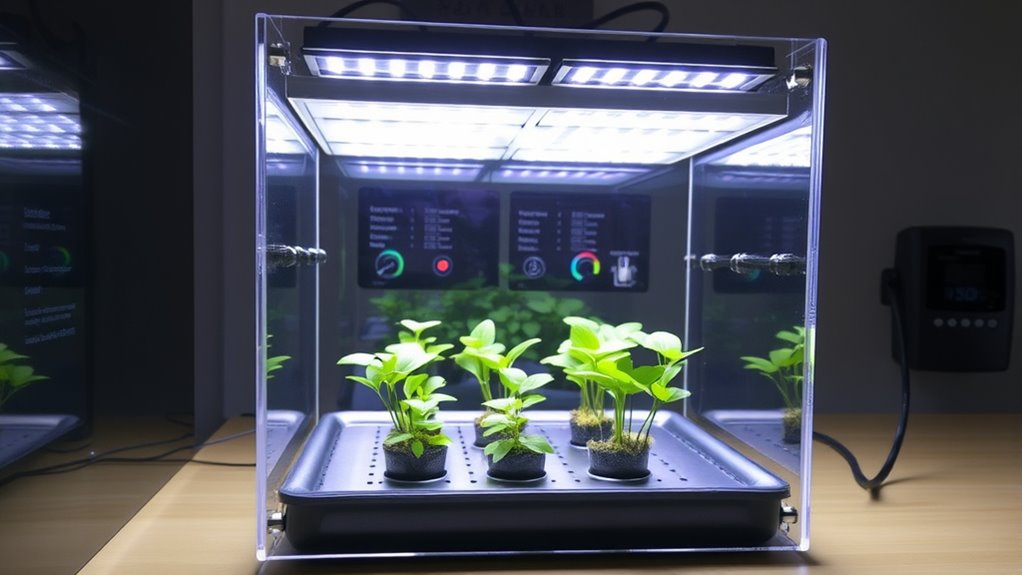
Ever wondered how to optimize plant growth indoors? Creating a DIY plant growth chamber with adjustable LEDs is an excellent way to achieve this. To get started, you need to understand that controlling the lighting spectrum and temperature is crucial for healthy, vigorous plants. The lighting spectrum determines how plants perceive light, influencing photosynthesis, flowering, and overall growth. With adjustable LEDs, you can tailor the spectrum to match the specific needs of different plant species, switching between blue light for vegetative growth and red light for flowering stages. This flexibility allows you to optimize conditions without constantly changing bulbs or setups.
Temperature control is equally vital. Plants thrive within specific temperature ranges, and maintaining consistent warmth ensures optimal metabolic activity. Your DIY chamber should feature a reliable heating and cooling system—think small, programmable fans or heating pads—that can keep the environment within the ideal range. Incorporating a thermostat or temperature sensor helps you monitor and adjust conditions on the fly, preventing temperature swings that could stress or damage your plants. When designing your chamber, consider insulation to minimize heat loss or gain, which makes temperature regulation more efficient and energy-saving. Additionally, understanding the importance of contrast ratio in lighting can help you select LEDs that promote better plant health by providing appropriate brightness levels.
The combination of lighting spectrum adjustments and precise temperature control creates an environment where your plants can flourish. When setting up your LEDs, position them at appropriate distances from the plants to ensure even light distribution without causing heat stress. Use adjustable mounts so you can fine-tune the light intensity and angle as your plants grow. Pair this with a temperature regulation system that responds to sensor feedback, making your chamber a self-regulating environment. This setup allows you to simulate different seasons or growth stages, giving you greater control over plant development.
Moreover, integrating timers or smart controllers can automate lighting schedules, mimicking natural day-night cycles and reducing manual intervention. This not only promotes healthy growth but also conserves energy. Remember to maintain proper airflow within the chamber to prevent mold and pests—small fans or vents can help circulate air evenly and keep humidity levels in check. Regularly check your environment’s parameters to ensure your plants stay within their preferred conditions.
In essence, designing a DIY plant growth chamber with adjustable LEDs and robust temperature control empowers you to create an ideal indoor garden. By fine-tuning the lighting spectrum and maintaining consistent temperatures, you give your plants the best chance to grow strong, healthy, and productive. This approach combines technology and creativity, transforming a simple space into a thriving indoor ecosystem tailored to your plants’ needs.

TopoGrow Grow Tent Complete Kit 300W LED Grow Light Full-Spectrum Indoor Hydroponics 32"X32"X63" Grow Tent 4" Ventilation Kit with Hangers,Hygrometer, Shear, Timer,Trellis Netting Full Setup
LED 300W Grow Light: light includes 100PCS x 3W LED chips, red,bule, purple and yellow chips used to...
As an affiliate, we earn on qualifying purchases.
Frequently Asked Questions
What Is the Optimal Light Cycle for Different Plant Species?
The ideal light cycle varies depending on plant species; most thrive with 14-16 hours of light and 8-10 hours of darkness for vegetative growth. For flowering plants, you might switch to 12 hours of light and 12 hours of dark. Adjust the light cycle based on each plant species’ specific needs, ensuring they get enough light for growth while mimicking their natural environment for healthy development.
How Do I Prevent Overheating Inside the Growth Chamber?
To prevent overheating inside your growth chamber, you should implement effective ventilation strategies like exhaust fans or passive vents to promote air circulation. Regular temperature monitoring with a reliable thermometer helps you catch rising temperatures early. Adjust your LED intensity or cycle times as needed, and guarantee proper airflow. These steps keep your environment stable, promoting healthy plant growth while avoiding heat stress.
Can I Use Alternative Lighting Options Besides LEDS?
Yes, you can use alternative lighting options besides LEDs, like fluorescent or incandescent bulbs. Just make certain they provide the right light spectrum options your plants need, such as blue and red wavelengths for healthy growth. Keep in mind that some alternatives may generate more heat, so monitor temperature levels carefully. Choose lights that are energy-efficient and suitable for the specific plants you’re growing to optimize your growth chamber’s effectiveness.
How Often Should I Calibrate the LED Brightness Levels?
You should calibrate your LED brightness levels regularly—about every 4 to 6 weeks—to keep things running smoothly. Think of it as giving your setup a tune-up; this ensures consistent light intensity and maximizes LED longevity. Frequent calibration prevents your plants from getting too much or too little light, helping them thrive. Don’t wait for problems to pop up—staying on top of calibration keeps your growth chamber in tip-top shape.
What Safety Precautions Are Recommended During Construction?
During construction, prioritize electrical safety by turning off power sources and using insulated tools. Wear protective gear like gloves and goggles, and double-check all wiring connections to prevent shorts or shocks. Guarantee proper ventilation to avoid inhaling fumes from soldering or adhesives. Keep your workspace clean and organized to avoid accidents. Regularly inspect your setup for loose connections or exposed wires, and always follow safety guidelines to protect yourself throughout the build process.

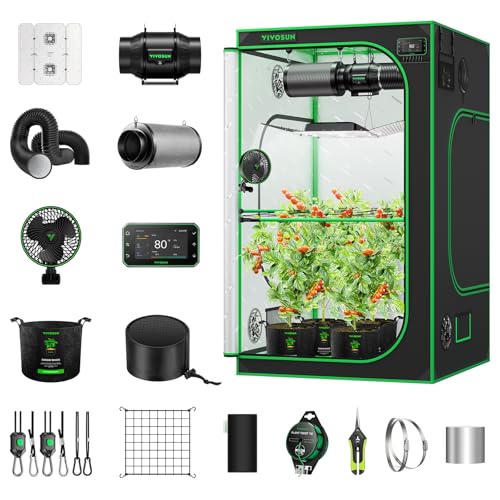
VIVOSUN Smart Grow Tent Kit, 4 × 4ft 4-Plant System, WiFi-Integrated Automatic Grow System with Full Spectrum LED Grow Light, Efficient Ventilation System with GrowHub E42A+ Controller
Smart Grow Tent Kit: A complete system that includes everything you need for smart, efficient everyday indoor growing;...
As an affiliate, we earn on qualifying purchases.
Conclusion
Building your DIY plant growth chamber is like crafting a tiny universe where your plants can thrive under your care. Just as a gardener tends to each star in the night sky, you’ve created a controlled environment that nurtures growth and possibility. With adjustable LEDs guiding your plants’ journey, you become both architect and gardener of this miniature cosmos. Keep experimenting and watching your green universe flourish—your efforts are the seeds of tomorrow’s lush, vibrant world.

MARS HYDRO 3x3 Grow Tent Kit Complete System,150W TS1000 LED Programmable&Dimmable Grow Light, 32"x32"x63" 1680D High Reflective Mylar Grow System with 4inch Smart WiFi Control Ventilation System
✩✩【2025 New Upgraded Smart Light and Ventilation】✩✩The grow light and ventilation kit has been completely upgraded. Simply purchase...
As an affiliate, we earn on qualifying purchases.
VIVOSUN Smart Pro Grow Tent Kit 4×4 Complete Smart Grow System WiFi-Integrated Automatic Control GrowHub E42A+, 2-in-1 Tunable Spectrum LED Grow Light, 360° Ventilation & Circulation Control System
Plus Grow Tent Kit: A professional choice that simplifies indoor gardening and maximizes growth potential; Includes a premium...
As an affiliate, we earn on qualifying purchases.