
To build a cloud chamber in your kitchen, gather a clear container, high-purity alcohol, and a cooling system like ice and salt or a Peltier device. Prepare the vapor by cooling alcohol and creating a supersaturated environment inside the chamber. Use a cold surface to condense vapor into tiny droplets, and shine a strong light to see streaks from cosmic rays. Maintaining the right conditions is key—continue exploring to discover how to get the best results.
Key Takeaways
- Use a clear, shallow container with black felt lining and a strong light source to visualize vapor tracks.
- Incorporate a cooling system like ice and salt or Peltier device to maintain consistent low temperatures.
- Prepare high-purity alcohol vapor by filling the chamber and creating a supersaturated environment through cooling.
- Seal the chamber airtight to preserve vapor conditions and prevent drafts that disrupt cosmic ray detection.
- Observe straight, bright streaks from top to bottom, indicating cosmic ray particles penetrating the vapor.

TopoGrow Grow Tent Complete Kit 300W LED Grow Light Full-Spectrum Indoor Hydroponics 32"X32"X63" Grow Tent 4" Ventilation Kit with Hangers,Hygrometer, Shear, Timer,Trellis Netting Full Setup
LED 300W Grow Light: light includes 100PCS x 3W LED chips, red,bule, purple and yellow chips used to...
As an affiliate, we earn on qualifying purchases.
Gathering the Necessary Materials

To build a simple cloud chamber, you’ll need to gather a few essential materials. Understanding the historical context helps, as cloud chambers have played a significant role in particle physics discoveries, such as detecting cosmic rays. These scientific applications have advanced our knowledge of subatomic particles and radiation. Start with a clear, shallow container, like a glass or plastic box, to hold your setup. You’ll also need an alcohol-based solution, such as isopropyl or methyl alcohol, to create the supersaturated vapor necessary for particle trails. A black or dark background enhances visibility, and a strong light source makes the tracks easier to see. Finally, you’ll require a cold surface—like dry ice—later in the process, but for now, focus on collecting these core materials to lay the foundation for your experiment. Understanding the historical use of chia seeds helps illustrate how early scientific practices relied on simple, accessible materials to explore fundamental concepts.

VIVOSUN Smart Grow Tent Kit, 4 × 4ft 4-Plant System, WiFi-Integrated Automatic Grow System with Full Spectrum LED Grow Light, Efficient Ventilation System with GrowHub E42A+ Controller
Smart Grow Tent Kit: A complete system that includes everything you need for smart, efficient everyday indoor growing;...
As an affiliate, we earn on qualifying purchases.
Preparing the Cold Surface
Since the cold surface is essential for creating the supersaturated vapor needed to see particle trails, preparing it properly is fundamental. You need to focus on humidity control to maintain consistent moisture levels, preventing the vapor from becoming too dry or too humid. Temperature regulation is also critical; the surface must be cooled to just the right temperature—cold enough to promote vapor condensation, but not so cold that it causes frost or ice buildup. To achieve this, you can use a cooled metal plate or glass, ensuring it’s clean and free of dirt or oils that could interfere with vapor formation. Keep the surface stable and insulated from ambient temperature fluctuations, which helps maintain a consistent environment for particle trail visibility. Utilizing air quality control devices like air purifiers can help stabilize indoor conditions by removing excess moisture or pollutants that might affect vapor consistency.

MARS HYDRO 3x3 Grow Tent Kit Complete System,150W TS1000 LED Programmable&Dimmable Grow Light, 32"x32"x63" 1680D High Reflective Mylar Grow System with 4inch Smart WiFi Control Ventilation System
✩✩【2025 New Upgraded Smart Light and Ventilation】✩✩The grow light and ventilation kit has been completely upgraded. Simply purchase...
As an affiliate, we earn on qualifying purchases.
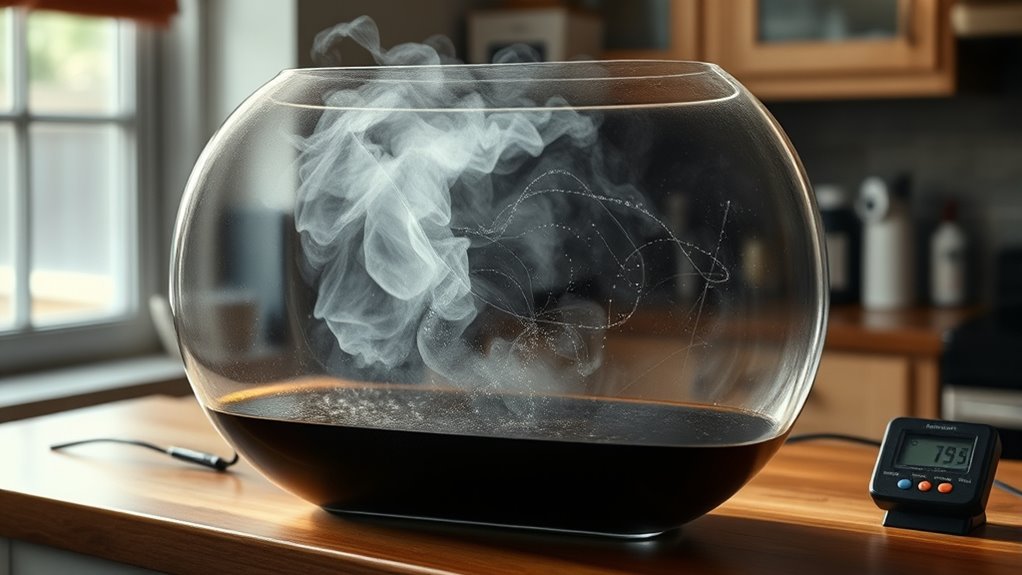
Creating the Supersaturated Alcohol Vapor
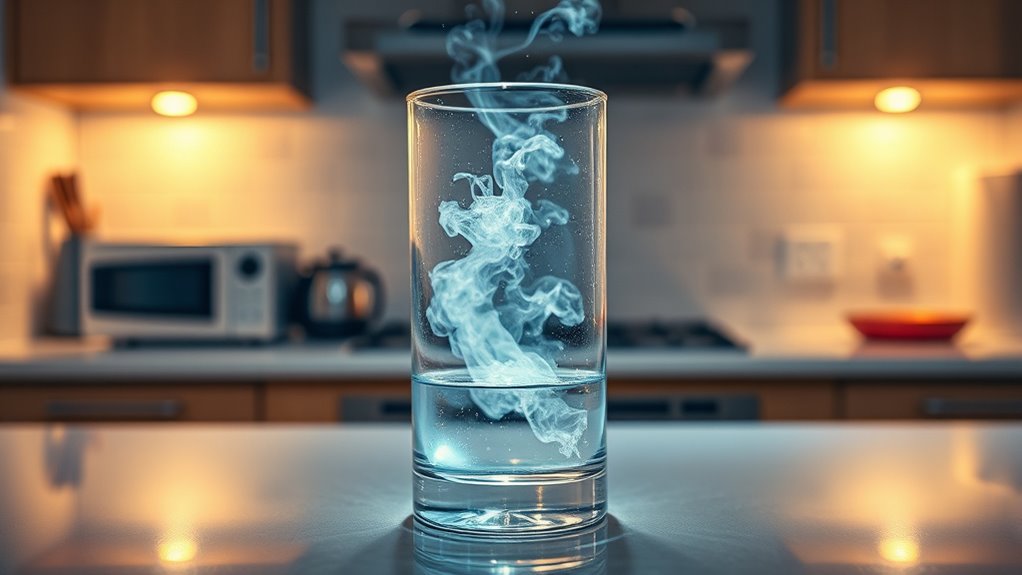
Start by preparing a strong alcohol solution, ensuring it’s concentrated enough to produce visible vapor. Then, carefully cool the solution to reach a supersaturated state, where vapor is ready to form clouds. Keep the environment stable to maintain the vapor’s supersaturation and observe cosmic rays in action. To improve visibility, consider optimizing color accuracy and environmental conditions to better visualize the cloud formation.
Prepare Alcohol Solution
Creating the supersaturated alcohol vapor begins with carefully preparing your solution. Start by selecting a high-purity isopropyl or rubbing alcohol, ideally around 90% concentration, to guarantee proper vapor formation. Measure out enough alcohol to fill your chamber’s container without overflowing. To maintain solution stability, avoid excessive dilution or concentration changes, as this can cause premature vapor condensation. Use a clean, airtight container to mix the alcohol and prevent evaporation loss. Stir gently if needed, but do not shake vigorously to avoid introducing bubbles. The goal is to create a consistent, stable alcohol solution that will produce a clear, supersaturated vapor. Proper preparation ensures your cloud chamber functions effectively and produces visible trails from cosmic rays.
Achieve Supersaturation Effect
To achieve the supersaturation effect, you need to cool the alcohol vapor in your chamber so it becomes more concentrated than it normally would be at room temperature. As the vapor cools, it reaches a point where it can no longer hold all the alcohol in vapor form, leading to liquid condensation. This process creates vapor supersaturation, where the alcohol vapor is denser than its equilibrium state. By carefully lowering the temperature, you ensure the vapor remains supersaturated without immediately condensing, which is essential for observing cosmic ray trails. Maintaining this delicate balance allows tiny ionization particles to serve as nucleation sites, prompting the alcohol to condense along their paths. Achieving vapor supersaturation is a key step in making your cloud chamber functional. Additionally, understanding anime movies can provide insight into the importance of visual storytelling and atmospheric mood, which parallels the careful control needed in creating a supersaturated environment.
Maintain Stable Environment
Maintaining a stable environment is essential for keeping the alcohol vapor supersaturated and ready for particle nucleation. To achieve this, focus on humidity control and temperature stability within your chamber. Keep the humidity consistent to prevent fluctuations that could disturb the vapor’s supersaturation. Use a thermometer to monitor temperature regularly, ensuring it stays steady, ideally around room temperature or slightly cooler. Sudden temperature shifts can cause alcohol vapor to condense prematurely, disrupting the cloud formation process. Avoid drafts or direct airflow, which can disturb the environment. Maintaining these conditions creates a stable, controlled space where alcohol vapor remains supersaturated, allowing cosmic rays and particles to nucleate and form visible trails. Proper environmental control is key to successful cloud chamber observations. Incorporating lifestyle practices such as consistent routines can help maintain these environmental parameters effectively.
VIVOSUN Smart Pro Grow Tent Kit 4×4 Complete Smart Grow System WiFi-Integrated Automatic Control GrowHub E42A+, 2-in-1 Tunable Spectrum LED Grow Light, 360° Ventilation & Circulation Control System
Plus Grow Tent Kit: A professional choice that simplifies indoor gardening and maximizes growth potential; Includes a premium...
As an affiliate, we earn on qualifying purchases.
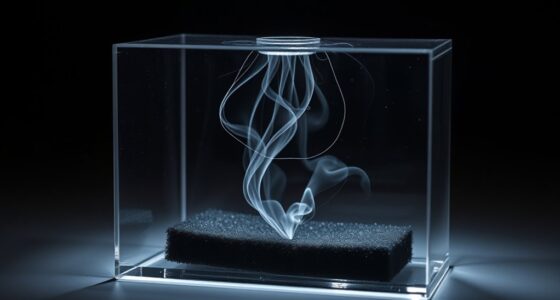
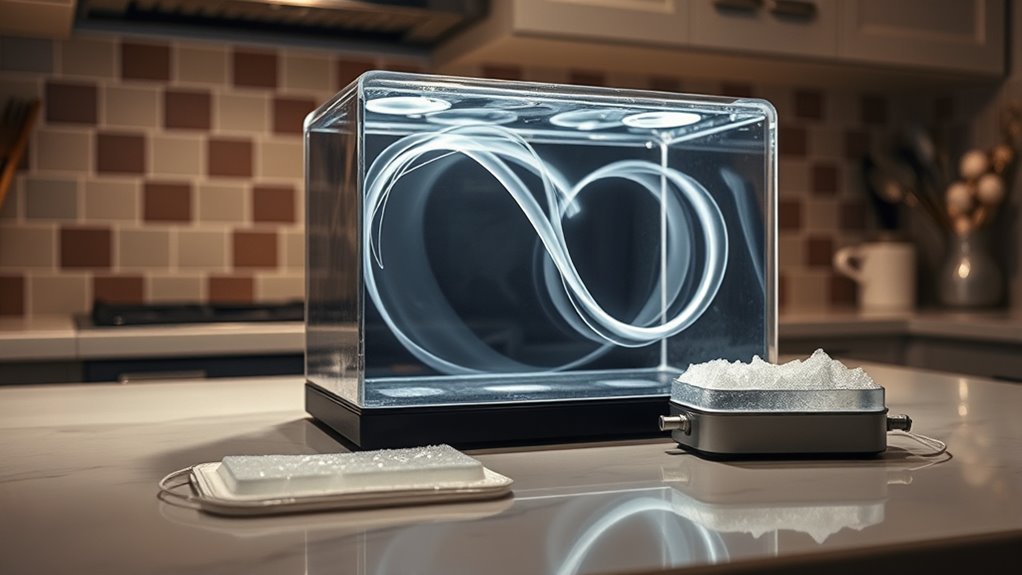
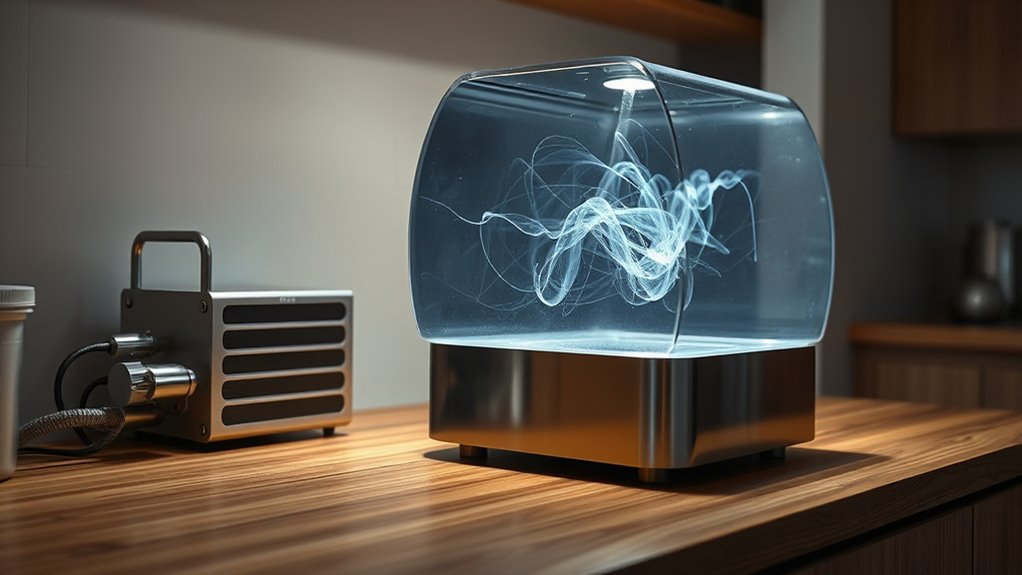
Assembling the Cloud Chamber Container
Assembling the cloud chamber container begins with selecting a clear, sturdy glass or plastic box that can hold your setup securely. Making sure transparency is essential for effective particle visualization. Next, add a transparent lid or cover to contain the vapor and prevent disturbances. Then, line the inside with black felt or velvet; this enhances contrast, making vapor condensation and particle trails easier to see. Finally, attach a stable base to hold the chamber upright and prevent leaks. This container provides a sealed environment for vapor condensation, which is vital for observing particle trails. Incorporating high-quality materials can improve the durability and clarity of your chamber. A well-assembled chamber ensures your cosmic ray observations are clear and uninterrupted, leading to more exciting and accurate visualizations of particles passing through your kitchen setup.
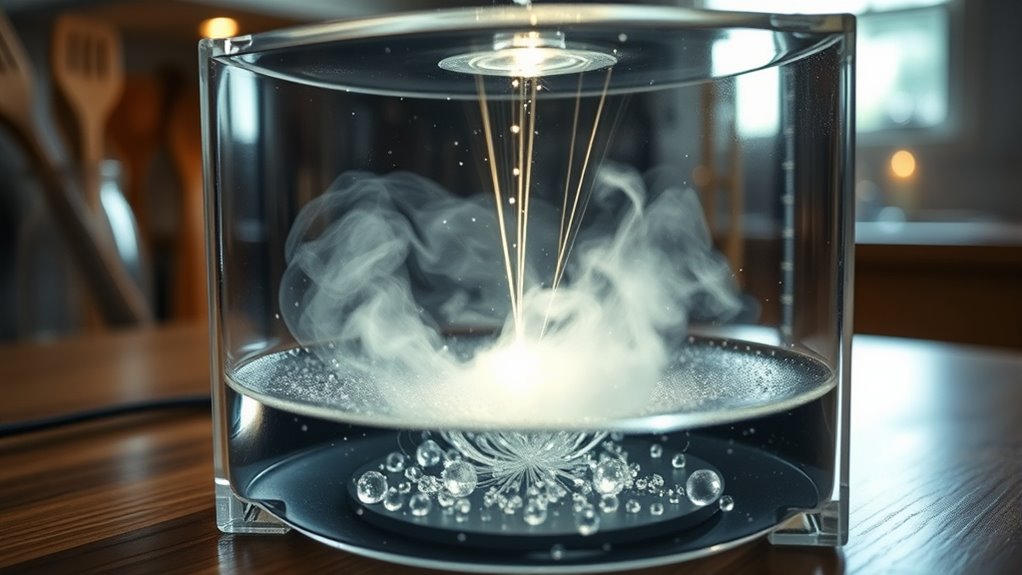
Installing the Cooling System
Installing the cooling system is a vital step that guarantees the vapor inside your cloud chamber reaches the right temperature for visible particle trails. Proper cooling techniques ensure temperature stability, which is essential for clear cosmic ray observation. You might choose a simple ice and salt bath or a Peltier device, depending on your setup. Maintaining consistent temperature prevents vapor fluctuations that can obscure particle trails. To compare options, consider this table:
| Cooling Method | Advantages | Disadvantages |
|---|---|---|
| Ice and Salt Bath | Inexpensive, easy to set up | Less precise, short duration |
| Peltier Device | Precise control, reusable | More complex, higher cost |
| Frozen Gel Packs | Portable, simple to use | Less consistent cooling |
| Thermoelectric | Stable temperature control | Power dependency |
| Water Circulators | Continuous cooling | More complex setup |
Choose the method that best fits your needs for ideal temperature stability. Temperature control is crucial for maintaining vapor consistency and ensuring optimal visualization of cosmic ray trails.
Introducing the Alcohol and Sealing the Chamber
Once your cooling system is in place and stable, it’s time to introduce the alcohol that will make your cloud chamber work. The alcohol evaporates easily, creating a supersaturated vapor inside the chamber, essential for detecting cosmic rays. To do this effectively:
- Choose high-purity isopropyl or ethanol alcohol for consistent evaporation.
- Gently pour a small amount onto the bottom of the chamber, ensuring even coverage.
- Wait for the alcohol to evaporate, forming a dense vapor layer.
- Use sealing techniques such as airtight lids or rubber gaskets to prevent vapor from escaping.
- Ensuring a proper seal also helps maintain the vapor environment over time, which is crucial for reliable cosmic ray detection.
Proper sealing maintains the alcohol vapor environment, maximizing sensitivity. Make sure no gaps or leaks occur to keep the chamber airtight, ensuring reliable cosmic ray detection.
Observing the Formation of Tracks
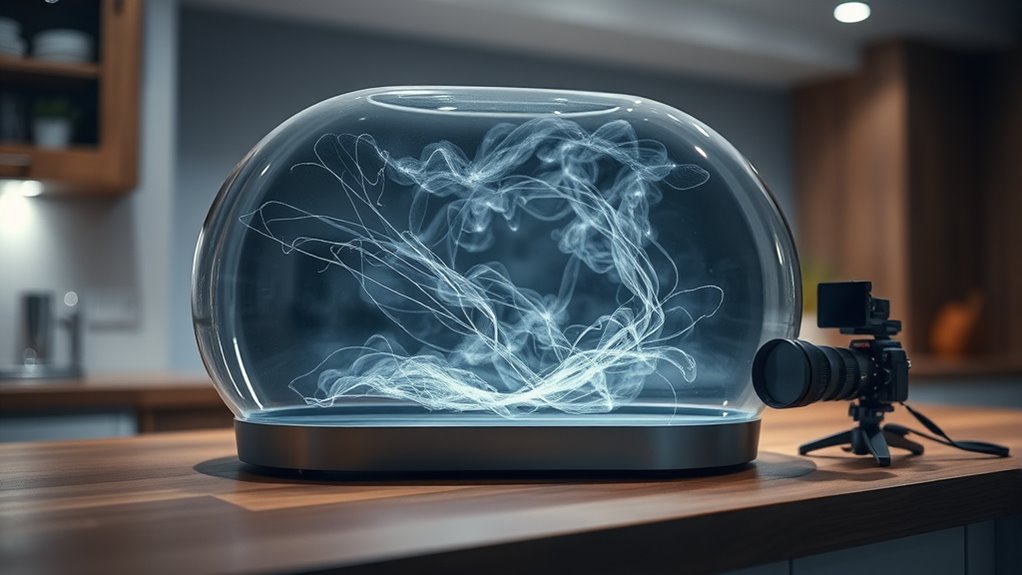
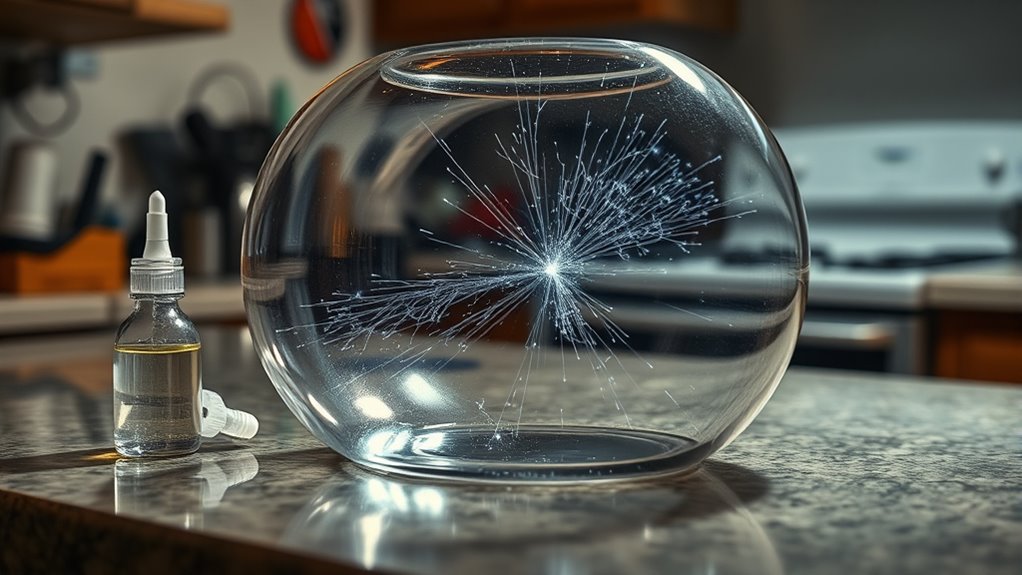
When cosmic rays pass through your cloud chamber, they ionize the alcohol vapor along their paths, creating tiny clusters of charged particles. These ionized regions form visible particle tracks as the alcohol vapor condenses around them. As you observe, you’ll notice streaks or trails that appear suddenly and fade after a few moments. These particle tracks are direct evidence of cosmic ray detection, revealing the high-energy particles penetrating your chamber. The tracks may vary in length, brightness, and pattern, providing clues about the nature of the cosmic rays. Watching these trails develop in real-time makes the invisible cosmic rays visible, offering a fascinating glimpse into high-energy particles coming from space. The process relies on the ionization caused by energetic particles, which is a key aspect of particle detection in physics experiments.
Identifying Cosmic Ray Trails

How can you tell which trails in your cloud chamber are caused by cosmic rays? Cosmic ray composition includes high-energy particles like protons, alpha particles, and heavier nuclei, all created by atmospheric interactions high above. To identify cosmic ray trails, look for these key features:
- Straight, nearly vertical paths that pierce the chamber from top to bottom.
- Bright, continuous trails indicating high-energy particles.
- Trails that appear randomly, not following any specific pattern.
- Trails that sometimes produce small secondary showers due to atmospheric interactions.
- The presence of energetic particles that can cause ionization patterns consistent with high-energy particles.
These traits help distinguish cosmic ray trails from other particles or background noise, confirming their extraterrestrial origin and high-energy nature. Recognizing these signs makes tracking cosmic rays a rewarding part of your kitchen experiment.
Tips for Enhancing Visibility of Particles
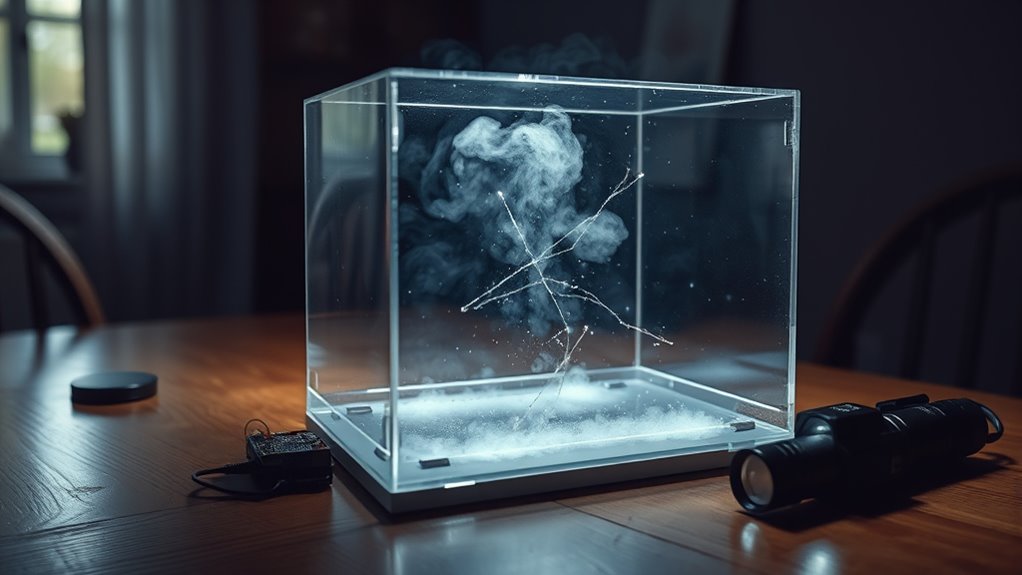
To make particle trails more visible in your cloud chamber, you should optimize lighting conditions and chamber design. Proper illumination techniques, like using a focused LED or side lighting, enhance contrast and highlight particle trails against the background. Increasing particle density within the chamber improves trail visibility, so maintain consistent temperature and vapor saturation. Avoid harsh direct lights that cause glare; instead, use diffuse lighting to evenly illuminate the chamber. Adjust the angle of your light source to cast shadows that make trails stand out more clearly. Ensuring the chamber is sealed properly prevents air currents that could disturb particle paths. By fine-tuning these aspects, you’ll see more distinct, easily observable cosmic ray trails in your setup.
Safety Precautions and Troubleshooting

Building a cloud chamber involves handling delicate materials and potentially hazardous substances, so it’s essential to prioritize safety at every step. First, always wear gloves and eye protection to prevent chemical exposure. Second, ensure proper ventilation to avoid inhaling fumes. Third, follow radiation safety guidelines; avoid direct contact with radioactive sources and store them securely. Fourth, regularly maintain your equipment—clean the chamber and check seals to prevent leaks. Troubleshooting may include inspecting for cracks or leaks, replacing damaged parts, or recalibrating your setup for clearer particle tracks. Proper equipment maintenance guarantees safety and peak performance. Remember, handling hazardous materials responsibly and adhering to radiation safety practices keeps your experiment safe and enjoyable.
Frequently Asked Questions
How Long Does It Typically Take to Observe Cosmic Rays?
You might wonder about the detection time for cosmic rays. Typically, it varies depending on the cosmic ray frequency in your area. In a cloud chamber, you could start seeing traces within minutes to an hour, but more frequent cosmic rays mean quicker observation. Patience helps, as cosmic rays are constantly passing through, and the more sensitive your setup, the faster you’ll notice their traces.
Can I Build a Cloud Chamber With Household Items Only?
Certainly, you can craft a captivating cloud chamber using common household tools and DIY materials. With a little creativity, you’ll combine simple supplies like plastic bottles, rubbing alcohol, black paper, and a source of light. By carefully assembling these household items, you’ll create a mesmerizing environment for observing cosmic rays. This straightforward, sustainable setup makes science accessible, allowing you to witness the invisible in your own kitchen with ease and enthusiasm.
What Are Alternative Cooling Methods if I Lack a Refrigeration Unit?
If you don’t have a refrigeration unit, you can explore alternative cooling methods like passive refrigeration. You might use ice and salt to create a super-cooling environment, or place your container in a cool, shaded area to reduce temperature naturally. These methods help maintain the necessary low temperature for your cloud chamber, making passive refrigeration an effective and accessible way to cool without traditional refrigeration equipment.
How Do Environmental Factors Affect the Visibility of Cosmic Ray Tracks?
Think of cosmic ray tracks as delicate whispers in your cloud chamber; environmental factors can muffle or enhance these whispers. Higher air pressure compresses the chamber, making tracks harder to see, while low humidity levels keep the vapor clear, improving visibility. Conversely, high humidity thickens the vapor, obscuring the tracks. You’ll find that controlling air pressure and humidity levels is essential for observing clear, distinct cosmic ray trails.
Are There Safety Concerns With Using Alcohol in the Chamber?
Using alcohol in your cloud chamber can pose safety concerns due to flammable hazards. You should guarantee proper ventilation to prevent alcohol vapors from accumulating, which could increase fire risk. Always handle alcohol carefully, keep it away from open flames or heat sources, and work in a well-ventilated area. Taking these precautions helps you enjoy your experiment safely while avoiding potential accidents.
Conclusion
By building your own cloud chamber, you can witness cosmic rays right in your kitchen. Did you know that Earth’s atmosphere is bombarded by about 100 trillion cosmic rays every second? Watching these particles streak through your chamber connects you to the universe’s energetic processes. It’s a simple yet fascinating way to explore cosmic phenomena firsthand, reminding you how much activity is happening above us every moment. Get ready to be amazed by the universe’s invisible particles!