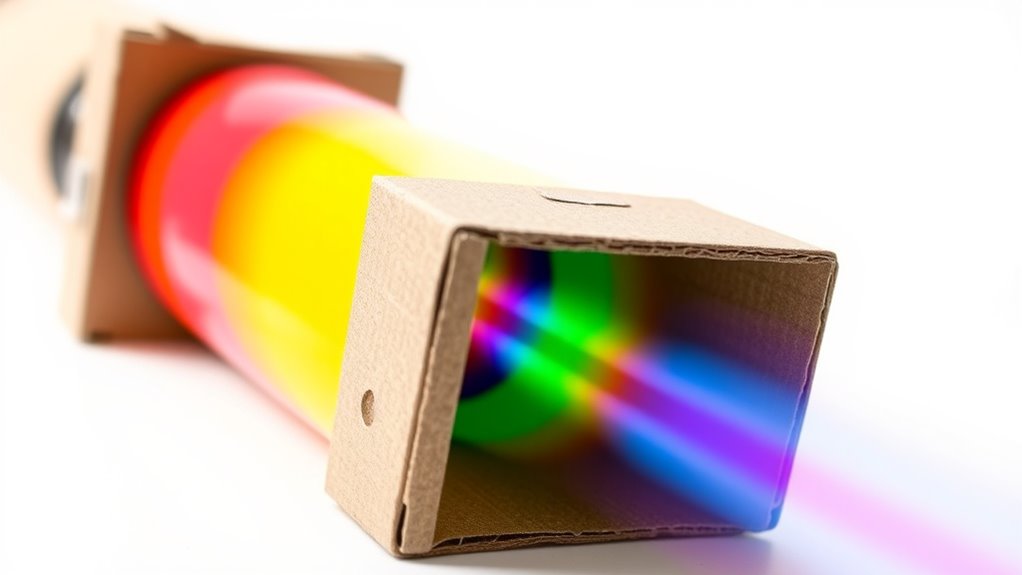

To brew your own rainbow, start by gathering simple materials like a cardboard tube, diffraction grating, and a slit made from foil or cardboard. Assemble these carefully, ensuring the diffraction grating is securely placed, and create a viewing window. Fine-tune the angles and light sources to see clear spectral lines and colorful patterns. Organizing and calibrating your setup will improve results. Keep exploring the tips and techniques, and you’ll discover how to make spectacular spectra with ease.
Key Takeaways
- Gather basic materials like a cardboard tube, diffraction grating, and a slit for simple assembly.
- Follow step-by-step instructions to cut and assemble the spectroscope, ensuring precise alignment of components.
- Use calibration with known light sources to fine-tune spectral clarity and measurement accuracy.
- Experiment with different light sources to observe and analyze varying spectral patterns.
- Maintain and clean optical parts regularly to ensure clear, accurate rainbow spectra.
Gathering Materials and Tools
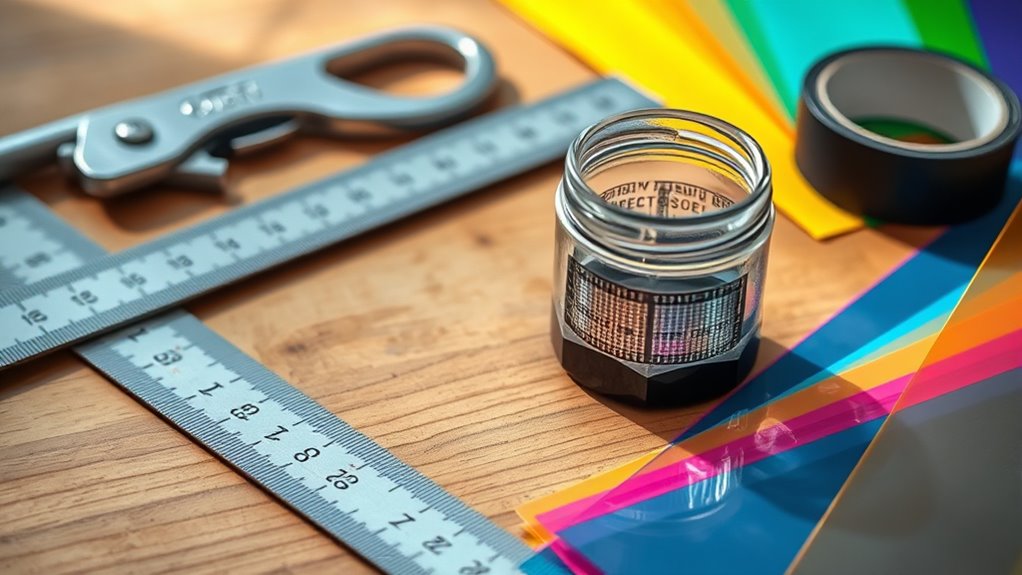
Before you begin building your spectroscope, it’s important to gather all the necessary materials and tools. Start by collecting items like a cardboard tube, diffraction grating, and a small piece of cardboard or aluminum foil for the slit. You’ll also need a craft knife, scissors, tape, and a ruler for assembly. To guarantee your spectroscope works accurately, consider how you’ll perform spectroscope calibration later on. Researching historical spectroscope designs can offer insight into effective arrangements and essential components. Keep in mind that precision in gathering materials will help produce clearer spectra and easier calibration. Additionally, understanding the family background of related scientific instruments can deepen your appreciation of their evolution. Once you have everything, you’ll be ready to assemble your device, bringing your understanding of spectroscope principles closer to reality. Proper preparation makes your DIY project smoother and more successful.
Understanding Spectroscope Principles
You see, light dispersion happens when different wavelengths bend at different angles, creating the spectrum you observe. Diffraction gratings are essential because they split light into its component colors with high precision. Understanding how spectral lines form helps you interpret the patterns you’ll see through your homemade spectroscope. To achieve accurate results, it’s important to consider the spectral properties of light, which are fundamental to analyzing the spectra effectively.
Light Dispersion Mechanics
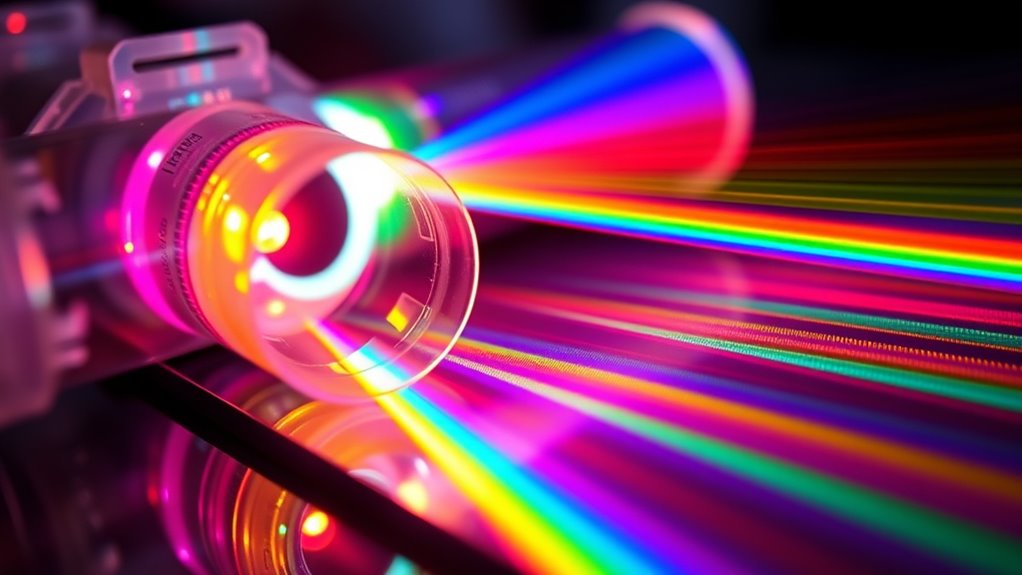
Light dispersion is the process that separates white light into its component colors, forming the rainbow-like spectrum observed through a spectroscope. When photons pass through a material, their interaction with the medium’s atoms depends on the refractive index, which varies for different wavelengths. This variation causes different colors to bend at different angles, a phenomenon known as refraction. As light enters the spectroscope’s prism or diffraction element, each wavelength slows down differently due to its specific refractive index. This results in the separation of colors, creating a spectrum. Your understanding of how photons interact with materials and how refractive indices change with wavelength helps explain why light splits into its constituent colors, forming the basis for observing spectra in your DIY spectroscope. Additionally, understanding the cybersecurity vulnerabilities associated with digital technologies emphasizes the importance of protecting your device and data during experiments.
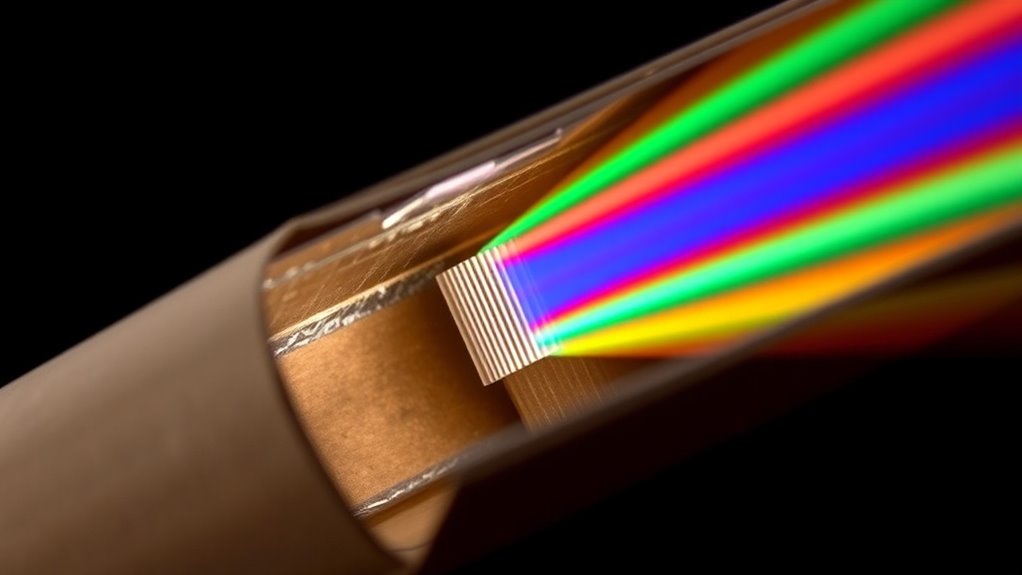
Role of Diffraction Gratings
Diffraction gratings are essential components in a spectroscope because they separate light into its individual colors more precisely than prisms. They work based on the diffraction principle, where light waves bend and interfere as they pass through or reflect off tiny, evenly spaced lines. This process results in spectral separation, allowing you to see distinct colors. To understand their role: 1. Light hits the grating, causing waves to diffract at specific angles. 2. Different wavelengths interfere constructively at different points, forming separate spectral lines. 3. The grating’s spacing determines the angles at which colors appear, enabling detailed spectral analysis. Spectral resolution is also influenced by the quality and design of the diffraction grating, impacting the clarity of the spectral lines observed.
Spectral Line Formation
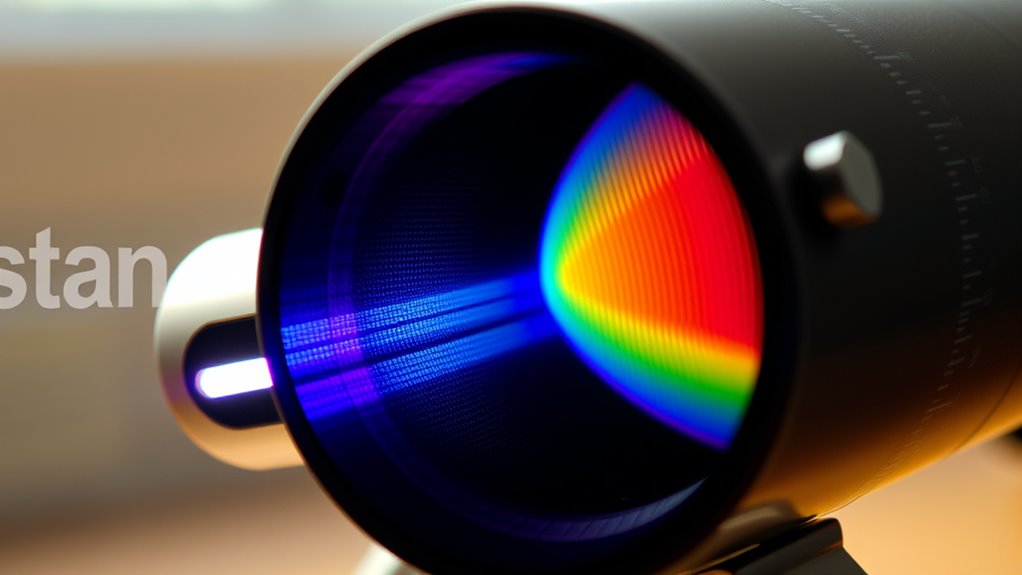
Spectral lines form when specific wavelengths of light are separated and detected by the spectroscope. This process is known as spectral line formation, which occurs during the analysis of emission spectra. When atoms or molecules get energized, they emit light at particular wavelengths unique to each element. These wavelengths appear as bright lines against a dark background in the emission spectrum. Your spectroscope captures this light through diffraction, dispersing it into its component colors. Each spectral line represents a specific changeover between energy levels within an atom, making spectral line formation essential for identifying elements. Understanding the physical processes behind spectral line formation can help you interpret spectral data and gain insights into the composition and physical conditions of distant objects or light sources.
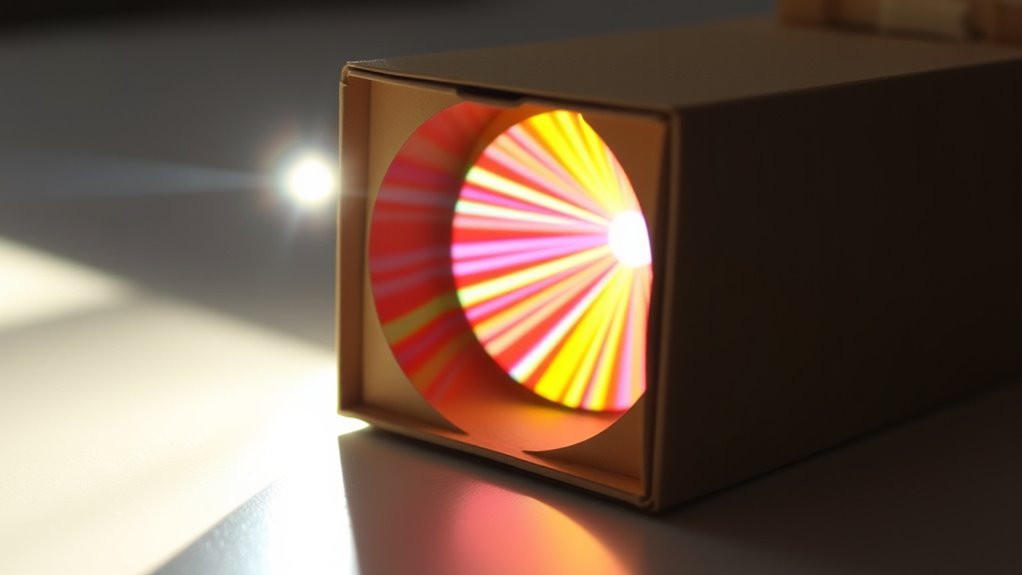
Preparing the Viewing Chamber
To prepare your viewing chamber, start by choosing a container that’s sturdy and the right size. Make sure it’s completely light-tight so external light doesn’t interfere with your observations. Finally, secure a clear viewing window that stays in place and doesn’t let any light leak in. Using a material with good light-blocking properties can help ensure accurate observations.
Selecting the Right Container
Choosing the right container is essential for creating an effective viewing chamber for your spectroscope. Your container’s selection impacts both durability and the clarity of your observations. Focus on these key points:
- Container selection: Opt for a sturdy, opaque container to prevent unwanted light interference.
- Material durability: Use durable materials like thick plastic or metal that resist cracks and deformities over time.
- Size and shape: Pick a container that fits comfortably in your setup, with enough space for the spectroscope components without crowding.
- Lightproofing: Ensuring the container is completely lightproof enhances the accuracy of spectral observations by preventing stray light.
A well-chosen container ensures stability and longevity. Prioritize material durability to avoid frequent replacements, and choose a size that aligns with your project needs. This foundation helps you build a reliable, high-quality spectroscope.
Ensuring Light Tightness
Since light leaks can ruin your spectroscope’s accuracy, confirming the viewing chamber is completely light-tight is essential. Start by inspecting your container for gaps or holes where light could seep in. Use sealing techniques like opaque tape, weatherstripping, or foam strips around edges and openings. Apply a bead of hot glue or silicone sealant along seams to block tiny cracks. Make sure any joints are fully sealed, and double-check that the lid fits snugly without gaps. If your container isn’t inherently light-proof, consider lining the interior with dark, matte material or wrapping it with black duct tape. Proper light leak prevention ensures your spectroscope captures clean, accurate spectra without interference from stray light. Additionally, implementing space-saving organization methods inside your viewing chamber can help maintain a clutter-free environment, improving the overall function of your DIY spectroscope.
Securing the Viewing Window
After ensuring your container is light-tight, the next step is securing the viewing window to prevent any unwanted light leaks. This guarantees superior optical clarity and a clear view of the spectra. To do this effectively:
- Choose a transparent material, like acrylic or glass, for the viewing window.
- Cut it precisely to fit the opening, ensuring no gaps or cracks.
- Seal around the edges with weatherproof or opaque tape, creating an airtight seal.
- Consider the spectroscopic principles involved to optimize your setup and achieve the best spectral results.
This process keeps external light out and maintains the integrity of your spectral observations. Properly securing the viewing window enhances optical clarity, so your spectroscope produces accurate, vivid spectra. Taking these steps ensures your DIY spectroscope is both functional and reliable for viewing rainbow patterns clearly.
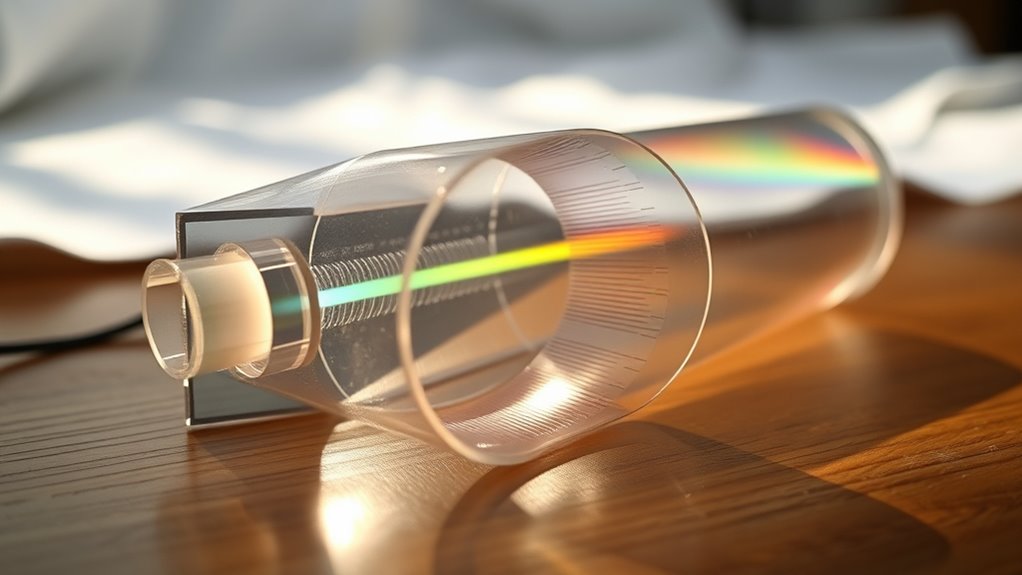
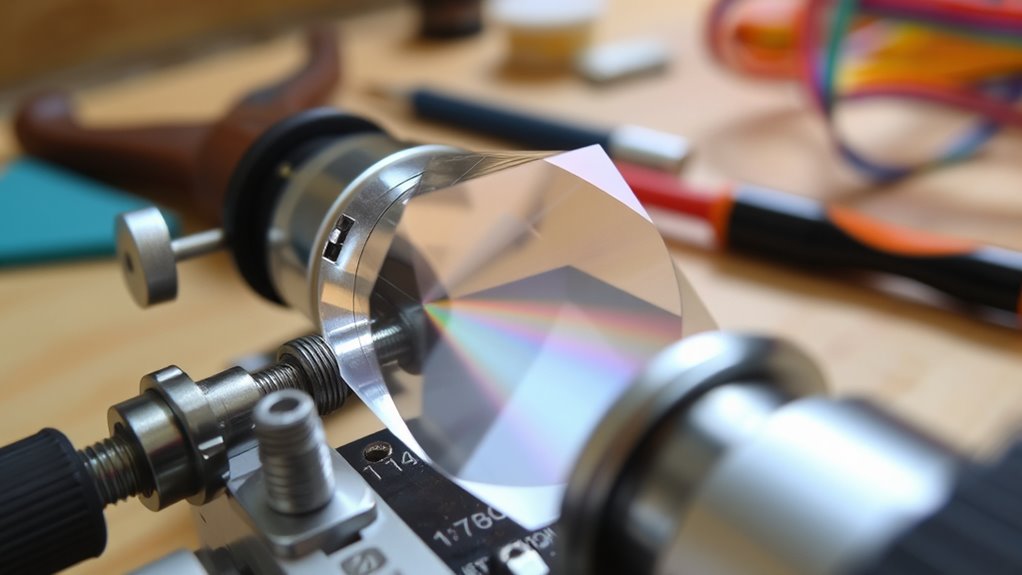
Creating the Diffraction Grating
Creating a diffraction grating involves carefully arranging tiny lines or slits on a surface to split light into its component colors. To maximize diffraction efficiency, you’ll want precise control over the grating spacing—the distance between each slit. Smaller spacing results in a clearer separation of spectral lines, enhancing your spectroscope’s performance. You can create a homemade grating using materials like a piece of plastic or aluminum foil with carefully etched lines. The following table summarizes key factors:
| Factor | Effect |
|---|---|
| Grating Spacing | Determines the separation of spectral lines |
| Diffraction Efficiency | Affects light intensity of the spectrum |
| Slit Width | Influences spectral resolution |
| Number of Lines | Impacts overall spectral clarity |
Focus on precision to ensure your grating produces vibrant, sharp spectra. Additionally, understanding the types of headphone jacks can help you connect your spectroscope to various devices for enhanced viewing experiences.
Assembling the Spectroscope Body
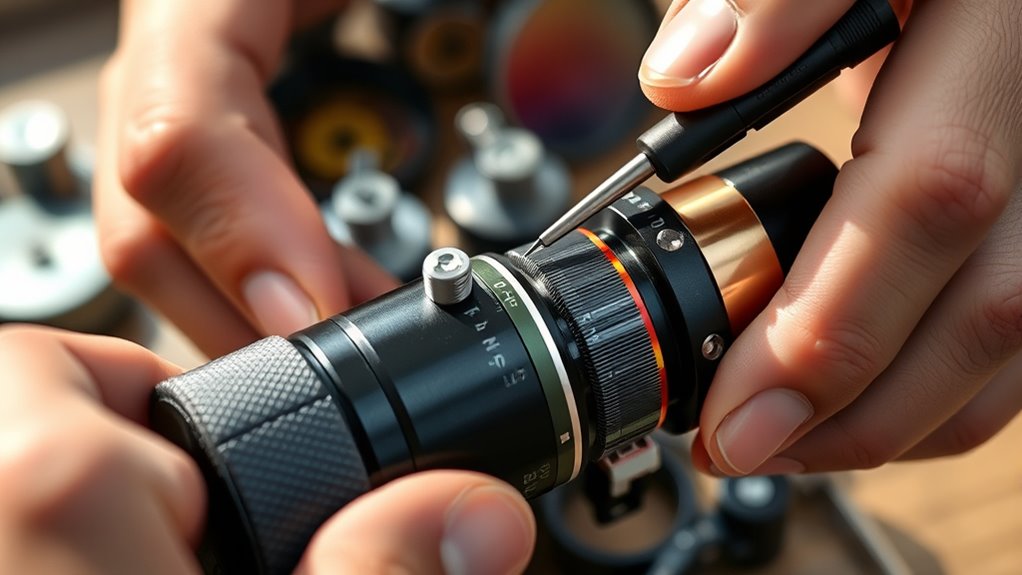
With your diffraction grating ready, it’s time to assemble the main body of your spectroscope. First, secure the tube or container that will house your optical components. Next, carefully insert the diffraction grating at the designated slot, ensuring it’s stable for accurate spectroscope calibration. Finally, attach the viewing window or slit, making sure it aligns properly with the diffraction grating for ideal optical alignment. During assembly, double-check that all parts are snug and correctly positioned to prevent light leaks or misalignment. This step is essential for clear spectral readings and accurate calibration later. Take your time to guarantee everything fits tightly and aligns well, setting a solid foundation for precise observations through your DIY spectroscope.
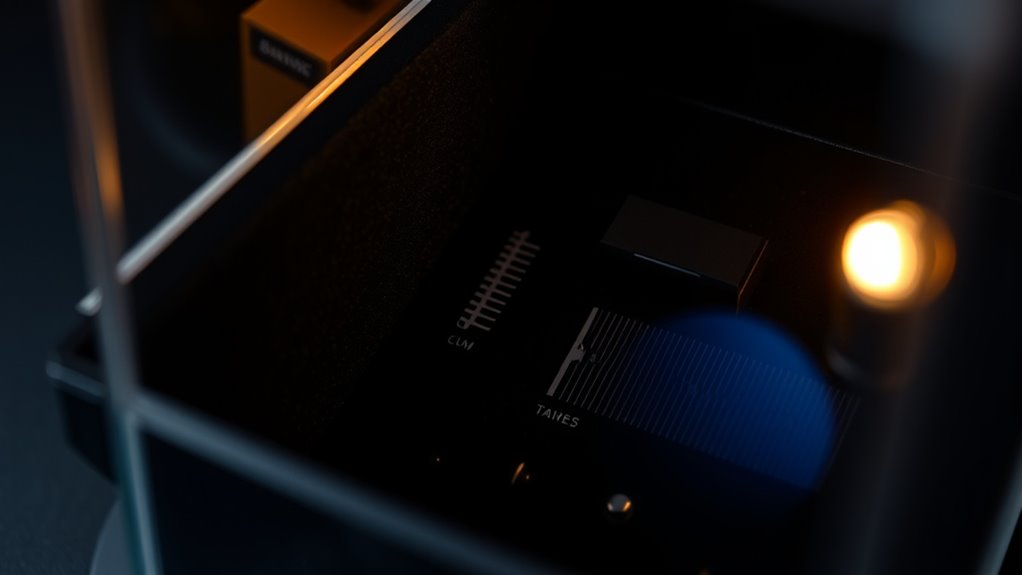
Aligning the Components
To guarantee your spectroscope produces accurate readings, you need to carefully align its optical components. Proper optical alignment ensures that light passes smoothly through the system, preventing distortions. Begin by checking the position of the diffraction grating relative to the viewing slit and the detector. Use calibration techniques, such as shining a known light source, to verify the spectral lines are clear and correctly positioned. Adjust the components gradually, ensuring they are secure and aligned along a straight path. Small misalignments can cause blurry or shifted spectra, so take your time. Consistent calibration and precise optical alignment are vital for accurate measurements. Once everything is aligned properly, you’ll be ready to observe the vibrant spectra your spectroscope can reveal.
Testing With Different Light Sources
You should test your spectroscope with various light sources to see how they affect your results. Different sources vary in brightness, intensity, and spectral output, which can influence your observations. Make sure your light source is compatible and provides clear, measurable spectra for accurate testing.
Light Source Variability
Testing your spectroscope with different light sources reveals how each affects the observed spectra. Light source variability plays a key role in spectral brightness and clarity. Different sources emit unique light patterns, influencing the detail you see. For example, a LED might produce a sharp, bright spectrum, while a fluorescent bulb could display a broader range with dimmer lines. To explore this, try these steps:
- Swap between incandescent, LED, and fluorescent lights to compare spectral brightness.
- Observe how each source’s emission lines or continuous spectrum appear through your spectroscope.
- Note how the intensity and clarity change with different sources, helping you understand the impact of light source variability on spectral observations.
Brightness and Intensity
Different light sources produce varying levels of brightness and intensity in the spectra you observe, which can considerably affect your spectroscope’s clarity. Higher light intensity results in brighter, more distinct spectral lines, making analysis easier. To manage this, use brightness control, such as adjusting the distance or filtering the light, to optimize the spectral display. Lower light intensity can make lines faint and harder to distinguish, so ensure your source provides enough illumination without overwhelming the device. Experimenting with different light sources helps you learn how brightness impacts spectral quality. Remember, balancing light intensity is key; too much can cause glare, while too little produces dull spectra. Fine-tuning brightness control improves your ability to clearly observe spectral features and enhances your overall spectroscope experience.
Source Compatibility
To guarantee your spectroscope works effectively, it’s essential to verify its compatibility with various light sources. Testing with different sources helps ensure accurate device calibration and smooth software integration. First, try natural sunlight, which provides a broad spectrum for detailed analysis. Second, use LED lights, which are stable and easy to calibrate. Third, experiment with incandescent bulbs to observe warmer spectra. These tests help you identify any calibration issues and confirm your device reads spectra correctly across sources. Adjust your device calibration as needed, and verify that your software accurately interprets the data. Compatibility across multiple sources ensures your spectroscope delivers reliable results, regardless of the light you’re analyzing. This process enhances your understanding and improves your overall spectroscope performance.
Adjusting for Clear Spectral Lines
Once you’ve aligned the components of your spectroscope, the next step is to adjust it for clear spectral lines. To do this, focus on calibration techniques that enhance spectral line accuracy. Begin by comparing your observed lines with known reference spectra, such as from a mercury or neon lamp. Fine-tune the angle of your diffraction grating or the position of the viewing window until the spectral lines appear sharp and well-defined. Use a small screwdriver or adjustment screw to make precise tweaks, ensuring each line is distinct without blurring. Repeating this process helps optimize your setup. Proper calibration ensures your spectroscope accurately captures the spectrum, making it easier to analyze and interpret the spectral lines with confidence.
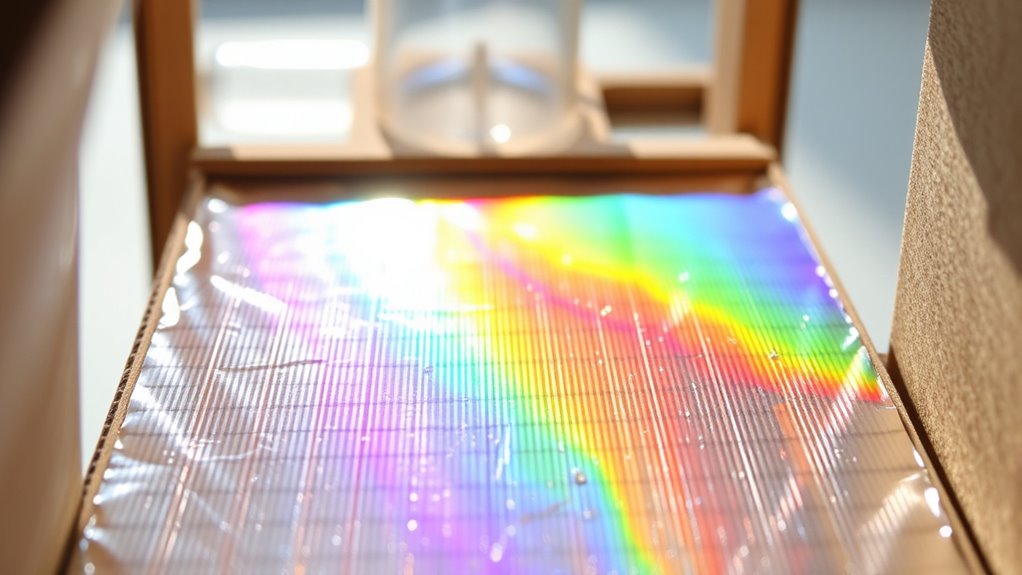
Exploring Spectral Patterns and Colors
With your spectroscope calibrated and spectral lines clearly visible, you can now begin to explore the patterns and colors that emerge in the spectrum. This is where spectral analysis becomes exciting, revealing distinct chromatic patterns unique to different light sources. To deepen your understanding, try these activities:
- Observe how spectral lines spread into a rainbow of colors, helping you identify specific wavelengths.
- Compare spectra from various sources like LEDs, incandescent bulbs, and fluorescent lights, noting differences in chromatic patterns.
- Look for subtle variations and line intensities, which can reveal details about an object’s composition or energy emissions.
These spectral patterns and colors serve as visual clues, revealing insights into the nature of light and matter through your DIY spectroscope.
Tips for Enhancing Your Spectroscope’s Performance
Enhancing your spectroscope’s performance requires attention to detail and proper adjustments, which can substantially improve the clarity and accuracy of your spectral observations. Start by regularly calibrating your spectroscope to ensure precise measurements; this involves comparing known spectral lines and adjusting as needed. Pay close attention to lens quality, as higher-quality lenses reduce distortions and improve resolution. Clean the lenses carefully to prevent dirt or smudges from affecting the light path. Secure all components firmly to avoid misalignment. Consider experimenting with different diffraction grating angles for better spectral separation. Fine-tuning these elements will sharpen the spectral lines and make your observations more reliable. With proper calibration and quality lenses, your spectroscope will perform at its best, revealing vibrant and accurate spectra.
Frequently Asked Questions
How Can I Customize My Spectroscope for Specific Wavelengths?
To customize your spectroscope for specific wavelengths, you can use wavelength filters that block out unwanted light and highlight your target spectrum. Additionally, applying calibration techniques, like comparing known light sources, guarantees accuracy. Adjust the slit or diffraction grating alignment to optimize the focus on your chosen wavelengths. These steps help you fine-tune your device, making it more precise for studying particular spectral lines or colors.
What Safety Precautions Should I Follow During Construction?
When building your spectroscope, prioritize safety by wearing appropriate safety gear like goggles and gloves to protect your eyes and skin. Handle glass components carefully to avoid cuts, and work in a well-ventilated area to minimize inhaling dust or fumes. Keep your workspace tidy, and always follow instructions closely. If you’re unsure about any step, seek guidance to guarantee safe handling and construction, preventing accidents.
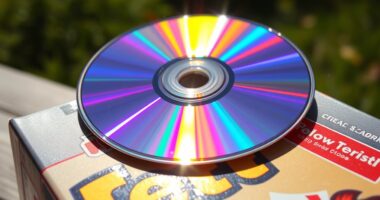
Can I Use Recycled or Household Materials for Parts?
You can definitely use recycled materials and household supplies for your spectroscope. Items like cardboard tubes, plastic bottles, or old CDs work well for the body or diffraction grating. Just guarantee the materials are clean, sturdy, and safe to handle. Avoid using anything that might be chemically hazardous or fragile. Reusing household supplies not only saves money but also makes your project eco-friendly and fun to build!
How Do Weather Conditions Affect Spectroscope Accuracy?
Imagine Galileo’s telescope in a rainstorm—weather can really mess with your spectroscope’s accuracy. Atmospheric interference and temperature fluctuations cause light distortion and calibration issues, making readings less reliable. Humidity, wind, and sunlight can all alter the spectral lines you observe. To get the best results, perform your experiments in stable conditions, avoid extreme weather, and wait for clear, dry days to minimize these effects and guarantee accurate measurements.
What Are Advanced Modifications to Improve Spectral Resolution?
To improve spectral resolution, you can implement advanced modifications like spectral sharpening techniques, which enhance the clarity of spectral lines. Additionally, diffraction enhancement methods, such as using higher-quality diffraction gratings or optimizing slit width, can markedly boost your spectroscope’s resolution. By focusing on these modifications, you’ll achieve sharper, more detailed spectral data, enabling you to analyze spectra more precisely and uncover finer spectral features.
Conclusion
Now that you’ve built your own rainbow, you’re officially a scientist—or at least a magician with a diffraction grating. Who knew that slapping together a few common materials could turn you into a color-shifting wizard? So go ahead, impress your friends with your newfound spectral prowess or dazzle yourself every time you see a rainbow. Just remember: with great spectroscopes comes great responsibility… and maybe a little obsession with those tiny, beautiful lines.