
To control shine like a product photo pro, use diffused lighting to soften reflections on matte surfaces and direct, smaller lights for sharp highlights on glossy materials. Adjust your camera angle to position highlights strategically and prevent overexposure. Employ diffusers, modifiers, and reflectors to shape highlights precisely. Post-process by fine-tuning highlights and recovering details. Mastering these techniques will help you achieve professional results—if you want to learn more, you’ll find useful tips ahead.
Key Takeaways
- Use diffused lighting sources like softboxes or umbrellas to soften highlights and reduce harsh reflections on shiny surfaces.
- Adjust the angle of your light sources to control highlight placement and minimize glare on reflective products.
- Incorporate polarizing filters or ND filters to manage reflections and balance highlight intensity during shooting.
- Experiment with camera angles to position highlights optimally, enhancing texture and shape without overexposing.
- Utilize post-processing tools to recover detail in overexposed highlights and fine-tune their appearance for a natural look.

Torjim Softbox Photography Lighting Kit, 16'' x 16'' Professional Softbox Lighting Kit with 85W 3000-7500K LED Bulbs, Studio Lights for Photography/Video Recording/Live Streaming/Portraits Shooting
【Illuminate Your Creativity】 Torjim softbox lighting kit is made of high-quality PET fabric and a foldable nylon cover,…
As an affiliate, we earn on qualifying purchases.
As an affiliate, we earn on qualifying purchases.
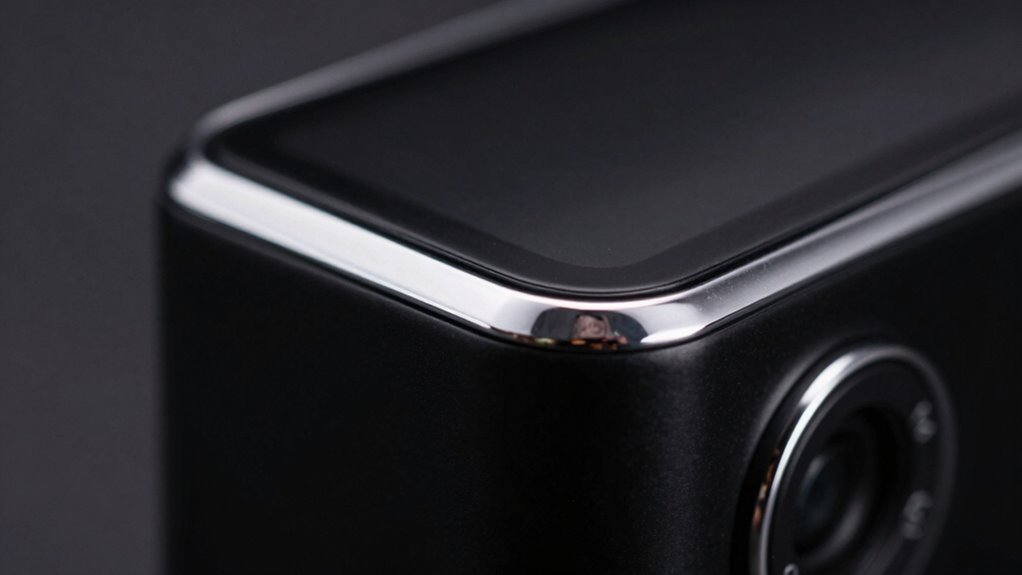
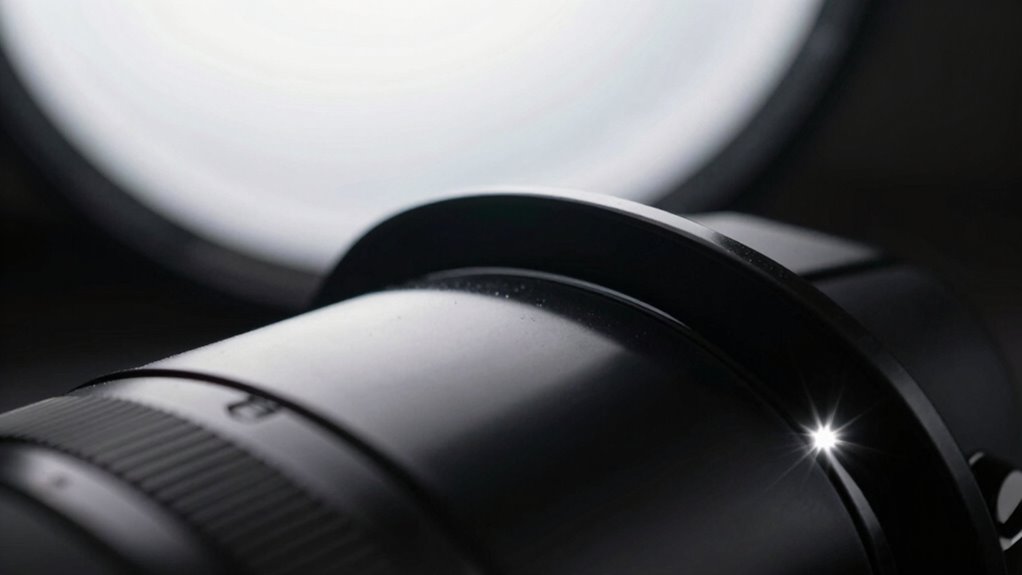
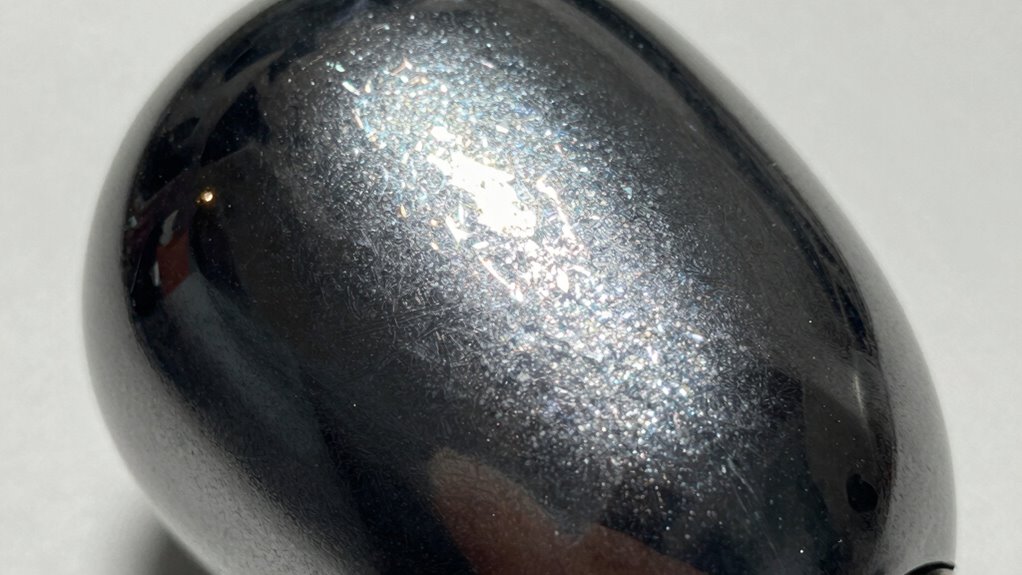
Understanding How Specular Highlights Affect Product Photos

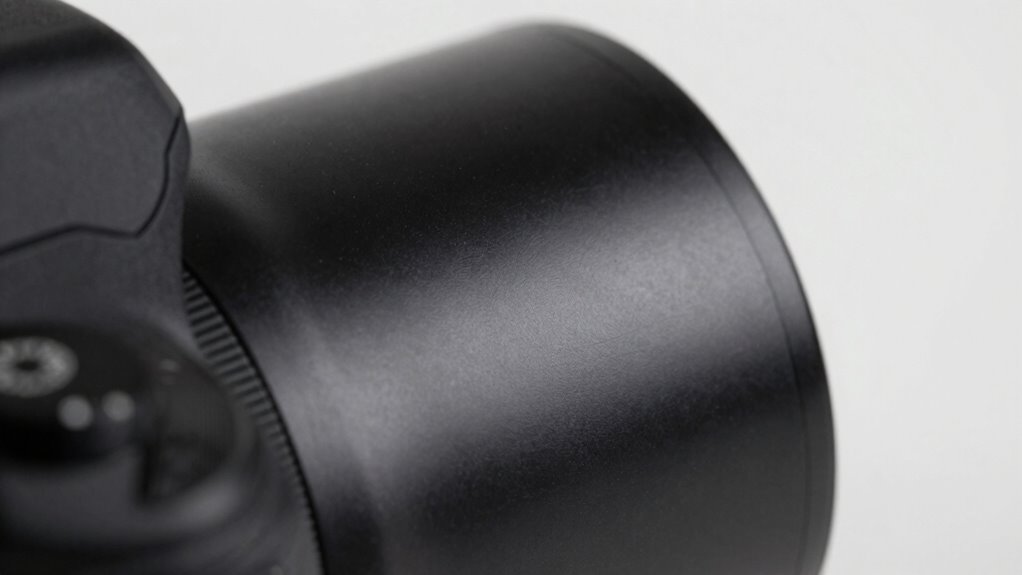
Understanding how specular highlights affect product photos is essential for creating images that look realistic and appealing. These highlights are bright spots that reflect the surface’s gloss and material properties. When you capture a photo, the color reflection from the highlight reveals the object’s surface gloss level—shiny surfaces produce sharp, intense highlights, while matte surfaces create softer, diffused reflections. Recognizing how these highlights behave helps you convey texture and quality effectively. You can manipulate highlights to emphasize a product’s sleekness or to reduce glare, depending on your goal. By understanding the relationship between surface gloss and color reflection, you guarantee your photos accurately represent the product’s finish, making them more attractive and convincing to viewers. Additionally, employing adaptable content formats can further enhance the presentation of your product images across various digital platforms. This understanding of architectural needs can also inspire innovative ways to showcase products through thoughtful design elements. Moreover, the principle of comparative advantage can guide how you select lighting techniques that best enhance product features. A well-balanced approach to battery capacity ensures that your images are not only visually striking but also accurately reflect the product’s functionality and appeal. Moreover, considering pet storm-anxiety routines can help create a calming atmosphere that enhances focus during the product shoot.

K&F CONCEPT 58mm Circular Polarizer Filter Ultra-Slim 18 Multi-Coated Optical Glass Circular Polarizing Filter for Camera Lenses with Cleaning Cloth (K Series)
Enhance Color & Contrast: CPL filter can enhance the color and contrast, and remove non-metallic reflections such as…
As an affiliate, we earn on qualifying purchases.
As an affiliate, we earn on qualifying purchases.
Choosing the Right Lighting to Control Highlights
Choosing the right lighting is essential for controlling specular highlights in your product photos. To manage reflective surfaces, use diffused light sources that soften reflections and reduce harsh highlights. Softboxes, umbrellas, or diffusers spread light evenly, creating gentle light diffusion. Incorporating natural lighting techniques can further enhance the quality of your images. Additionally, understanding safety tips when working with lighting equipment is crucial to prevent accidents, especially when using portable oil radiators that can generate heat. Position lights at angles that minimize direct reflections on shiny surfaces. Using multiple light sources can help balance highlights and shadows, giving you more control. Additionally, understanding ADAS sensor calibration can enhance the overall visual quality of your automotive repair images. A well-calibrated projector can also improve the clarity of images, similar to achieving optimal color accuracy. Here’s a helpful comparison:
| Lighting Type | Effect on Highlights | Best Use Case |
|---|---|---|
| Direct Light | Sharp, intense highlights | High-gloss surfaces needing emphasis |
| Diffused Light | Soft, subtle highlights | Reflective surfaces needing control |
| Backlighting | Reduces front highlights | Creating depth and reducing glare |
| Side Lighting | Defines surface texture | Highlighting details without glare |
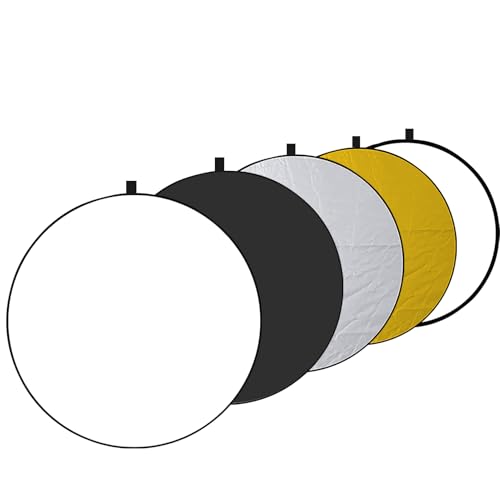
EMART 24'' (60cm) 5 in 1 Photo Collapsible Photography Reflector with Bag – Portable Camera Panel for Studio Video,Outdoor Lighting, Indoor Shooting, Portraint -Translucent, White, Silver, Gold, Black
【5-in-1 Multi-Purpose Photography Reflector】 This portable reflector features gold, silver, white, black, and translucent surfaces, plus a soft…
As an affiliate, we earn on qualifying purchases.
As an affiliate, we earn on qualifying purchases.
Adjusting Your Shooting Angle for Better Highlights

Adjusting Your Shooting Angle for Better Highlights
Adjusting your shooting angle can dramatically influence how highlights appear on your product surfaces. By experimenting with different angles, you can control highlight positioning for a more appealing look. Shift your camera slightly to see how the reflections change; small adjustments can make highlights more vibrant or subdued. Angle experimentation helps you find the *best* position where highlights enhance the product’s texture and shape without causing glare or distraction. Keep in mind that the angle of your light source relative to the camera also affects highlight placement. To improve your shot, move your camera or light source incrementally, observing how the highlights move across the surface. This iterative process allows you to fine-tune highlight positioning, elevating your product photos to a professional standard. Additionally, understanding glycolic acid benefits can help you apply these techniques effectively to enhance your overall photographic skills. Incorporating elements of event planning into your shoots can help create a more dynamic and engaging atmosphere for your product displays. A well-organized cleaning routine can also ensure that your shooting environment remains tidy, allowing for a more focused photography session. Moreover, leveraging AI-driven storytelling techniques can inspire creative approaches to highlight presentation and product narrative.

2 Pack 22"/55cm White Translucent Soft Umbrella, Photography Light Reflector Umbrella Kit Mini Lighting Diffuser for Studio/Outdoor Photo and Video Lighting Accessories (Bracket NOT Included)
Package Contents: The package includes 2 diffuser umbrellas, providing photographers with multiple lighting options for creating balanced illumination…
As an affiliate, we earn on qualifying purchases.
As an affiliate, we earn on qualifying purchases.
Using Diffusers and Modifiers to Soften or Sharpen Highlights
Using diffusers and modifiers allows you to control the quality of your highlights directly. For reflective surfaces, light diffusion is key to managing shine and creating the desired look. To soften highlights, you can use a larger diffuser or a translucent modifier that spreads light evenly, reducing harsh reflections. Conversely, if you want sharper highlights, opt for a smaller, more focused modifier that concentrates light on the surface.
Here are some options to contemplate:
- Use a softbox or a large diffuser for gentle, diffused highlights that minimize reflections.
- Employ a specular reflector or a small beauty dish to sharpen highlights on reflective surfaces.
- Add a grid or snoot to modifiers for more control, sharpening or softening highlights precisely.
Adjusting these tools helps you master highlight control like a product photo pro.
Post-Processing Tips for Fine-Tuning Highlights

Sure! Here’s your revised article subheading content with the requested changes:
—
Once you’ve captured your highlights with the right lighting tools, fine-tuning them in post-processing can make a significant difference. Adjusting the color temperature allows you to correct any unwanted color casts in your highlights, making them appear more natural or creatively styled. Incorporating Victorian fashion principles can inspire unique color choices that enhance your product’s appeal. Highlight recovery tools are essential for salvaging details in overexposed areas, preventing them from losing texture or appearing flat. Use your editing software’s highlight sliders carefully, gradually restoring detail without introducing noise or reducing contrast. Moreover, understanding automation techniques can streamline your editing process and help you manage adjustments more efficiently. Regularly checking your spray tip size is also important, as it can influence how light interacts with the surface of your product. Fine-tuning these aspects guarantees your highlights enhance the overall image, adding depth and realism. Remember, subtle adjustments often yield the best results, so work patiently to achieve a polished, professional shine that complements your product’s features. Additionally, incorporating techniques from foam rolling recovery can help maintain your focus and energy during long editing sessions. Using body-based methods can also enhance your awareness, allowing you to approach each adjustment with a clearer mind and better creativity.
—
Let me know if you need any further adjustments!
Troubleshooting Overexposed or Glary Highlights
Overexposed or glary highlights can quickly detract from your image’s quality, making details appear blown out or washed out. To troubleshoot this, start by adjusting your camera’s exposure settings to better control highlight retention. Next, pay attention to color temperature; warmer or cooler tones can influence how highlights appear and help reduce glare. Finally, consider using a graduated filter or ND filter to balance the light across your shot, preventing harsh highlights. Additionally, shooting in RAW allows you to recover some highlight detail during post-processing. By fine-tuning these elements, you can minimize overexposure and maintain natural-looking, controlled highlights that enhance your product’s shine without losing essential details.
How to Capture Consistent Highlights on Different Materials
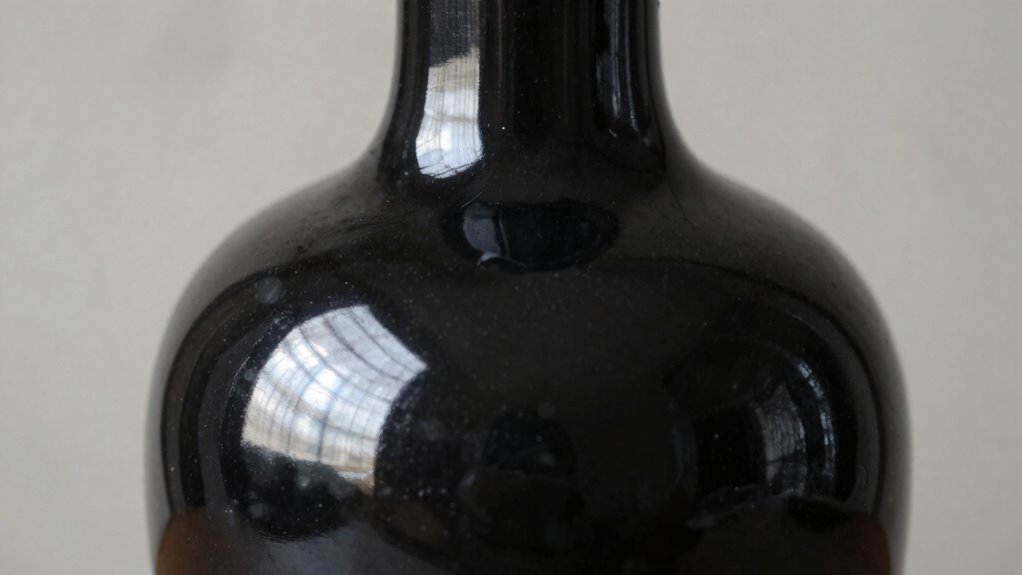
Capturing consistent highlights across different materials requires understanding how each surface reflects light. Surface textures influence how light interacts with a subject, so smooth, glossy surfaces produce sharp, bright highlights, while matte textures diffuse light for softer reflections. Reflective properties vary: metals and glass are highly reflective, creating intense, well-defined highlights, whereas fabrics and plastics scatter light, resulting in subtler specular spots. To maintain consistency, adjust your lighting setup based on these properties—use smaller, direct light sources for shiny surfaces and larger, diffused lighting for textured or matte finishes. Incorporating 85mm lenses can further enhance your ability to capture intricate details and highlights. Additionally, understanding credit card terms can help you manage the financial aspects of investing in quality photography equipment. Keep your camera settings steady to compare highlights accurately across materials. By recognizing how surface textures and reflective properties behave, you can control highlights and guarantee your product photos look professional and cohesive. Furthermore, understanding dream analysis can help you interpret the emotional responses evoked by your photography.
Frequently Asked Questions
What Camera Settings Best Enhance Specular Highlights?
To enhance specular highlights, you should adjust your camera settings by lowering your ISO for cleaner highlights and increasing your aperture to deepen the depth of field. Use lighting angles that position the light source at an angle to the subject, creating strong reflections. Incorporate diffusion techniques to soften harsh light and control the intensity of highlights, ensuring they appear vibrant yet not overpowering in your product photos.
How Do Reflectivity and Glossiness Influence Highlight Control?
Think of reflectivity and glossiness as the mirrors and polished surfaces of your scene. High reflectivity and glossiness create sharp, bright highlights, like a spotlight on a shiny surface. To control these, understand that increased surface roughness diffuses reflection, softening highlights, while smooth, glossy surfaces produce crisp, intense reflections. Adjusting these properties helps you tame highlights, making your product photos look polished without overwhelming the viewer.
Can Polarization Filters Improve Highlight Management?
Yes, polarization filters can improve highlight management by reducing unwanted reflections and glare. Their polarization benefits include controlling the intensity of specular highlights, making shiny surfaces appear more balanced and less harsh. When you use a polarization filter, you gain better control over highlight reduction, allowing you to achieve a more polished, professional look in your product photos. This tool is especially helpful for managing reflective surfaces and controlling shine effectively.
What Are Common Mistakes When Photographing Shiny Surfaces?
You often make the mistake of shooting shiny surfaces with poor lighting angles, causing harsh reflections that distract from the product. Additionally, choosing cluttered or overly bright backgrounds can intensify unwanted highlights. To improve, adjust your lighting angles to diffuse reflections and opt for neutral backgrounds that contrast subtly, helping highlights appear controlled and enhancing the product’s appeal. These tweaks make your images look professional and polished.
How Does Surface Texture Affect Highlight Appearance?
Think of surface texture as a dance floor; smoother surfaces create sharp, mirror-like highlights, while rougher textures disperse light like a crowd scattering, resulting in softer, diffused highlights. Surface roughness directly influences highlight appearance by affecting how light reflects. When you manage surface texture, you control highlight diffusion—making shiny objects look appealing or reducing unwanted glare, giving your photos a professional, polished look.
Conclusion
Think of controlling specular highlights like tending a garden—you need to nurture and shape the light to reveal your product’s best qualities. With careful planning, the right tools, and a keen eye for detail, you can cultivate perfect highlights that make your photos bloom. Master this skill, and your images will shine with professionalism, mesmerizing viewers just like a well-tended garden draws admiration. Keep experimenting, and watch your product photos flourish.