
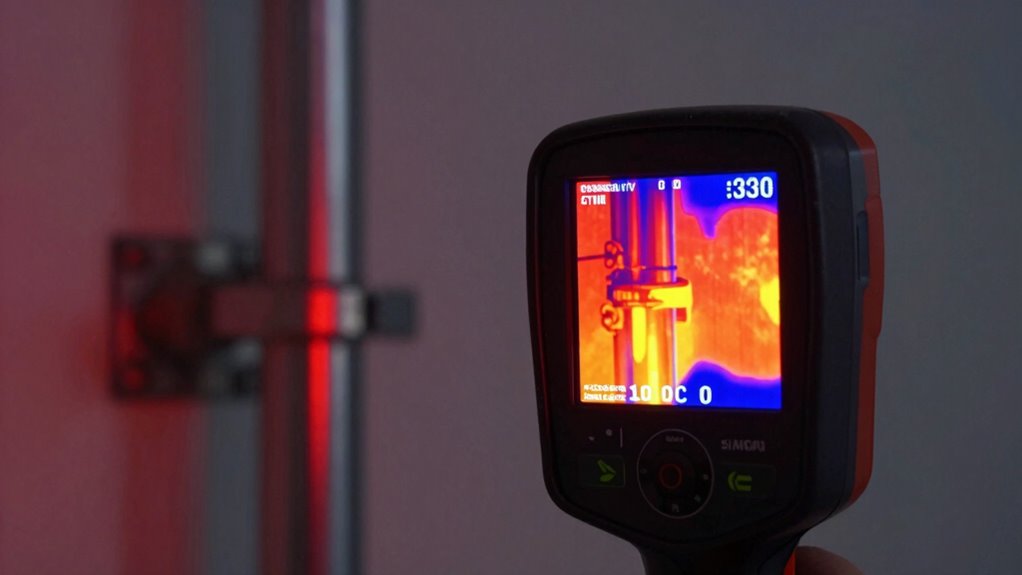
Emissivity is a vital setting on your thermal camera because it determines how accurately your device measures surface temperatures. Different materials emit infrared energy differently, and if you ignore this, your temperature readings can be misleading. Adjusting emissivity guarantees you get reliable results, whether you’re detecting heat loss or spotting overheating. Getting this right can prevent false alarms and improve your understanding of thermal data. Keep exploring to discover how to set and measure emissivity effectively.
Key Takeaways
- Emissivity determines how effectively a surface emits infrared radiation, directly impacting thermal imaging accuracy.
- Correctly setting emissivity ensures reliable temperature readings and prevents false data interpretation.
- Different materials require specific emissivity adjustments based on their surface properties and reflectivity.
- Using reference materials with known emissivity helps calibrate thermal cameras for precise measurements.
- Proper emissivity management enhances thermal image analysis, aiding in accurate detection of heat loss or overheating.

TOPDON TC004 Mini Thermal Imaging Camera, 240 x 240 TISR Resolution, 15-Hour Battery Life, 128 x 128 IR Resolution, 25Hz Handheld Infrared Camera with High/Low Temp Alerts, Auto Shutdown- Blue
【Enhanced Thermal Clarity】Start with 128×128 thermal imaging and enhance to 240×240 resolution with TISR technology for greater details….
As an affiliate, we earn on qualifying purchases.
As an affiliate, we earn on qualifying purchases.
What Is Emissivity and Why It Matters in Thermal Imaging
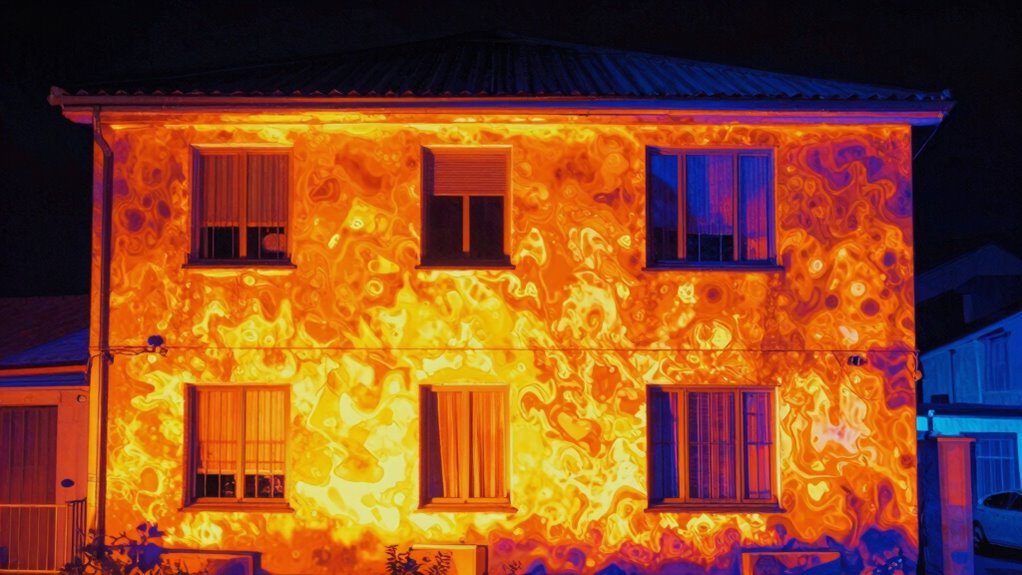
Emissivity is a measure of how effectively a surface emits thermal radiation, and it plays a crucial role in thermal imaging accuracy. If you don’t account for it, your thermal images could be misleading, affecting thermal safety and detection. Surfaces with high emissivity emit more infrared radiation, making them easier to identify, while low-emissivity materials reflect infrared signals, aiding in infrared camouflage. Understanding emissivity helps you choose the right settings on your thermal camera, ensuring precise temperature readings. For thermal safety, knowing how different materials radiate heat can prevent accidents and equipment failures. Additionally, surfaces that exhibit traditional techniques of craftsmanship, like Indonesian decor masks, can have varied emissivity levels that impact thermal imaging. When you recognize how emissivity impacts infrared emission, you can better interpret thermal images and avoid false alarms or missed detections, especially in environments where infrared camouflage is used to hide objects or people. Furthermore, employing eco-friendly practices in your thermal imaging approach can further enhance safety and efficiency in various applications. Moreover, understanding budgeting limitations in thermal imaging technology can help you make informed choices about the devices you invest in. Additionally, understanding color accuracy is equally important as it can influence the clarity of thermal images in different settings. This understanding of digital content helps in optimizing data presentation and enhancing user engagement.

TempPro TP30 Infrared Thermometer Gun, Laser Thermometer for Cooking, Pizza Oven, Griddle, Engine, HVAC, Temperature Gun with Adjustable Emissivity & Max Measure -58°F ~1022°F, Gift for Dad Husband
【Highly Accurate & Adjusts to Any Surface】Designed with the latest thermopile sensor technology, the infrared laser thermometer gun…
As an affiliate, we earn on qualifying purchases.
As an affiliate, we earn on qualifying purchases.
How Different Materials Affect Infrared Emission and Emissivity
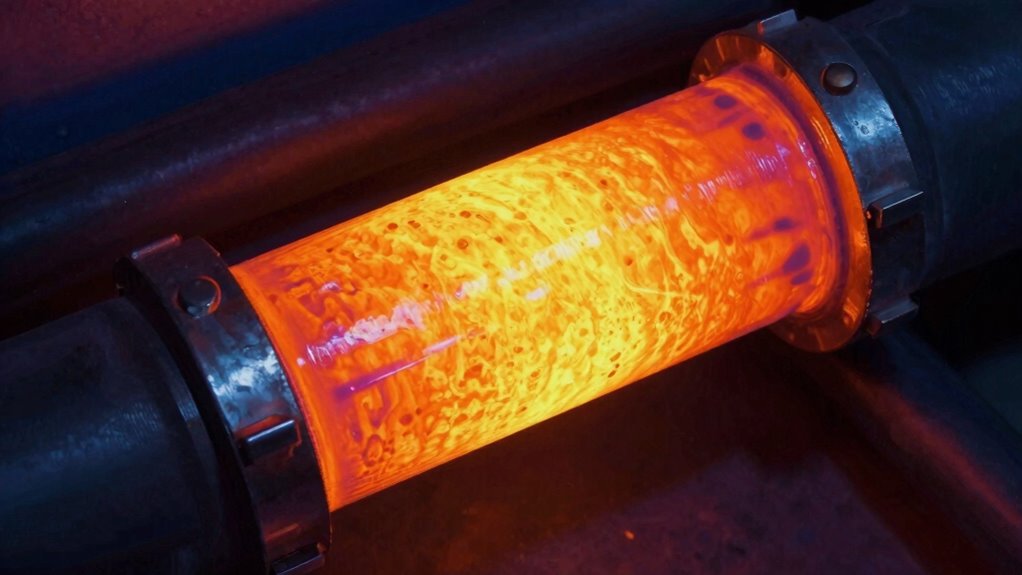
Different materials radiate infrared energy in varying degrees, markedly impacting thermal imaging results. Material reflectivity plays a key role; shiny or smooth surfaces tend to reflect infrared radiation, reducing their apparent temperature and lowering emissivity. Conversely, matte or rough surfaces absorb and emit more infrared energy, resulting in higher emissivity values. Surface roughness influences how a material interacts with infrared waves: rougher textures increase emissivity because they trap heat and reduce reflectivity, while smoother surfaces reflect more IR energy, making them appear cooler. Understanding these properties helps you interpret thermal images accurately. Recognizing how material reflectivity and surface roughness affect infrared emission allows you to adjust your equipment settings more precisely, ensuring better detection and measurement of temperature differences across various surfaces. Additionally, knowing the efficiency of air systems can provide valuable context for analyzing thermal performance in home environments. This understanding is crucial for optimizing at-home spa routines that rely on precise temperature gradients for effective treatment outcomes, especially when considering cultural influences on design and material choice in spa settings.
Klein Tools TI223 Mobile Thermal Imaging Camera, Thermal Imager for iOS and Android, 19,200 Pixels, Wide Temperature Range of -4 to 752-Degree Fahrenheit, Professional Infrared Camera
19,200-PIXEL RESOLUTION: High-quality thermal imaging camera delivers excellent resolution for troubleshooting hot and cold spots in electrical and…
As an affiliate, we earn on qualifying purchases.
As an affiliate, we earn on qualifying purchases.
Common Mistakes When Adjusting Emissivity Settings
When adjusting the emissivity setting on your thermal camera, it’s easy to make mistakes that can lead to inaccurate temperature readings. Many users overlook the importance of correctly calibrating emissivity, especially with different thermal camera brands that might have varying adjustment techniques. A common mistake is setting emissivity too high or too low for the material, which skews results. Some forget to account for surface conditions or assume uniform material properties, leading to errors. Additionally, relying solely on default settings without proper calibration can cause inaccuracies. To avoid these pitfalls, familiarize yourself with your camera’s specific emissivity adjustment techniques and always verify with known reference sources. Proper adjustment ensures reliable thermal readings, no matter which brand of camera you use. Understanding ethical consumer choices can also enhance your decision-making when selecting thermal imaging equipment. Furthermore, ensuring proper cabling solutions during installation can help maintain the integrity of the thermal imaging system. Remember that accurate readings depend on fact-checking & media literacy, as these skills can help you discern the quality and reliability of thermal imaging information. Additionally, using dynamic microphones during live demonstrations can greatly improve the clarity of sound when explaining thermal imaging concepts. Always consider material properties when calibrating emissivity, as different surfaces can significantly affect thermal readings.

MILESEEY TR10 Thermal Imaging Camera,Super Resolution 192 x 192 Thermal Camera,25 Hz Refresh Rate, -4°F to 1022°F Handheld Infrared Imager,8-Hour Battery Life Infrared Camera
【High Definition Thermal Imaging】The MILESEEY TR10 delivers enhanced 192×192 thermal clarity infrared sensor. Its 25Hz high refresh rate…
As an affiliate, we earn on qualifying purchases.
As an affiliate, we earn on qualifying purchases.
How to Set Correct Emissivity on Your Thermal Camera
Setting the correct emissivity on your thermal camera is vital for accurate temperature readings. To do this, start by selecting the right color palette, which helps you interpret thermal data effectively. Many cameras allow you to adjust emissivity settings directly, so match the value to the surface you’re measuring—typically between 0.90 and 0.98 for most materials. Keep in mind that incorrect settings can lead to false readings, causing unnecessary troubleshooting. Also, be mindful of your camera’s battery life, especially when changing settings frequently or performing prolonged sessions. Properly setting emissivity guarantees reliable results, reduces the need for repeated measurements, and helps you conserve battery power. Additionally, understanding panel snow management can be crucial for ensuring optimal thermal performance in solar systems. This way, you get precise thermal images without sacrificing device performance. Furthermore, embracing inclusive casting can enhance your understanding of how different materials respond to thermal imaging, ultimately improving your accuracy. To enhance your skills, consider exploring AI applications in education, which can provide innovative ways to learn about thermal imaging techniques. Furthermore, understanding home essentials can help you create a well-informed approach to using thermal imaging effectively.
Tips for Measuring and Estimating Emissivity in the Field

To get accurate readings, you can use reference materials with known emissivity values. Conducting simple tests on different surfaces helps you estimate emissivity more reliably in the field. These methods guarantee your thermal images are as precise as possible. Additionally, understanding solar charge controllers can enhance your overall energy management when integrating thermal imaging with solar technology. Proper home safety measures can also prevent accidents when working with thermal imaging equipment in various environments.
Using Reference Materials
Have you ever wondered how to accurately determine an object’s emissivity in the field? Using reference materials can help you get close. You can compare the thermal readings of objects with known emissivity, adjusting your camera’s settings accordingly. A consistent color palette makes it easier to interpret thermal images, especially when dealing with subtle temperature differences. Keep in mind, camera resolution affects the level of detail you capture, impacting measurement accuracy. To better understand, consider this table:
| Reference Material | Emissivity | Surface Finish | Temperature Range | Use Case |
|---|---|---|---|---|
| Matte Black Paint | 0.98 | Rough | -20°C to 100°C | General |
| Aluminum Foil | 0.05 | Smooth | -30°C to 80°C | Reflection |
| Raw Steel | 0.70 | Semi-rough | -10°C to 600°C | Metals |
| Glass | 0.92 | Smooth | -40°C to 200°C | Transparent objects |
| Rubber | 0.95 | Rough | -50°C to 50°C | Insulation |
Using such references improves your accuracy in the field.
Conducting Emissivity Tests
Conducting emissivity tests in the field requires careful measurement and observation to guarantee accuracy. Start by considering material coatings, as different coatings can notably influence emissivity values. For example, painted or coated surfaces often have lower emissivity than uncoated materials. Additionally, surface roughness plays a crucial role; rougher surfaces tend to emit more infrared radiation, affecting your readings. Use a contact or non-contact method to estimate emissivity, like a reference material with a known emissivity value, and compare it with your target surface. Always clean the surface thoroughly to remove dirt or debris that could alter the measurement. Keep in mind that environmental factors, such as dust and humidity, can impact your readings, so perform tests in as controlled a setting as possible. Incorporating outdoor cooling fans can also help maintain a consistent temperature, further improving measurement accuracy. Furthermore, understanding thermal radiation principles will enhance your ability to interpret emissivity results effectively. To achieve optimal results, consider implementing effective soundproofing techniques that can minimize external noise interference during your measurements. Engaging in early socialization and training can improve your overall approach by fostering a more mindful and responsive testing environment. Additionally, being aware of safety checks is essential to ensure that both the equipment and personnel are protected during testing procedures.
How Proper Emissivity Settings Improve Thermal Imaging Accuracy
Setting the correct emissivity guarantees your temperature readings are accurate, preventing misinterpretations. Different materials have unique emissivity values that can vary, affecting your thermal images. Proper calibration techniques help account for these variations, improving overall imaging precision.
Accurate Temperature Readings
Why does adjusting emissivity settings matter when taking thermal images? Proper settings ensure your temperature readings are accurate, which is critical for reliable analysis. When emissivity is correctly calibrated, your thermal camera interprets emitted infrared radiation precisely, leading to correct temperature data. Inaccurate emissivity causes errors that can mislead your conclusions, regardless of your color palette choices or image resolution. Using the right emissivity setting allows you to interpret thermal images with confidence, ensuring temperature variations are genuine. This accuracy helps you identify issues like heat loss or overheating more effectively. By fine-tuning emissivity, you enhance the overall quality of your thermal images, making your temperature readings more dependable and actionable.
Material Emissivity Variations
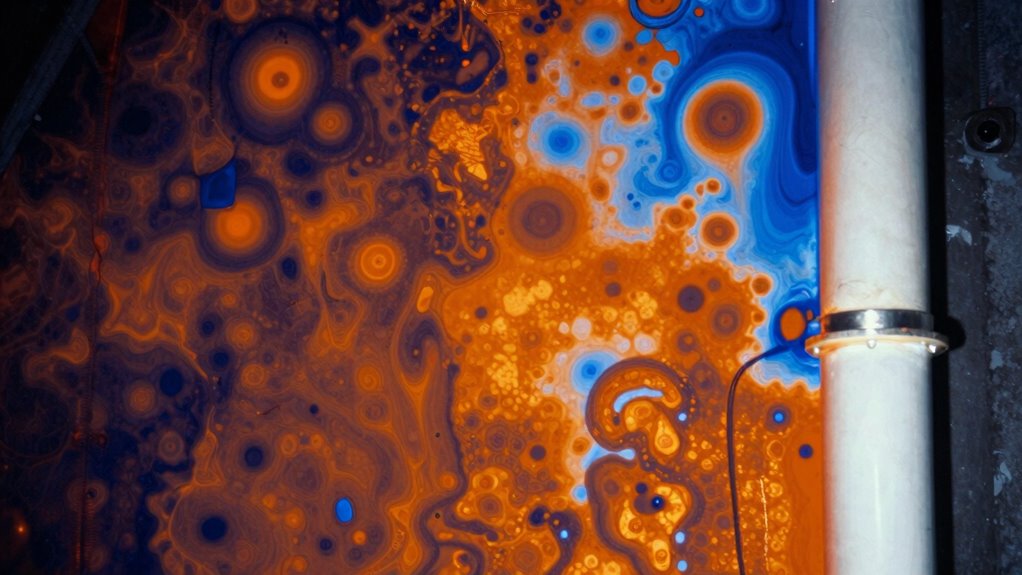
Different materials emit infrared radiation at varying levels, making accurate emissivity settings vital for precise thermal imaging. Surface reflectance influences the amount of infrared radiation reflected from a surface, which can skew temperature readings if not properly accounted for. Materials with high reflectance, like metals, tend to reflect more infrared radiation, requiring adjustments to emissivity settings. Conversely, materials with low reflectance, such as matte finishes, emit more infrared radiation directly. Material conductivity also plays a role; high-conductivity materials often have different emissivity values compared to insulators. Understanding these variations helps you set the correct emissivity, improving measurement accuracy. Properly adjusting for surface reflectance and material conductivity ensures your thermal images are reliable and precise. Additionally, water damage restoration processes can affect the emissivity of certain materials, further complicating accurate thermal readings.
Proper Calibration Techniques
Accurate thermal imaging depends heavily on proper calibration, which guarantees your device interprets infrared radiation correctly. To achieve this, start with sensor calibration, confirming your thermal imager is set to the correct baseline. Adjust the emissivity setting to match the material you’re inspecting; this is vital because emissivity affects how your device detects infrared radiation. Proper emissivity adjustment minimizes errors caused by reflective or complex surfaces, improving measurement precision. Regular calibration routines, including using emissivity reference targets, help maintain accuracy over time. Remember, neglecting calibration or using incorrect emissivity settings can lead to false readings, compromising your results. By paying close attention to sensor calibration and emissivity adjustment, you guarantee your thermal imaging is both reliable and precise.
Frequently Asked Questions
Can Emissivity Be Adjusted Automatically on All Thermal Cameras?
Not all thermal cameras can automatically calibrate or adjust emissivity settings. Many models require manual input for emissivity, especially in older or basic units. However, advanced thermal cameras often feature automatic calibration and emissivity adjustment, making it easier to get accurate readings. You should check your camera’s specifications to see if it offers these features, as automatic emissivity adjustment can save you time and improve measurement accuracy.
How Does Emissivity Affect Temperature Readings of Human Skin?
Think of emissivity as the skin’s invisible cloak—if it’s off, your temperature readings can be wildly inaccurate. Higher skin moisture increases emissivity, making readings more reliable, while surface reflection can cause the thermal camera to pick up reflected heat, skewing results. To get accurate measurements, adjust for these factors, ensuring your thermal camera captures true skin temperature rather than reflections or dry skin’s lower emissivity.
Are There Standard Emissivity Values for Common Building Materials?
Yes, there are standard emissivity values for common building materials, but they vary based on material properties and surface textures. For example, smooth, non-metallic surfaces like drywall usually have an emissivity around 0.90, while rougher or coated surfaces can range from 0.85 to 0.95. Metals tend to have lower emissivity, often below 0.60, due to their reflective surface properties. Always consider these factors for accurate thermal readings.
What Tools Can I Use to Measure Emissivity in the Field?
Imagine you’re inspecting a building’s wall to identify materials; a handheld infrared thermometer with emissivity adjustment helps. You can use these tools with calibration techniques, such as comparing readings against a known reference surface, to measure emissivity in the field accurately. Material identification becomes easier when you match your readings to standard emissivity values, ensuring precise thermal imaging results without needing complex lab equipment.
How Often Should Emissivity Settings Be Recalibrated?
You should recalibrate your emissivity settings whenever material properties change or if your thermal camera shows inconsistent readings. Regular calibration procedures ensure accurate temperature measurements, especially when switching between different materials. It’s best to check and adjust your settings periodically—at least once a month or after significant environmental changes—to maintain precision. This proactive approach helps you avoid errors caused by outdated emissivity values, guaranteeing reliable thermal imaging results.
Conclusion
Now that you understand how vital emissivity is, imagine your thermal camera as a detective uncovering hidden details. Set it correctly, and you’ll reveal accurate, reliable images that tell the true story behind every surface. But miss a setting, and the evidence could be blurred or misleading. Are you ready to master your camera’s emissivity controls and access the full potential of your thermal imaging? The next scan could change everything.