Set up smart home security cameras to monitor the areas you choose, receive activity alerts, and review recordings. This guide is for beginners installing indoor or outdoor cameras who can use a smartphone app and connect devices to home Wi-Fi. Allow about 1-3 hours, depending on the number of cameras, mounting needs, and network setup.

Get the latest gadgets delivered free with Prime
- Fast, free delivery on millions of items
- Prime Video, Amazon Music and more included
- Member-only deals all year

Blink Outdoor 4 Camera and Wired Doorbell 2K+ System, 5 Cameras, Sync Module Core, Black
- ✔ Included devices: 5 Outdoor 4 cameras and 1 Wired Doorbell 2K+
- ✔ Included hub: Blink Sync Module Core
- ✔ Camera resolution: 1080p HD outdoor cameras; 2K doorbell
Blink Outdoor 4 Camera and Wired Doorbell 2K+ System, 3 Cameras, Sync Module Core, Black
- ✔ Included devices: 3 Outdoor 4 cameras and 1 Wired Doorbell 2K+
- ✔ Included hub: Blink Sync Module Core
- ✔ Outdoor camera resolution: 1080p HD

Anona 4K UHD Indoor Security Camera, 4-Pack
- ✔ Pack size: 4 cameras
- ✔ Resolution: 4K UHD, 8 MP
- ✔ Movement: 360° pan and 110° tilt
Difficulty: Beginner | Time: 1-3 hours
What You’ll Need
Tools & Materials:
- Smart cameras and their power adapters or charged batteries
- Smartphone or tablet with the camera manufacturer’s app
- Home Wi-Fi name and password
- Ladder and a suitable screwdriver or drill if mounting cameras
- Wall anchors and mounting hardware suitable for the surface
- Optional microSD card, subscription, or compatible recording hub for video storage
Knowledge:
- Basic smartphone and app use
- How to join a device to a home Wi-Fi network
- Basic safe use of a ladder and hand tools if mounting cameras
Check each camera’s Wi-Fi band, operating temperature, power requirements, and storage options before installation. Many cameras need 2.4 GHz Wi-Fi; some support 5 GHz or both bands. Confirm that your router can provide the required network. Ask household members for consent, and check local rules before recording shared spaces, neighbors, public areas, or audio.
Blink Outdoor 4 Camera and Wired Doorbell 2K+ System, 5 Cameras, Sync Module Core, Black
For a home with several sides, paths, or outbuildings to watch, this bundle offers the most complete exterior coverage in our lineup: five weather-resistant 1080p cameras, a wired 2K doorbell, and a Sync Module Core. The doorbell adds a useful front-entry perspective, while the five cameras let us place viewpoints around the property without buying cameras one at a time. Compared with the three-camera Blink bundle, the core camera experience is similar; the reason to choose this one is simply the additional coverage points.These are battery-powered cameras, not rechargeable ones. Included lithium batteries are specified for up to two years under default conditions, but frequent activity, settings, and the environment can change that. The 2.4 GHz Wi-Fi requirement is worth checking before installation, particularly if a home network uses a different band or has weak signal at the edges of the property. Alexa integration, night vision, live view, and two-way audio support routine monitoring, but person and vehicle detection and extended cloud storage require a separately purchased plan. That subscription dependency makes the system less attractive for buyers who expect its advanced alerts to work without ongoing service.Against the Anona four-pack, this Blink set is the better fit for outdoor boundaries and a wired entryway, while Anona offers more image detail and local microSD recording indoors. We would choose Blink when the location and number of exterior viewpoints matter more than 4K resolution. Skip this larger package if the property needs only a couple of cameras, if replacing disposable batteries is unwelcome, or if indoor pan-and-tilt monitoring is the priority.
Pros:
- Five weather-resistant 1080p cameras plus a 2K wired doorbell cover more exterior locations than the three-camera Blink bundle.
- Includes the Sync Module Core and ten lithium AA batteries.
- Supports night vision, live view, two-way audio, and Alexa integration.
- Outdoor cameras are specified to operate from -4°F to 113°F.
Cons:
- Person and vehicle detection and extended cloud storage require a separately purchased plan.
- Cameras use non-rechargeable batteries, and actual battery life varies with use and conditions.
- The system connects over 2.4 GHz Wi-Fi only.
Best for: Households that want several outdoor viewpoints and a wired doorbell in one Alexa-compatible setup.
Not ideal for: Buyers who need subscription-free person and vehicle alerts, rechargeable cameras, or indoor 4K pan-and-tilt coverage.
Bottom line: Choose this Blink bundle when broad outdoor coverage and a wired doorbell matter more than rechargeable power or plan-free advanced alerts.
“Choose this Blink bundle when broad outdoor coverage and a wired doorbell matter more than rechargeable power or plan-free advanced alerts.”
Blink Outdoor 4 Camera and Wired Doorbell 2K+ System, 3 Cameras, Sync Module Core, Black
This smaller Blink bundle keeps the lineup’s most useful combination—outdoor cameras plus a 2K wired doorbell—without making five camera placements part of the purchase. Three 1080p Outdoor 4 cameras can cover selected approaches, while the doorbell handles the front entrance. Compared with the five-camera version, this is the more sensible match for a compact property or a buyer who already has some coverage and wants to add an entryway view. The picture resolution and core capabilities are otherwise similar, so choose between the two Blink kits mainly by how many exterior angles you actually need.Live view, night vision, two-way audio, weather resistance, and Alexa support cover the basics of a connected monitoring setup. The cameras come with non-rechargeable lithium AA batteries, with stated battery life of up to two years depending on settings, activity, and conditions. As with the larger bundle, smart person and vehicle alerts and Blink Moments require a subscription. That distinction matters: the included hardware can monitor and communicate, but buyers seeking richer detection should account for a plan rather than assuming every alert is included.Compared with Anona, this package sacrifices 4K indoor detail and a local microSD option in exchange for outdoor-rated cameras and a doorbell. That makes it a better security fit for entry points and exterior approaches, but not for tracking movement across a room. We would skip it if the home has a wide perimeter that needs five camera positions or if disposable batteries and 2.4 GHz-only connectivity are deal-breakers.
Pros:
- Combines three outdoor cameras with a 2K wired doorbell and Sync Module Core.
- Includes six lithium AA batteries for the cameras.
- Provides live view, night vision, two-way audio, and Alexa compatibility.
- Weather-resistant cameras are specified for temperatures from -4°F to 113°F.
Cons:
- Person and vehicle alerts and Blink Moments require a subscription plan.
- Outdoor cameras use non-rechargeable batteries.
- Only supports 2.4 GHz Wi-Fi.
Best for: Buyers who want a focused outdoor setup with a doorbell camera, but do not need five exterior viewpoints.
Not ideal for: Large properties needing extensive perimeter coverage, or buyers who want local recording, indoor tracking, or plan-free advanced detection.
Bottom line: This is the better Blink choice for a smaller or already-partially-covered property that still needs a clear doorbell view.
“This is the better Blink choice for a smaller or already-partially-covered property that still needs a clear doorbell view.”
Anona 4K UHD Indoor Security Camera, 4-Pack
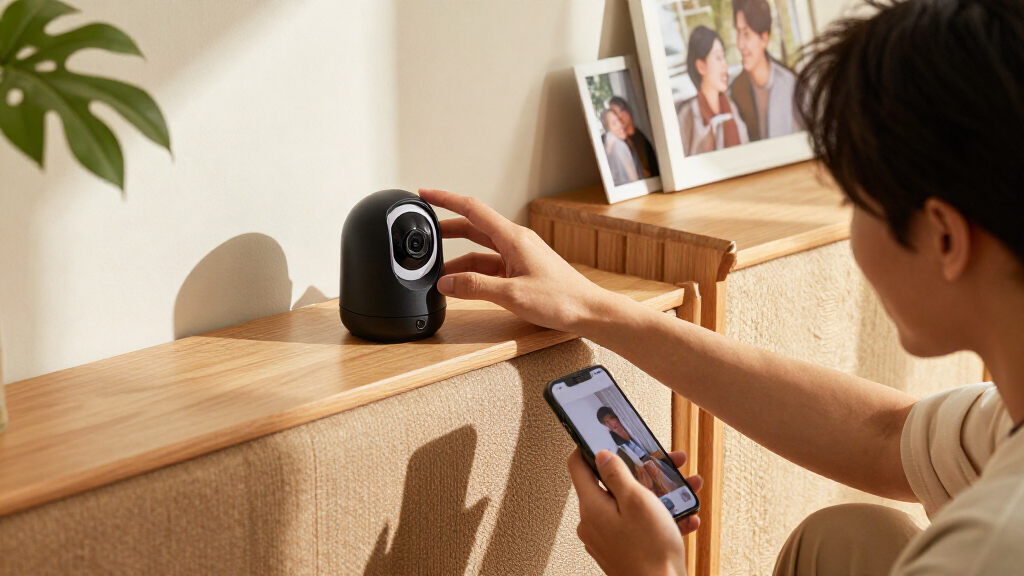
Anona takes a different approach from both Blink bundles: its four cameras are designed for indoor rooms, where 4K video, movement, and close observation can matter more than weather resistance or a doorbell view. Each camera records 8 MP video and can pan 360 degrees, tilt 110 degrees, and follow motion automatically. That movement helps one camera watch a broader room than a fixed viewpoint, while AI detection for people, pets, and baby crying can make alerts more relevant to household monitoring. The 8x digital zoom offers closer inspection, although digital zoom does not add detail beyond the recorded image.Unlike the battery-powered Blink cameras, Anona is corded, so it needs a suitable outlet and a stable indoor placement. Its dual-band Wi-Fi 6 support includes both 2.4 GHz and 5 GHz networks, offering more network flexibility than the Blink systems’ 2.4 GHz-only connection. Storage is another differentiator: buyers can use encrypted cloud storage or install a microSD card up to 512 GB, but the card is not included. That gives Anona a local-recording route not specified for either Blink bundle, though it means handling storage setup separately.There are meaningful limits. Anona is indoor-only, and its stated 15 fps frame rate is lower than some buyers may expect from a high-resolution camera, particularly when reviewing quick movement. Compared with Blink, it provides sharper indoor footage and pan-and-tilt coverage, but it does not watch a driveway, tolerate outdoor weather, or include a wired doorbell. We would choose it for rooms, pets, or family monitoring—not as a stand-alone perimeter-security system.
Pros:
- Four 4K UHD cameras with 8x digital zoom provide more recorded detail than the 1080p Blink outdoor cameras.
- 360° pan, 110° tilt, and motion auto-tracking help follow activity across a room.
- AI alerts identify people, pets, and baby crying.
- Supports encrypted cloud storage or local microSD recording up to 512 GB.
Cons:
- Indoor use only, unlike the weather-resistant Blink cameras.
- MicroSD card is not included.
- 15 fps recording may show fast movement less smoothly.
Best for: Households wanting multiple indoor viewpoints with 4K detail, room tracking, and an option for local microSD recording.
Not ideal for: Buyers seeking outdoor protection, a doorbell camera, battery-powered placement, or higher-frame-rate footage.
Bottom line: Pick Anona for indoor detail and flexible recording, but pair it with another system if outdoor security or a doorbell view is essential.
“Pick Anona for indoor detail and flexible recording, but pair it with another system if outdoor security or a doorbell view is essential.”
As an Amazon Associate we earn from qualifying purchases.
Before You Start
Choose camera locations before drilling or attaching mounts. Keep cameras away from heat sources and places where rain, glare, or direct sunlight could interfere with the image. Do not aim into a neighbor’s windows or private spaces. If a camera uses a power cable, plan a route that avoids doors, walkways, and other pinch or trip hazards. Turn on the camera and test its view from the intended location before fixing the mount in place.
Use a unique password for your camera account, and update your router and camera firmware when prompted. If you are unsure whether a mounting surface contains wiring or plumbing, do not drill there; choose another location or ask a qualified installer.
Step-by-Step Instructions
Step 1: Choose the areas to monitor
Walk through your home and list the entrances or spaces you want to monitor, such as the front door, garage entry, or living room. For each location, note whether you need indoor or weather-resistant outdoor equipment, access to a power outlet, and a clear Wi-Fi signal. Avoid placing cameras where household members expect privacy, such as bathrooms or bedrooms used by others.
Tip: A camera should support a specific monitoring need. Cover fewer locations well rather than adding cameras that create unnecessary alerts or record private activity.
Check: You have a list of camera locations, and each location has an appropriate camera type, power plan, and network signal.
Step 2: Set up the account and storage plan
Install the manufacturer’s official app, create an account, and choose a strong, unique password. Turn on two-factor authentication if the service offers it. Decide how recordings will be stored: local memory card, a hub or recorder, or the provider’s cloud service. Check any subscription terms, retention limits, and the steps for deleting or sharing clips before you rely on the system.
Tip: Do not reuse your email or banking password for the camera account. Avoid sharing account access broadly; use separate household accounts or app invitations when supported.
Check: You can sign in to the app, two-factor authentication is active if available, and you understand where recordings will be saved.
Step 3: Prepare the Wi-Fi network
Check the camera’s network requirements in its setup instructions. Confirm that your phone is connected to the correct home Wi-Fi network and that you have its password ready. If the camera requires 2.4 GHz Wi-Fi, use that band during setup; some routers combine bands under one network name, while others let you select them separately. Test Wi-Fi strength at the planned camera location with your phone.
Tip: A weak signal can cause delayed live video, missed uploads, or repeated disconnections. Move the camera closer to the router or improve coverage with a compatible access point before permanently mounting it.
Check: The camera’s required Wi-Fi band is available, and the signal at each planned location is usable.
Step 4: Add and update each camera
Power on one camera at a time, open the app, and choose its add-device or setup option. Follow the prompts to scan a QR code, enter Wi-Fi details, or pair the camera. Name it by location, such as “Front Entry,” so alerts and recordings are easy to identify. Once it appears online, check for a firmware update and install it before adjusting settings or mounting the camera.
Tip: Keep the camera near the router during pairing if the app cannot find it. Return it to the intended location and test the connection before mounting.
Check: The app lists the camera as online, shows a live view, and reports no pending firmware update.
Step 5: Position and mount the cameras
Place each camera at a height and angle that shows the target area without aiming into private spaces. Open the live view while positioning it, then check the image for glare, obstructions, and blind spots. For a wired model, keep the cable secured and protected from weather as directed by the manufacturer. For a battery model, check how to remove and recharge it before fixing the mount. Use the supplied hardware or anchors suited to the wall material.
Tip: Do not mount a camera where a door, plant, or seasonal decoration will block its view. Follow the camera’s weather and mounting instructions; an indoor model is not suitable for outdoor exposure.
Check: The live view shows the intended area clearly, the camera is firmly attached, and cables or batteries can be accessed safely.
Step 6: Configure motion detection and notifications
In the app, set motion detection for each camera and adjust activity zones to include the areas you care about while excluding sidewalks, moving trees, or busy roads when possible. Select alert types, such as people or vehicles, only if your camera supports them. Set a schedule or privacy mode for times when monitoring is not wanted, and check household notification preferences.
Tip: Start with moderate motion sensitivity. Excessive sensitivity can create repeated alerts; very low sensitivity can miss activity. Adjust one setting at a time after observing real activity.
Check: A test movement in the chosen area triggers the intended alert, while excluded areas do not produce unnecessary notifications.
Step 7: Set recording and privacy controls
Choose whether the camera records continuously or only when it detects activity, if both options are available. Set clip length, notification behavior, and recording retention based on the storage plan. Review privacy controls, including audio recording, status lights, privacy shutters, and schedules. Disable audio or other features you do not need, and restrict access to household members who require it.
Tip: Cloud recordings may depend on a subscription, and local cards can fill or fail. Check the app’s storage status and learn how to export or delete important clips.
Check: The camera records according to your chosen schedule, privacy controls match your household’s needs, and the app shows the expected storage location.
Step 8: Test coverage, alerts, and recordings
With the system armed or in its normal monitoring mode, walk through each camera’s target area and confirm that the app sends an alert. Open the alert, check that the clip or event image loads, and verify that the date and time are correct. Test the live view from your phone while connected to mobile data, if you expect remote access. Repeat the test at night and in other lighting conditions when practical.
Tip: Do not assume a camera works because it appears online. Test detection, remote viewing, and playback separately; each can fail for a different reason.
Check: Every camera shows its intended view, sends expected alerts, and saves recordings that you can play back.
Common Mistakes to Avoid
- Mounting a camera before checking its live view from the intended position. — Temporarily hold or place the camera in position and inspect the live image before drilling or attaching the mount.
- Using a Wi-Fi band or signal that the camera cannot support reliably. — Check the camera’s network requirements and test signal strength at the installation point before pairing and mounting.
- Setting motion sensitivity too high or leaving busy areas in the detection zone. — Use activity zones to exclude irrelevant movement, then adjust sensitivity gradually after testing.
- Assuming recordings are being saved without checking storage or subscription limits. — Confirm the storage method, available capacity, retention period, and playback of a test event in the app.
Troubleshooting
Problem: The camera will not connect to Wi-Fi.
Solution:
Check the camera’s supported Wi-Fi band, re-enter the network password, and move the camera near the router for pairing. Confirm that the phone is on the home network and that the router is not blocking new devices. Restart the camera and router, then try setup again.
Problem: Live video is slow, choppy, or unavailable.
Solution:
Test Wi-Fi strength where the camera is installed and move it closer to the router or add compatible network coverage. Check whether other devices are heavily using the network. Restart the camera, confirm its firmware is current, and test live video again.
Problem: The camera sends too many alerts or misses movement.
Solution:
Review the activity zone and sensitivity settings. Exclude common sources of irrelevant movement, such as a road or moving branches, then test a person walking through the target area. Raise or lower sensitivity in small increments and retest.
Problem: Alerts arrive, but clips are missing or will not play.
Solution:
Check whether the camera’s storage is full, disconnected, or dependent on an expired subscription. Confirm recording is enabled for the current schedule and test a new event. For local storage, reseat the card only as the manufacturer directs; replace it if the app reports an error.
What Success Looks Like
The setup is complete when every camera remains online at its installed location, shows the intended area without privacy violations, and records or streams according to its settings. Test motion detection by walking through each monitored area. Confirm that the right phone receives the alert, the timestamp is correct, and the associated recording plays back. Check remote viewing over mobile data if you plan to use it away from home.
Next Steps
Review camera status, storage capacity, and alert history during the first few days. Adjust activity zones or sensitivity if alerts are irrelevant or activity is missed. Keep camera and router firmware current, replace or recharge batteries as needed, and periodically test playback and remote access. Recheck camera angles after moving furniture or seasonal changes. Remove access for anyone who no longer needs it, and contact the manufacturer or a qualified installer if a camera repeatedly disconnects or a mounting or wiring issue is unsafe.
Frequently Asked Questions
Do smart home cameras need Wi-Fi?
Many consumer cameras use Wi-Fi for setup, alerts, and remote viewing, but some systems record to a local hub or use wired network connections. Check the specific model’s network requirements. A camera without a stable connection may still record locally only if its design supports that function.
Can I use a smart camera without a subscription?
That depends on the model. Some cameras offer local recording or basic live viewing without a paid plan; other features, such as cloud storage, longer clip history, or advanced alerts, may require a subscription. Check the feature and retention terms before buying or relying on a camera.
Where should I place an outdoor security camera?
Choose a position with a clear view of the approach or entrance you need to monitor, reliable Wi-Fi, and a suitable power source. Follow the camera’s mounting and weather-resistance instructions, avoid glare and obstructions, and do not aim it into private areas or neighbors’ windows.
How can I reduce false motion alerts?
Limit the activity zone to the area that matters, exclude roads or moving foliage, and reduce sensitivity in small steps. If the camera offers person or vehicle detection, test those settings and confirm that important movement still triggers an alert.
How often should I test my cameras?
Test alerts, live viewing, and playback after installation and whenever you change network, storage, or notification settings. Check status and recordings periodically, and test again after a router change, camera relocation, or firmware update.