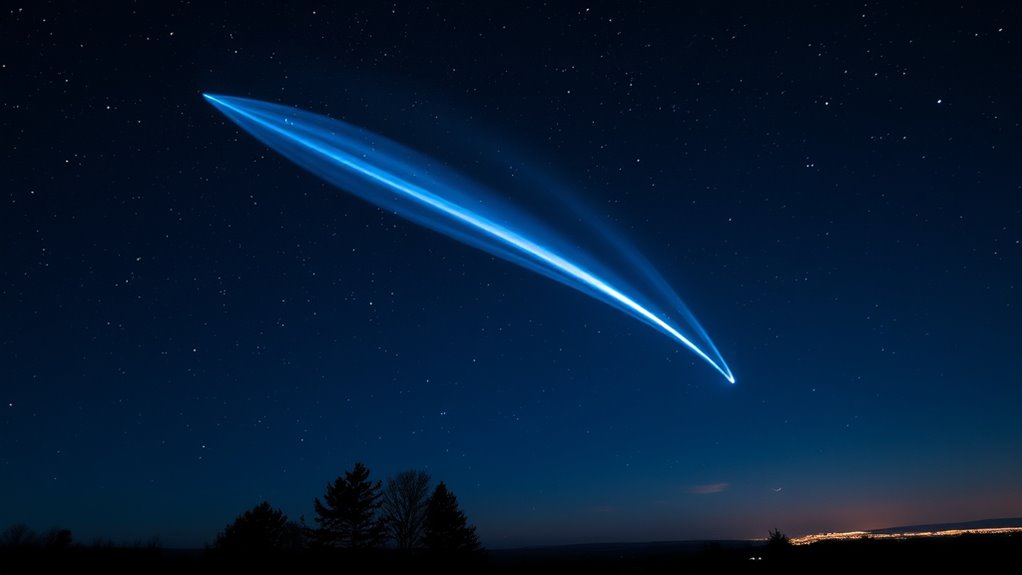

To photograph a comet with a kit lens, set your camera to manual mode and use a wide aperture like f/3.5 or f/5.6 to gather as much light as possible. Use a shutter speed between 15 to 30 seconds and aim for an ISO around 800-1600 to balance brightness and noise. Focus manually on a bright star or distant light, and keep your camera steady with a tripod. Adjust settings as needed to capture the comet’s tail and surrounding stars—there’s more to perfect your shot ahead.
Key Takeaways
- Use a wide-angle kit lens with the widest aperture (f/3.5 or f/5.6) for maximum light capture.
- Set your camera to manual mode, ISO 800-1600, and exposure times between 15-30 seconds.
- Manually focus on a bright star or distant light using live view for sharpness.
- Keep your camera steady with a tripod, and use a remote shutter or timer to prevent vibrations.
- Capture multiple images at different settings and stack or process them for enhanced comet detail.

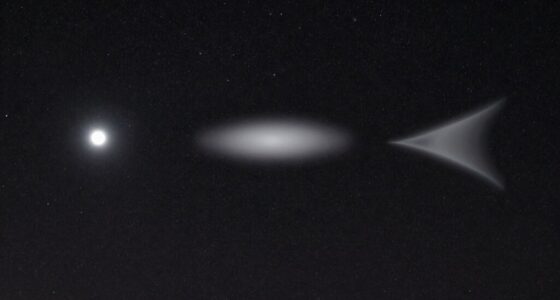
Capturing a comet with just a kit lens is entirely possible, even for amateur photographers. The key lies in understanding how to leverage your gear and the right techniques to capture the fleeting beauty of a celestial visitor. Since a kit lens typically has a fixed focal length and variable aperture, your main focus should be on mastering long exposure techniques and selecting the best lens settings. While a dedicated astrophotography lens can offer better results, your standard kit lens can still produce stunning images if used correctly.
Start by choosing the right lens and camera settings. Most kit lenses are versatile enough for night sky shots, but you’ll want to use the widest aperture available—often f/3.5 or f/5.6—to gather the maximum amount of light. This is essential because comets are faint objects, and a wider aperture allows more light to hit your camera’s sensor. When it comes to lens selection, your kit lens is usually a prime or zoom with a decent wide-angle view, which is ideal for capturing the vastness of the night sky and the comet’s tail. Keep in mind that a longer focal length can help zoom in on the comet, but it also demands steadier hand or tripod stability.
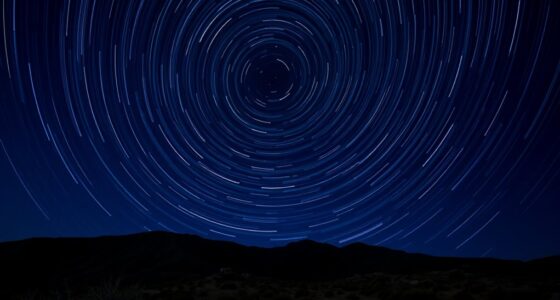
Long exposure techniques are your best friends here. To get the most detail, you’ll want to set your camera to manual mode and experiment with exposure times between 15 and 30 seconds. Longer exposures will let in more light, revealing the comet’s tail and surrounding stars, but be cautious—exposures that are too long can cause star trails due to the Earth’s rotation. To mitigate this, use the “tracking” feature if your camera or mount supports it, or keep exposures shorter and stack multiple shots later. Remember to set your ISO as low as possible, around 800 or 1600, to avoid excessive noise while still capturing enough light. Use a remote shutter release or your camera’s timer to prevent vibrations during the shot.
Focusing is critical. Autofocus often struggles in low light, so switch to manual focus and dial in focus on a bright star or distant light source before capturing the shot. Zoom in on your live view if possible, to fine-tune focus for sharpness. Once everything’s set—aperture wide open, ISO balanced, focus locked, and your exposure time decided—take several shots to increase your chances of catching the comet at its best. Later, you can stack these images or adjust them in post-processing to bring out more detail.
With patience and practice, you’ll find that your kit lens, paired with proper long exposure techniques, can produce enthralling images of a comet streaking across the night sky.
MIAO LAB 11 in 1 Phone Camera Lens Kit – Wide Angle Lens & Macro Lens+Fisheye Lens/ND32/kaleidoscope/CPL/Color Lens Compatible with iPhone Samsung Sony and Most of Smartphone
📷【11 IN 1 DETACHABLE LENS】:This perfect phone camera lens kit including ND32 filter,kaleidoscope lens,CPL filter,star filter,Fisheye Lens four…
As an affiliate, we earn on qualifying purchases.
As an affiliate, we earn on qualifying purchases.
Frequently Asked Questions
What Is the Best Time of Night to Photograph a Comet?
You should photograph a comet during the darkest part of the night, ideally after moonset when light pollution is minimal. Avoid nights with a full moon, as its brightness washes out the comet’s details. Check moon phases and aim for a new moon or a thin crescent, ensuring the sky is as dark as possible. This will give you the best chance to capture the comet’s tail and intricate features clearly.
How Do Weather Conditions Affect Comet Photography?
Imagine you’re in a time machine heading to a clearer era. Weather conditions heavily influence your comet photography. Poor sky clarity, due to clouds or haze, blocks your view and causes atmospheric interference, reducing image quality. Clear, dry nights with minimal humidity give you the best chance. Wind can also shake your camera, so choose a calm night. Keep an eye on weather forecasts to optimize your chances of capturing that perfect comet shot.
Can I Use a Smartphone Instead of a Camera With a Kit Lens?
You can use a smartphone instead of a camera with a kit lens, but keep in mind smartphone limitations like smaller sensors and limited manual controls. To get the best shot, use an app with camera controls to manually adjust exposure, ISO, and focus. Use a sturdy tripod and tap into long exposure modes to capture more light. While it’s possible, a dedicated camera usually offers better quality for comet photography.
What Settings Should I Use for Long Exposure Shots?
Your camera can capture the night sky’s magic! For long exposure shots, start with an aperture setting around f/3.5 to let in plenty of light. Keep ISO adjustments moderate, like 800 or 1600, to prevent graininess. Use a tripod and set a timer or remote shutter to avoid shake. Experiment with exposure times from 15 to 30 seconds—this helps reveal the comet’s shimmering beauty without overexposing the image.
How Can I Stabilize My Camera During Long Exposures?
To stabilize your camera during long exposures, prioritize tripod stability by ensuring it’s on a flat surface and securely set up. Use a sturdy tripod and consider weighting it down for extra steadiness. If you don’t have a tripod, master handheld techniques like bracing your elbows against your body or a stable surface. These methods help minimize shake and produce clearer, sharper images of the comet.

Mastering Long Exposure: The Definitive Guide for Photographers
As an affiliate, we earn on qualifying purchases.
As an affiliate, we earn on qualifying purchases.
Conclusion
Capturing a comet with your kit lens is like catching a fleeting whisper from the cosmos—fragile yet unforgettable. With patience, the right settings, and a steady hand, you can turn your camera into a time machine, freezing this cosmic traveler in its majestic journey across the night sky. Remember, even with simple gear, you hold the power to reveal the universe’s secrets—so go ahead, chase that celestial wonder, and make it yours to keep forever.

Kiwifotos RS-60E3 Remote Switch Shutter Release Cord for Canon EOS Rebel T6 T7 T5 EOS R50V R6 Mark III II R6 R7 R8 R10 R100 RP T8i T7i T6s T6i T5i T4i SL3 SL2 90D 80D 70D 77D M5 M6 Mark II SX70 & More
Control autofocus and shutter triggering, Capture images without shaking camera
As an affiliate, we earn on qualifying purchases.
As an affiliate, we earn on qualifying purchases.

Astrophotography Made Simple for Beginners: A Clear Step-by-Step Guide to Capturing the Night Sky, Milky Way, and Stunning Star Photos Using Any Camera or Smartphone
As an affiliate, we earn on qualifying purchases.
As an affiliate, we earn on qualifying purchases.