To instantly sharpen your star tracker shots, use a quick polar alignment shortcut with your smartphone. Start by roughly aligning your mount with the North Celestial Pole using a compass app, then fine-tune by observing star movements or Polaris’s position. Confirm your compass is calibrated, and keep your device steady away from magnetic interference. This simple method saves time and improves sharpness. Keep going to discover more tips that make your astrophotos even clearer.
Key Takeaways
- Use a smartphone with sky mapping apps to quickly identify and align with the North Celestial Pole.
- Employ a rough polar alignment followed by real-time star movement adjustments for faster results.
- Calibrate your smartphone compass to improve accuracy in locating Polaris or the celestial pole.
- Minimize light pollution and magnetic interference to enhance sensor precision during quick alignment.
- Regularly verify and fine-tune alignment with visual star cues for sharper, more precise astrophotos.
Why Precise Polar Alignment Matters for Astrophotography
Precise polar alignment is essential for astrophotography because it guarantees your telescope accurately tracks celestial objects as they move across the sky. When you master celestial navigation, you’ll understand how to position your mount relative to Earth’s axis, ensuring smooth tracking. Proper telescope calibration is vital to eliminate errors that cause star trails or blurry images. Without accurate alignment, your camera won’t follow stars precisely, wasting time and reducing image quality. Achieving precise polar alignment helps you capture sharp, detailed astrophotos with minimal post-processing. It’s the foundation for successful long-exposure imaging, allowing your equipment to compensate for Earth’s rotation. In short, investing effort into accurate polar alignment greatly improves your astrophotography results. Additionally, exploring new frontiers in digital content can enhance your understanding of innovative techniques and tools in astrophotography.
Traditional Steps for Accurate Polar Alignment

To achieve accurate polar alignment, you typically follow a series of well-established steps that have guided astronomers for decades. First, set up your mount on a stable surface to guarantee equipment stability. Next, perform detailed calibration of your polar scope or reticle, adjusting for any misalignments. Then, align your mount’s polar axis with the North Celestial Pole, using the reticle or polar finder. Keep your equipment steady throughout this process to prevent errors. Remember that Milky Way shooting often requires precise alignment to capture stunning images. Use the following table to understand key points:
| Step | Focus Area | Importance |
|---|---|---|
| Mount setup | Equipment stability | Prevents movement errors |
| Calibration | Accurate readings | Ensures precise alignment |
| Polar axis alignment | Targeting celestial pole | Core to accuracy |
| Final check | Equipment stability | Maintains alignment |
Discover the Easy Shortcut to Polar Alignment

Ever wonder if there’s a faster way to align your telescope’s polar axis? The truth is, many polar alignment myths suggest you need complex procedures or perfect equipment calibration. But that’s not always true. There’s an easy shortcut that saves time and still delivers sharp star tracker shots:
- Use a rough polar alignment method first, then fine-tune by observing star movement.
- Skip unnecessary equipment calibration steps that don’t substantiallyimprove accuracy.
- Focus on visual cues, like Polaris’ position, instead of relying solely on elaborate tools.
This approach simplifies the process and clears up common misconceptions. You don’t need perfect equipment or hours of setup. With this shortcut, you can quickly align your mount, avoid polar alignment myths, and get better astrophotography results faster.
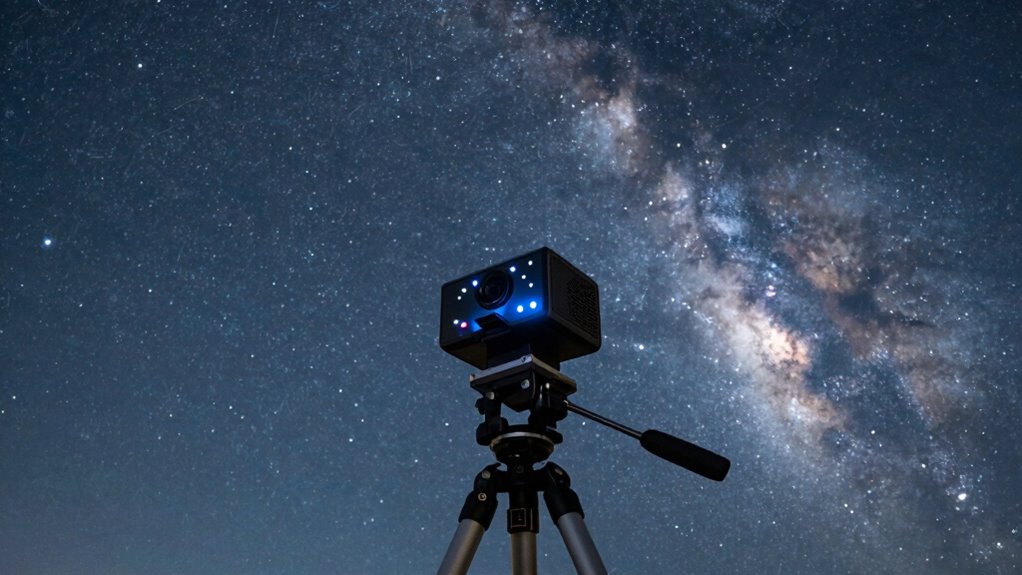
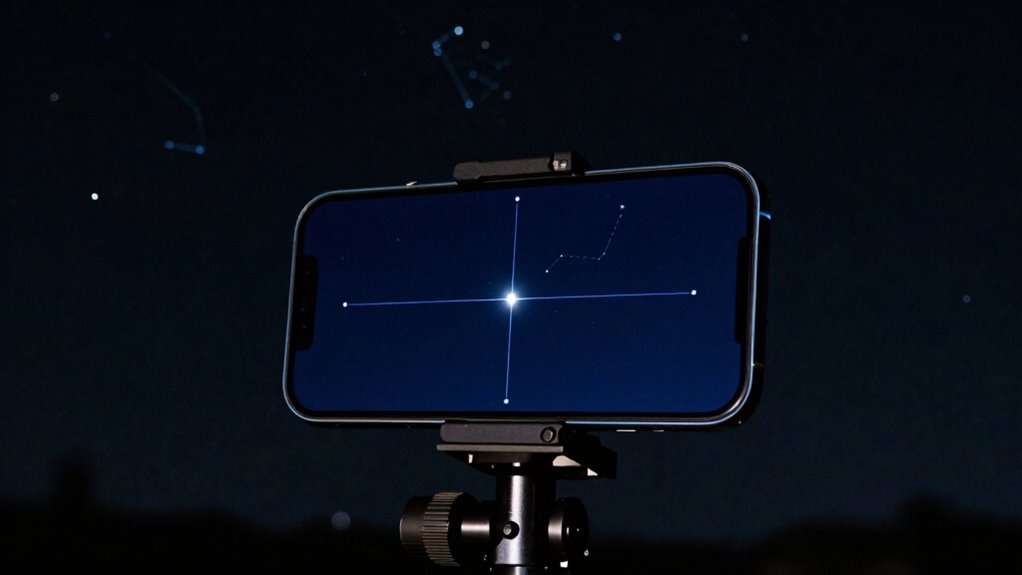
Use Your Smartphone to Quickly Align Your Star Tracker
Sure! Here’s your modified content with the requested addition:
—
Have you considered how your smartphone can simplify the star tracker alignment process? Modern apps use sky mapping to identify constellations and stars quickly, guiding you to precise alignment points. By pointing your phone at the night sky, you can verify your star tracker’s position and make quick adjustments. Additionally, some apps assist with lens calibration, ensuring your camera’s view aligns perfectly with the star tracker’s tracking system. This reduces setup time and increases accuracy, especially in unfamiliar skies. Using essential safety tips for handling your equipment can further enhance your overall experience. Furthermore, achieving optimal color accuracy in your images can significantly improve the overall quality of your astrophotography. Simply use your phone’s camera and sky mapping features to cross-check star positions, making alignment straightforward. A well-organized workspace can lead to stronger daily routines that enhance your focus and efficiency. With this method, you can achieve a sharp, well-aligned star tracker setup faster, resulting in clearer astrophotography shots. Furthermore, utilizing electric power generation through bike generators can enhance your outdoor setup by providing renewable energy to charge your devices. Remember to practice regular gear maintenance for your star tracker to ensure it performs optimally.
—
Let me know if you need any further changes!
Top Tips for Fast and Accurate Smartphone Polar Alignment

To get quick and precise polar alignment using your smartphone, start with clear night skies free of light pollution. Next, align your device with the magnetic pole to guarantee accuracy, then use your compass to fine-tune your positioning. Additionally, consider using a reliable world clock tool to ensure you’re tracking celestial events at the correct times. Incorporating techniques from sustainable textile technologies can also enhance your overall tracking experience, as they often promote lightweight and durable materials for equipment. Moreover, maintaining optimal water system efficiency in your tracking setup can prevent disruptions caused by equipment overheating. Creating a cozy environment with comfortable seating can help you stay focused during longer tracking sessions. Furthermore, having a comfortable seating area can encourage social interactions while you wait for the perfect shot. These simple tips can considerably speed up the process and improve your tracking results.
Use Clear Night Skies
Why is a clear night sky essential for quick and accurate smartphone polar alignment? It allows you to see the stars clearly, making celestial navigation and star chart reading much easier. Without cloud cover or light pollution, you can identify key stars and constellations faster, streamlining the alignment process. A clear sky helps you verify your position and orientation more precisely, reducing guesswork.
To maximize your chances:
- Choose nights with minimal moonlight and cloud cover
- Find a location far from city lights for better visibility
- Use star charts or apps to identify prominent stars effortlessly
With a clear night sky, you’ll improve your star tracker shots instantly, ensuring your polar alignment is accurate and your images sharp.
Align With Magnetic Pole
Did you know that aligning your smartphone with the Earth’s magnetic pole can remarkably speed up your pole alignment process? By using your device’s compass, you can quickly identify the magnetic pole’s position relative to your location. Keep in mind that magnetic declination—the angle between magnetic north and true north—varies by location, so adjusting for it improves accuracy. Start by pointing your phone’s compass toward magnetic north, then make small adjustments to account for declination, ensuring your smartphone’s orientation aligns with the Earth’s magnetic field. This method gives you a reliable reference for initial polar alignment, saving time compared to traditional methods. Properly aligning with the magnetic pole helps you achieve better star tracker shots, especially when time is limited. Additionally, understanding the battery capacity of your devices ensures you have enough power to keep your equipment running during your stargazing sessions. Using this technique can also enhance your overall experience, as proper alignment contributes significantly to capturing clearer images of celestial bodies.
Utilize Smartphone Compass
Using your smartphone’s compass is one of the quickest ways to achieve accurate polar alignment. It simplifies celestial navigation, helping you pinpoint the North Celestial Pole with ease. Before starting, make sure your smartphone is properly calibrated—open your compass app and follow prompts to fix any inaccuracies. To maximize accuracy:
- Use a dedicated compass app that offers declination adjustments
- Keep your phone steady and away from magnetic interference
- Cross-check with star charts for confirmation
This approach makes aligning your star tracker faster and more precise, saving you time in the field. Remember, a well-calibrated smartphone provides reliable readings, so regularly update your calibration and verify your compass’s accuracy before each session.
Troubleshoot Common Smartphone Polar Alignment Issues
When troubleshooting common smartphone polar alignment issues, the first step is to verify that your device’s sensors are functioning correctly. Make certain your compass and accelerometer are calibrated properly, as inaccurate readings can throw off alignment. Check for excessive sky glow, which can interfere with sensor signals, especially in urban areas. If you notice persistent issues, review your equipment setup—make sure your phone is securely mounted and level, as instability affects accuracy. Regularly maintaining your setup, similar to how proper use of ceiling fans enhances airflow, can help improve your overall results. Additionally, ensuring that your cabling solutions are properly routed can prevent interference that may affect sensor performance. Clear away any obstructions or light pollution that could distort sensor data. Sometimes, restarting your device or updating the app helps resolve sensor glitches. Confirm that your environment is free from magnetic interference, which can skew compass readings. Ensuring you have a solid understanding of grocery savings strategies can also enhance your focus and effectiveness in resolving these technical challenges. Additionally, immersive soundscapes in your recording environment can help you better gauge the quality of your setup. Starting your week with calm confidence can also enhance your focus and effectiveness in resolving these technical challenges.
Final Tips to Capture Crisp, Clear Night Sky Images

Achieving sharp, clear images of the night sky requires more than just proper polar alignment; it also depends on ideal camera settings and stable setup. To enhance your shots, focus on precise celestial navigation techniques to locate your target and verify your telescope calibration is spot-on for accurate tracking. Use a low ISO to reduce noise, a wide aperture for more light, and a slow shutter speed suited to your subject. Keep your camera steady with a sturdy tripod or mount, and consider using a remote shutter release to eliminate vibrations. Additionally, check your focus carefully, use appropriate filters for light pollution, and review your images frequently to make adjustments. These final tips help you capture crisp, breathtaking night sky images with confidence.
Frequently Asked Questions
Can This Shortcut Work With All Types of Star Trackers?
This shortcut works with most star trackers, but equipment compatibility varies. You need to check if your device supports the required calibration features for the shortcut to function properly. Some trackers may need specific firmware updates or additional accessories. Always review your star tracker’s specifications and calibration requirements beforehand. If compatible, you’ll find the shortcut quickens your alignment process, ensuring sharper shots without extensive adjustments.
Does Weather Affect the Accuracy of the Shortcut Method?
Weather conditions can definitely impact the accuracy of the shortcut method. Wind, clouds, and humidity create calibration challenges by causing vibrations or obscuring your view of stars, making precise alignment harder. Clear, stable weather helps guarantee your star tracker stays accurately calibrated. If weather is poor, you might need extra calibration steps or wait for better conditions to achieve the sharpest, most reliable shots.
Is Special Software Required for the Smartphone Alignment Technique?
No, special software isn’t strictly required for the smartphone alignment technique, but it can enhance your experience. You just need compatible apps that work with your device’s operating system, making app installation straightforward. Many apps offer features like guiding you through the alignment process or providing real-time feedback. Confirm your smartphone’s software compatibility with the app before installing, so you can easily achieve precise polar alignment without extra tools.
How Much Time Does the Shortcut Save Compared to Traditional Methods?
You save significant time with this shortcut compared to traditional methods, often reducing alignment time from 20-30 minutes to just a few minutes. This boost in time efficiency doesn’t compromise alignment accuracy; it still delivers precise star tracker shots. You’ll find it’s ideal when quick setup is essential, giving you sharper images without the hassle of lengthy calibration procedures.
Can This Shortcut Be Used for Daytime Astronomical Observations?
Think of your star tracker as a telescope that can see the sun during daytime. Yes, this shortcut can be used for solar observations and daytime visibility, making it easier to align your equipment without waiting for night. Like a lighthouse guiding ships safely at dawn, it helps you quickly sharpen your shots during daylight, so you can capture solar details or monitor celestial movements without needing nighttime conditions.
Conclusion
Mastering this polar alignment shortcut transforms your astrophotography. By using your smartphone for quick, precise alignment, you eliminate much of the guesswork and long setup times. Think of it like tuning a musical instrument—small adjustments lead to stunning, sharp star images. With practice, you’ll capture crisp, clear night sky shots effortlessly. Embrace this method, and watch your astrophotography skills soar, making every shot a masterpiece of cosmic clarity.