Using a DIY Lambertian sensor allows you to accurately measure light distribution throughout your grow room. By placing the sensor at different spots, you can identify uneven coverage, hotspots, or shadows affecting your plants. Proper calibration guarantees reliable data, helping you make informed adjustments to fixture positions and add supplemental lighting if needed. This approach helps create a balanced, efficient lighting setup. Keep exploring to discover how to optimize your grow environment even further.
Key Takeaways
- Build a DIY Lambertian sensor to accurately measure light from all angles in your grow room.
- Calibrate the sensor against a known light source for precise and reliable readings.
- Measure light intensity at multiple locations to identify hotspots and shadow zones.
- Use the collected data to adjust fixture positioning for even light distribution.
- Continuously monitor with the sensor system to optimize and maintain uniform lighting conditions.
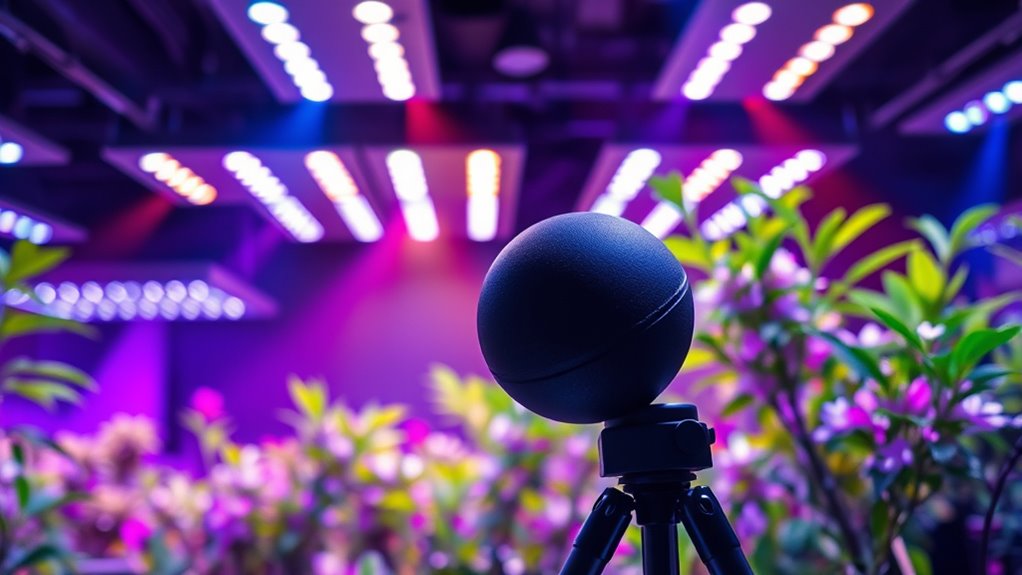
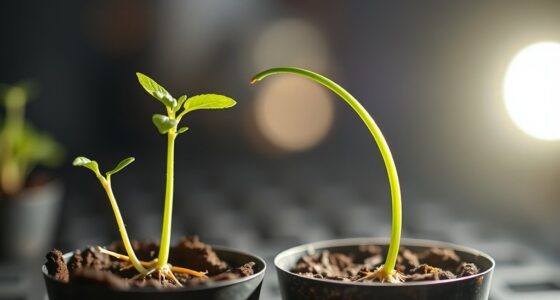
Ever wondered how to guarantee your grow room receives the perfect amount of light? Achieving optimal light distribution isn’t just about installing the right fixtures; it’s about understanding how light spreads throughout your space. Light uniformity is essential because uneven lighting can lead to poor plant growth, uneven yields, or even stress your plants. To truly maximize your setup, you need to map out how light interacts with your grow environment. One effective way is by using a DIY Lambertian sensor, which helps you assess and improve light distribution with precision.
Ensure your grow room gets even, optimal light with a DIY Lambertian sensor for precise mapping and adjustments.
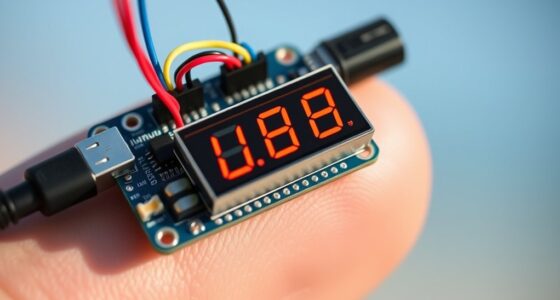
A Lambertian sensor mimics a perfect diffuse reflector, capturing light equally from all angles. This makes it ideal for mapping the light distribution in your grow room because it provides an accurate representation of how light actually reaches your plants. When setting up your sensor, focus on proper sensor calibration. Calibration ensures that your sensor readings are accurate and consistent across different areas of your grow space. Without calibration, you risk misinterpreting the data, which could lead to misguided adjustments that don’t actually improve light uniformity. Calibration involves comparing your sensor’s readings against a known light source or standard, then adjusting your sensor’s output accordingly. This step is critical because it guarantees your measurements are reliable, allowing you to make informed decisions about lighting adjustments.
Additionally, understanding the importance of a high contrast ratio in your lighting setup can help you better interpret your light mapping data, as it influences how well your plants can differentiate between light and dark areas. Once your sensor is calibrated, you can systematically map the light intensity across your grow room. Move the sensor to different locations and record the readings at each point. Pay close attention to areas where light intensity drops off or peaks, as these are signs of uneven distribution. By analyzing this data, you’ll identify hotspots and shadow zones that might be hindering your plants’ growth. With this insight, you can fine-tune your lighting setup—adjusting fixture angles, adding supplemental lights, or repositioning lamps to improve light uniformity. Over time, this process helps you establish a more balanced light environment, which is essential for healthy, vigorous plant development.
Incorporating a DIY Lambertian sensor into your grow room monitoring system empowers you with detailed, actionable information. It’s a cost-effective method to guarantee your setup delivers consistent, uniform light, which directly translates to healthier plants and better yields. Remember, sensor calibration is the backbone of accurate measurements, so take the time to calibrate properly. With a clear understanding of your room’s light distribution, you can maximize your grow environment with confidence, making sure every plant gets the light it needs to thrive.

PAR Meter for led Grow Lights High Precision Quantum Sensor Par Light Meter PPFD Tester for Measuring Plants Photosynthetic Activity in 400-700nm Par Meter Light Lux Tester
【HIGH PRECISION PPFD MESUREMENT】This Par Meter integrated with highly accurate Quantum Sensor Measuring for Photosynthetic Photon Flux Density...
As an affiliate, we earn on qualifying purchases.
Frequently Asked Questions
How Does the Lambertian Sensor Compare to Other Light Sensors?
When comparing the Lambertian sensor to other light sensors, you’ll find it offers decent sensor accuracy for diffuse light detection. However, calibration challenges can arise because it relies on a specific surface reflection model, making precise measurements tricky. Unlike photodiodes or quantum sensors, Lambertian sensors excel at measuring light distribution uniformly but might need frequent calibration to maintain accuracy, especially in changing grow-room conditions.
What Are Cost-Effective Alternatives for DIY Light Mapping?
For cost-effective alternatives, you can explore using photodiodes, light-dependent resistors (LDRs), or inexpensive phototransistors as DIY sensor options. These sensors are affordable and easy to implement for light mapping projects. While they might not offer the precision of specialized Lambertian sensors, they provide reliable data for basic grow-room light assessments. Combining multiple sensors can improve accuracy without markedly increasing costs.
Can This Method Be Used for Outdoor Grow-Rooms?
Yes, you can use this method for outdoor grow-rooms, but you’ll need to take into account outdoor conditions like weather and sunlight fluctuations. Make certain your DIY Lambertian sensor is durable enough to withstand rain, wind, and temperature changes. Proper waterproofing and sturdy materials are essential. While it’s feasible, adapting the setup for outdoor use requires extra care to maintain accuracy and sensor longevity under varying environmental factors.
How Often Should the Light Mapping Be Recalibrated?
Think of your sensor calibration like tuning a guitar—regularly needed to stay in harmony. You should recalibrate your sensor whenever environmental factors change considerably, like lighting, humidity, or temperature. Also, check it every few weeks to guarantee accuracy. Consistent calibration keeps your light mapping precise, helping your plants thrive. Don’t wait for issues—stay ahead by maintaining your sensor’s accuracy to adapt to your environment’s dynamics.
What Software Tools Are Recommended for Analyzing Light Data?
For analyzing light data, you should use software that excels in light data visualization, like MATLAB or Python with libraries such as Matplotlib or Pandas. These tools help you interpret sensor calibration techniques and identify patterns or inconsistencies in your light measurements. They also enable you to create clear visual representations, making it easier to optimize your grow-room lighting setup. Choose software that matches your skill level and data complexity.

VBR-100 Quantum PAR Meter 6000umol/(㎡s), RGB PAR Breakdown, PPFD Distribution Mapping, Bluetooth Free App, Sensor Name(VBR-100 Plus), No Spectrum Selection
Accurate PAR Test or Any Spectrum. Measure PAR (400–700nm) and PPFD accurately under various light sources. VBR-100 reads...
As an affiliate, we earn on qualifying purchases.
Conclusion
By exploring this DIY Lambertian sensor, you open the door to a more harmonious grow-room environment. With a little curiosity and effort, you can subtly fine-tune your lighting setup, revealing new levels of growth and vitality. Remember, sometimes the smallest adjustments can lead to the most rewarding results. Embrace the journey, and let your newfound understanding gently guide your plants toward their full potential—your garden’s secret to thriving quietly awaits.
URCERI MT-92H Light Meter with Split Sensor Lux/Foot Candles Meter 500ms Refresh Rates Range up to 200,000 Lux Switchable Backlight Temperature Measurer 14℉-140℉
High-Precision Light Measurement: Delivers accurate readings from 0-200,000 Lux with ±3% accuracy and resolution down to 0.1 Lux....
As an affiliate, we earn on qualifying purchases.

Dr.meter LX1330B Digital Illuminance Light Meter, 0-200,000 Measurement Range Lux Meter, Lighting Intensity Brightness Measurement for Indoor Outdoor, Light Meters for Plants
High Precision & Fast Response: This high-precision illuminance meter delivers lightning-fast readings 2 times per second, ensuring you...
As an affiliate, we earn on qualifying purchases.