
To get perfectly flat, shadow-free scans, choose a sturdy copy stand with adjustable height, tilt, and rotation for ergonomic comfort and stability. Secure your documents flat with weights or clips, and verify the surface is level using a bubble level. Position your camera directly above, parallel to the surface, and optimize diffuse lighting to minimize shadows and glare. Use polarizing filters and adjust angles to eliminate reflections. Keep your setup stable, clean, and well-calibrated for consistent, high-quality results—details that can make all the difference.
Key Takeaways
- Use an adjustable, sturdy copy stand with a level surface and secure joints for stability and precise positioning.
- Mount documents flat with clips, weights, or support frames to prevent curling and shifting during scanning.
- Position the camera directly above, parallel to the document, to avoid distortion and ensure sharp, even images.
- Employ diffuse, uniform lighting from multiple angles, and use polarizing filters to eliminate shadows and glare.
- Regularly calibrate equipment, check for stability, and fine-tune setup with test shots for optimal, shadow-free results.
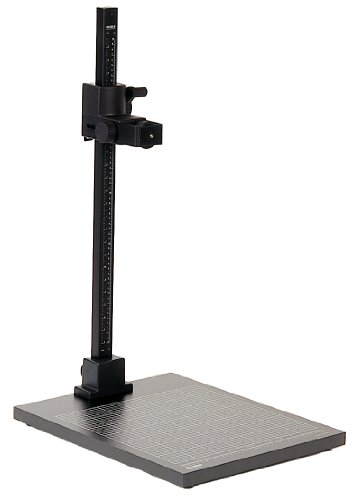
Kaiser 205411 Copy Stand RS 2-XA
Non-reflective matte gray base board with printed fine grid and inch/cm scale. Matte black anodized aluminum tubing column…
As an affiliate, we earn on qualifying purchases.
As an affiliate, we earn on qualifying purchases.
How to Choose the Best Copy Stand for Flat Scans

Choosing the right copy stand for flat scans can considerably improve your scanning quality and workflow. To do that, consider its historical context—earlier models prioritized basic functionality, but modern designs emphasize precision and ease of use. Ergonomic considerations are vital; look for stands that allow adjustable height, tilt, and rotation to reduce strain during extended use. A stand with a sturdy, lightweight frame offers stability without sacrificing portability. Make sure it has a flat, level surface to hold your documents securely. Door swings and other design elements can also affect how you position your copy stand for optimal results. Incorporating comfortable seating areas in your workspace can further enhance your productivity. Understanding the importance of digital concepts in your setup can help you make more informed decisions. Compatibility with different camera types and ease of setup are also essential. By understanding these factors, you’ll select a copy stand that not only suits your needs but also enhances accuracy and efficiency in your scanning process. Additionally, using essential DIY tools can further streamline your setup and improve overall results.

K&F CONCEPT 58mm Circular Polarizer Filter Ultra-Slim 18 Multi-Coated Optical Glass Circular Polarizing Filter for Camera Lenses with Cleaning Cloth (K Series)
Enhance Color & Contrast: CPL filter can enhance the color and contrast, and remove non-metallic reflections such as…
As an affiliate, we earn on qualifying purchases.
As an affiliate, we earn on qualifying purchases.
Set Up Your Copy Stand for Stability and Flatness

To guarantee clear, sharp scans, you need to properly secure your camera and documents using effective mounting techniques. Make sure the surface is level to prevent any unwanted tilt or distortion. Exploring flexible publishing platforms can also enhance the ways you present and share your scanned images. Additionally, ensuring your environment is free from storm anxiety triggers will help maintain focus and stability during the scanning process. Taking these steps will give you a stable, flat setup that produces professional results.
Secure Mounting Techniques
Ensuring your copy is securely mounted is essential for achieving sharp, flat images without unwanted movement. Use mounting adhesives carefully to keep delicate documents in place, avoiding shifts during scanning. Tensioning techniques, like stretching or clamping, help maintain flatness and prevent curling or warping. Properly tensioned setups reduce shadows caused by uneven surfaces. Here’s a quick guide:
| Technique | Equipment Needed | Benefits |
|---|---|---|
| Mounting adhesives | Acid-free glue or tape | Keeps pages flat and secure |
| Tensioning techniques | Clamps or weights | Prevents curling, ensures flatness |
| Surface tension | Precision alignment | Minimizes movement during scan |
| Support frames | Rigid backing | Stabilizes fragile or thick items |
Additionally, understanding proper email protocols can enhance communication when coordinating scanning tasks with team members.
Leveling the Surface
A level surface is vital for capturing sharp, distortion-free images, so take the time to carefully adjust your copy stand before you start scanning. Ensuring the surface is perfectly flat prevents skewed scans and shadows. When leveling, consider surface durability—choose materials that resist warping or damage over time. Material selection is essential; opt for stable, rigid materials like tempered glass or high-quality acrylic. Use a bubble level to confirm flatness and make fine adjustments with adjustable feet or shims. Keep in mind that an uneven surface can compromise image quality and require repeated rescanning. Proper leveling creates a solid foundation, leading to consistent, precise results and a professional finish. Prioritize stability and flatness to streamline your scanning process effectively. Additionally, ensuring high contrast ratios can greatly enhance the clarity of your scans.
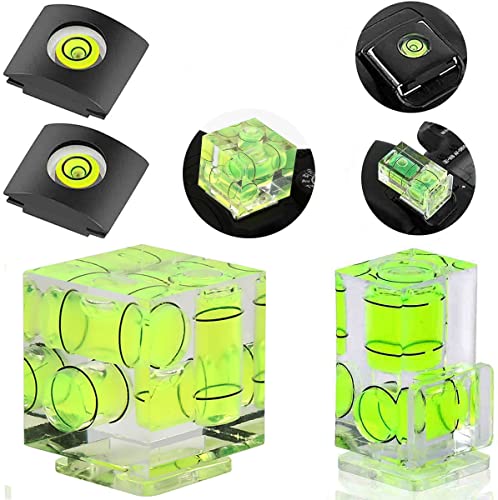
Camera Level Hot Shoe Level, Hot Shoe Bubble Level Camera Hot Shoe Cover 3 Axis 2 Axis 1Axis Bubble Spirit Level Compatible with Nikon, Olympus, Pentax Digital and Film Cameras-4 Packs
Standard Shoe Mount Type:1pcs of 3 axis spirit camera level, 1pcs of 2 axis spirit bubble level and…
As an affiliate, we earn on qualifying purchases.
As an affiliate, we earn on qualifying purchases.
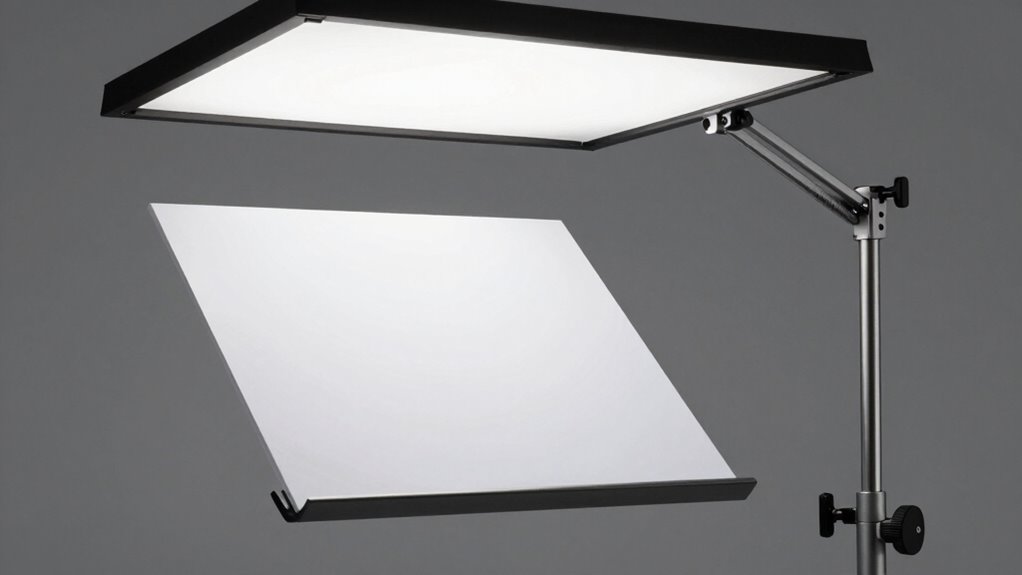
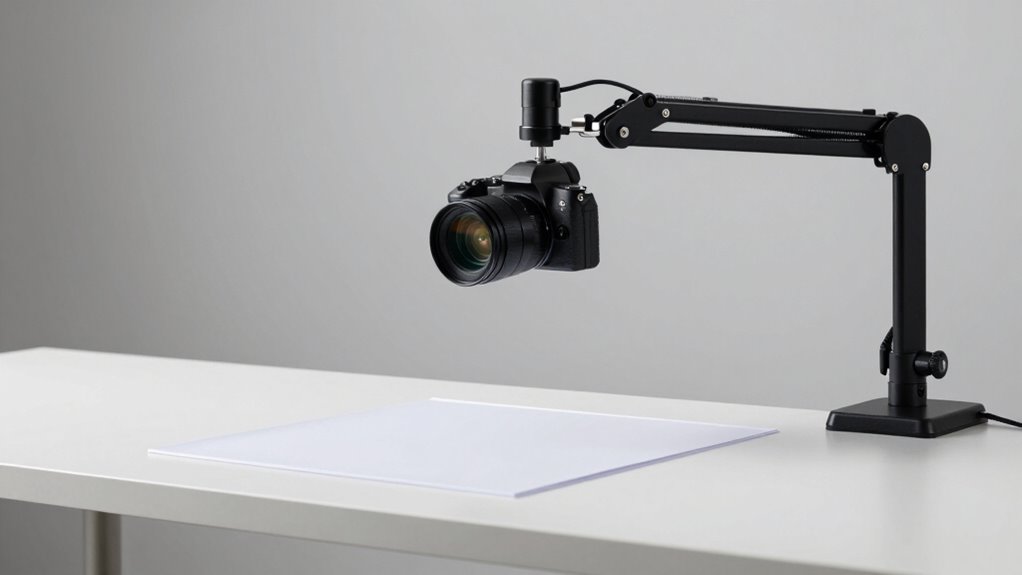
Position Your Camera and Lights for Even Illumination
Achieving even illumination begins with carefully positioning your camera and lights. Start by placing your camera directly above the object, ensuring the lens is parallel to the surface to prevent distortion. Use consistent, diffuse lighting on both sides to minimize shadows and hotspots, which helps maintain background contrast. Proper color calibration of your lights is essential to capture accurate colors and avoid color shifts that can affect your scan quality. Keep the background smooth and uniform in tone, enhancing contrast and making details stand out. Adjust your lights so the illumination is evenly spread across the surface, avoiding uneven patches. Regularly check your setup with test shots, tweaking light placement as needed to maintain consistent, shadow-free, and color-accurate scans.
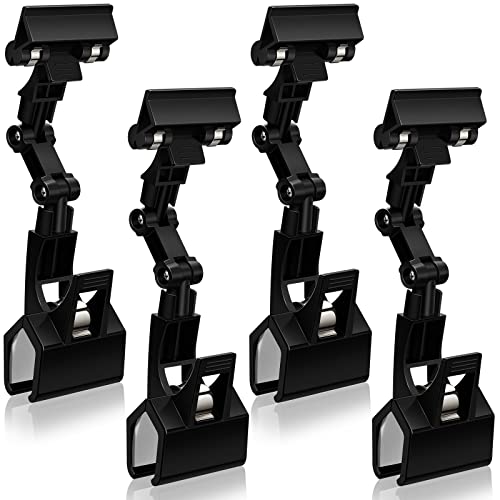
Pack of 4 Flexible Documents Holder Foldable Adjustable Copy Paper Holder Clip for Computer Monitor Handy Artist Supplies Rack Canvas Clamp Double Head Typing Painting Easel Accessory(Black)
Reliable Material Selection: these paper holders for typing are made of quality PP plastic materials, which are firm…
As an affiliate, we earn on qualifying purchases.
As an affiliate, we earn on qualifying purchases.
Adjust Lighting Angles to Avoid Shadows and Hotspots

Adjusting your lighting angles is vital for eliminating shadows and hotspots that can obscure details. Proper angles guarantee even illumination, which is essential for accurate color calibration and a clean background. To achieve this, experiment with different light positions relative to your document, avoiding direct, harsh angles that cast shadows. Use diffusers or reflectors to soften light and distribute it evenly. Consider the background selection carefully—choose a color that complements your document and minimizes reflections. Keep in mind that multiple light sources from different angles can help eliminate uneven lighting, shadows, and hotspots. Regularly check your setup through the camera view to fine-tune angles for the best results. This process guarantees a flat, well-lit scan free from distracting shadows or glare.
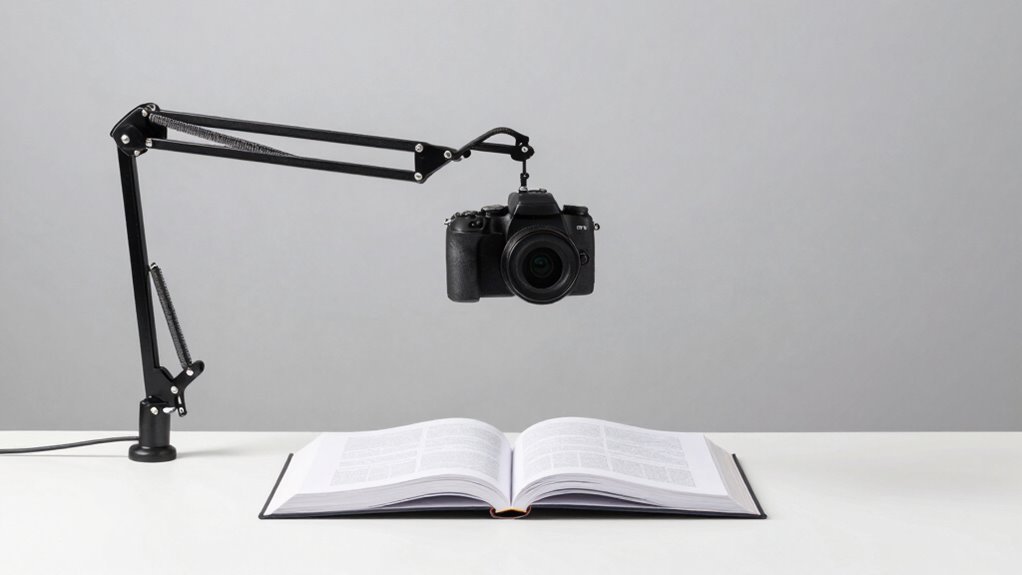
Make Sure Your Document Lies Flat and Smooth

Ensuring your document lies flat and smooth is essential for capturing clear, professional-quality scans. When your document is properly flattened, it reduces distortions and shadows, making it easier to read and preserve for the long term. A flat, smooth surface also helps maintain document preservation and archival quality by minimizing creases, wrinkles, and tears that can worsen over time. Use weights, a glass sheet, or a gentle press to flatten curled or folded pages before scanning. Additionally, be mindful of heat buildup when using any devices that may generate warmth, as this can impact both your documents and scanning equipment. Taking these steps ensures your scans are sharp, accurate, and suitable for digital archiving. Properly preparing your documents not only improves visual clarity but also extends their lifespan, maintaining their integrity for future reference. Additionally, using proper heating techniques can also help in flattening documents that may have been affected by humidity.
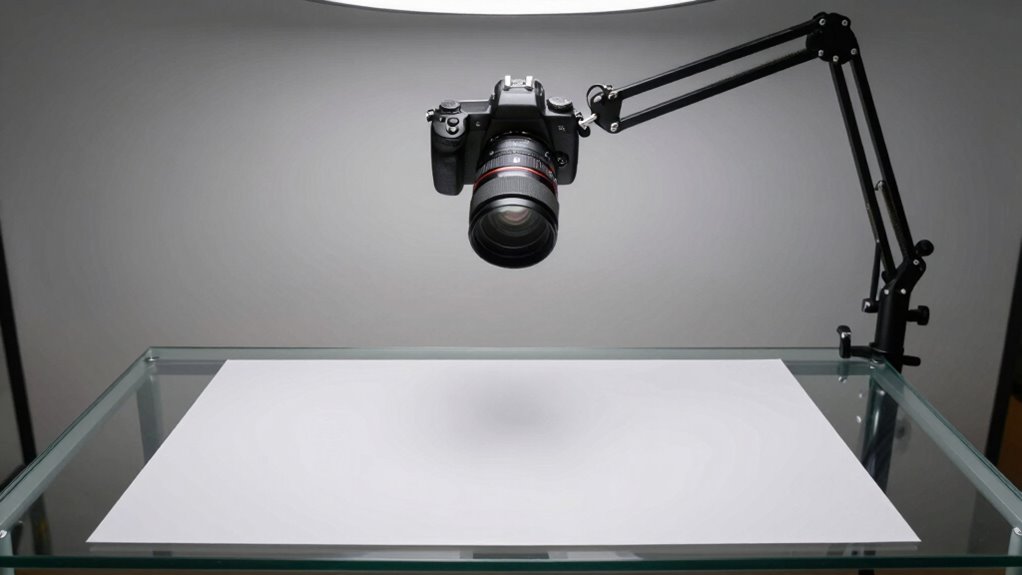
Eliminate Glare and Reflections in Your Scans
Glare and reflections can markedly compromise the quality of your scanned images, making text difficult to read and details hard to see. To eliminate these issues, consider adjusting your lighting setup to minimize direct reflections. Using diffused light sources helps reduce harsh glare, while polarizing filters can block reflective surfaces. Proper color calibration ensures your scans maintain accurate hues without unwanted shine. Additionally, background removal techniques can help eliminate reflective backgrounds, making your documents clearer. Keep these tips in mind:
- Use diffused, soft lighting to minimize glare
- Apply polarizing filters to reduce reflections
- Calibrate colors regularly for accuracy
- Remove reflective backgrounds with editing tools
Incorporating skin care principles can also enhance the overall presentation of your materials. This approach guarantees your scans are sharp, true-to-life, and free of distracting reflections. Additionally, using studio setups can provide a controlled environment that further enhances the quality of your scans.
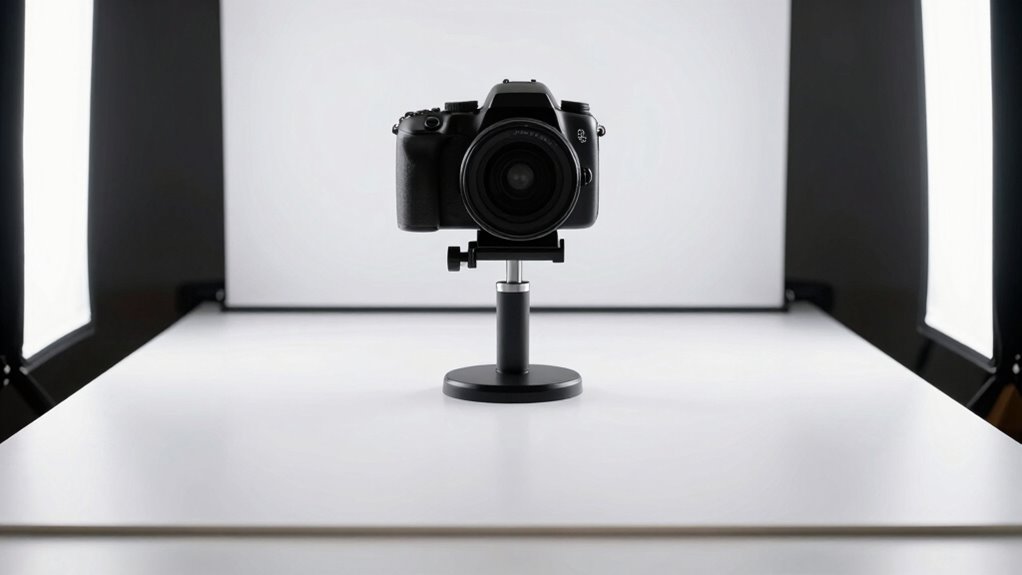
Tips for Consistent, High-Quality Copy Stand Setups
To guarantee consistent, high-quality scans, you need to focus on proper camera alignment, making sure it’s perfectly centered and level. Use reliable lighting techniques to avoid shadows and glare, keeping your setup uniform each time. Additionally, secure your equipment with stable mounting methods to prevent shifts that can compromise your results. Investing in premium items can elevate your setup, ensuring that you achieve the best possible output with every scan. Incorporating essential oils into your workspace can help create a calming atmosphere, enhancing your focus during the scanning process.
Proper Camera Alignment
Have you ever taken a photo with a copy stand and ended up with blurry or skewed images? Proper camera alignment is key to high-quality scans. To guarantee consistency, focus on maintaining correct camera angles and adjusting the focal length precisely. Misaligned cameras cause distortion and uneven focus, ruining your image quality.
Consider these tips:
- Use a tripod or stable mount to keep the camera steady
- Set a fixed focal length for all scans to maintain uniformity
- Align the camera lens perpendicular to the copy surface for minimal distortion
- Double-check camera angles before each shot to avoid skewed images
Consistent Lighting Techniques
Consistent lighting is essential for capturing clear, evenly exposed images on your copy stand. To achieve this, use uniform light sources that minimize shadows and hotspots. Position lights at the same angle and distance every time, ensuring consistent background contrast, which helps your scanner distinguish the document from the surroundings. Regularly perform color calibration on your lights to maintain accurate color reproduction across scans. Avoid mixing different types of bulbs or changing light positions, as this can cause variations in exposure and color. Keep light sources free of dust and dirt to prevent uneven illumination. By maintaining consistent lighting conditions, you’ll produce high-quality, repeatable scans with accurate colors and smooth, shadow-free backgrounds. Additionally, ensure your workspace is free of dust to enhance the overall quality of your scans.
Stable Mounting Methods
Ever wonder how to guarantee your copy stand stays steady and produces sharp, professional scans? Stable mounting methods are essential for consistent results. Focus on material selection; choose sturdy, vibration-resistant materials like metal or high-quality plastic to prevent wobbling. An ergonomic design ensures easy adjustments and reduces strain, maintaining stability during setup. To enhance stability, consider using weighted bases or anti-slip pads under the stand’s feet. Secure all joints tightly to avoid shifting, and regularly check for wear or looseness. Properly chosen materials combined with ergonomic design principles create a reliable, steady platform. This approach minimizes movement, resulting in perfectly flat, shadow-free scans with minimal effort and maximum consistency.
Troubleshoot Common Issues: Shadows, Glare, and Instability

When setting up your copy stand, you might encounter issues like shadows, glare, or instability that can affect the quality of your images. Shadows often result from uneven lighting or improper positioning, so adjust your light sources and use diffusers to soften shadows. Glare can be reduced by changing the angle of lights or adding polarizing filters, which also help with color calibration for accurate color reproduction. Additionally, using a remote car cover can protect your equipment from environmental factors that may cause glare or instability. Instability may cause blurry scans, so verify your equipment is secure and the stand is leveled. Regular equipment maintenance keeps everything functioning smoothly, preventing wobbling or misalignment. Addressing these issues early helps produce sharp, clear scans. Taking the time to troubleshoot ensures your setup remains reliable and your images are consistently high quality. Additionally, understanding the impact of regional flavors on your subject matter can enhance the overall presentation of your work.
Final Checks Before Scanning: Ensure Perfect Results
Before starting your scan, it’s essential to perform a quick series of final checks to guarantee everything is in ideal condition. Understanding the historical context of copying technology helps you appreciate the importance of precision. For creative applications, accuracy ensures your digital reproductions match the original’s detail and quality.
- Verify the copy stand is stable and level to prevent skewed results
- Check that the camera and lighting are properly aligned and secure
- Ensure the surface is clean, free of dust, smudges, or glare
- Confirm that your settings match the type of original, considering color and exposure adjustments
These steps help you achieve flawless, shadow-free scans, whether for archival preservation or creative projects. Proper preparation leads to consistent, professional results every time.
Frequently Asked Questions
How Do I Prevent Dust and Debris From Affecting Scan Quality?
To prevent dust and debris from affecting scan quality, you should regularly perform dust prevention measures like cleaning your workspace and handling materials with clean hands or gloves. Use compressed air or a soft brush to carefully remove debris from the scan surface and the object beforehand. Keeping your environment tidy, covering equipment when not in use, and working in a dust-free area also help guarantee your scans stay clear and sharp.
What Types of Cameras Are Best Suited for Flat Scans?
You should choose cameras with excellent stabilization to minimize motion blur during flat scans. Look for models with good lens compatibility, allowing you to use macro or macro-compatible lenses for detailed, sharp images. A camera with manual focus controls also helps in achieving precise focus on your document or photo. Mirrorless cameras or high-quality DSLRs typically provide the best stability and lens options for flat scans, ensuring clear, distortion-free results.
How Can I Improve Scan Results With Different Document Sizes?
To improve scan results across different document sizes, you need to master lighting angles and camera calibration. Adjust your lighting to minimize shadows and glare, especially for larger or irregularly shaped pages. Then, calibrate your camera to guarantee sharpness and accurate color rendition. These tweaks reveal hidden details and provide consistency. Stay attentive—small changes in angles or calibration can dramatically elevate your scans from good to perfect.
What Maintenance Is Required for Long-Term Copy Stand Use?
To guarantee long-term copy stand use, regularly check and perform lighting calibration to maintain consistent illumination and color accuracy. Keep the stand stabilized by tightening all joints and securing it on a flat surface to prevent shifting. Clean the rails and moving parts to avoid dust buildup, and inspect the cables and connections periodically. Proper maintenance helps you achieve sharp, shadow-free scans and prolongs your stand’s lifespan.
How Do I Optimize Settings for Scanning Fragile or Delicate Documents?
Like a vintage camera, you need to handle delicate documents with care. To optimize settings, start with gentle lighting adjustments to avoid damage and shadows. Use soft, diffuse light to prevent glare. Handle each document with clean, cotton gloves and support fragile edges to minimize stress. Adjust the scanner’s resolution carefully—high enough for detail but gentle on the paper. This approach guarantees clear scans without risking harm to your precious documents.
Conclusion
Think of your copy stand setup like tuning a fine instrument—every adjustment counts for perfect harmony. When you follow these steps, you’ll produce scans as flawless as a mirror’s reflection. I once struggled with shadows until I realized a simple tweak made all the difference, transforming my scans from blurry to brilliant. With patience and attention to detail, you’ll master the art of shadow-free, flat scans, turning your documents into pristine digital treasures.