
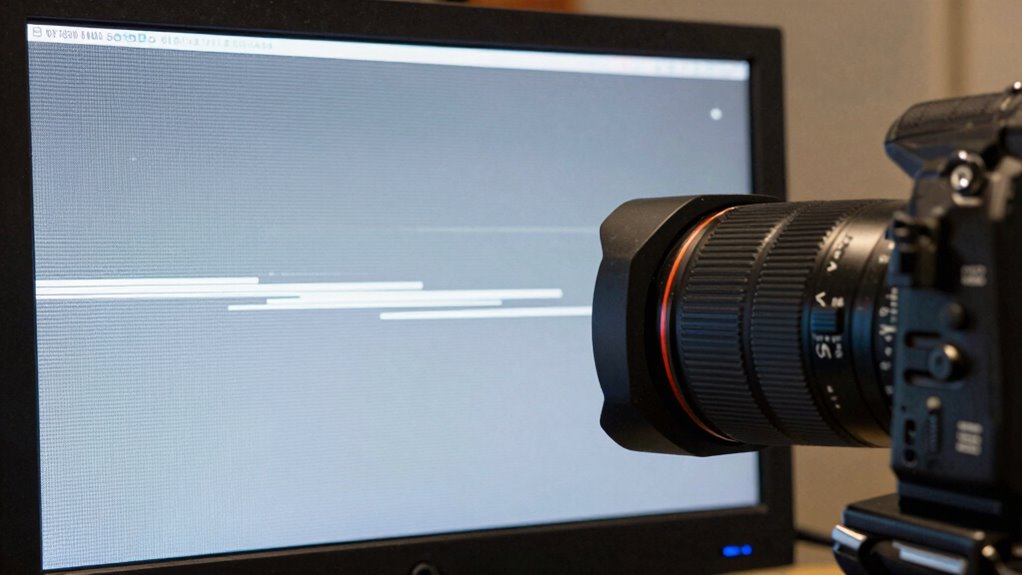
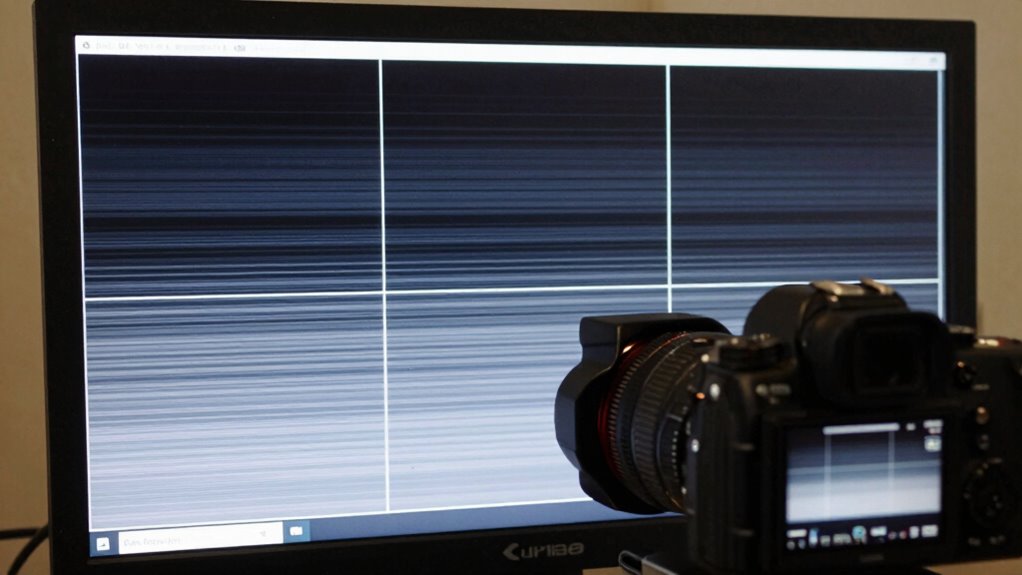
To spot PWM flicker before recording, test your lights with a camera or waveform monitor at different shutter speeds and angles. Look for inconsistent brightness, subtle color shifts, or flickering effects that aren’t visible to the naked eye. Use stable, flicker-free lights and verify your gear’s compatibility with your camera settings. If you keep going, you’ll discover practical tips to prevent flicker and guarantee smooth footage every time.
Key Takeaways
- Test lighting with slow shutter speeds or waveform monitors to observe brightness fluctuations before recording.
- Use light meters to detect inconsistent brightness or color shifts indicating PWM flicker.
- Verify camera shutter speed aligns with lighting frequency (50Hz or 60Hz) to prevent flicker issues.
- Choose flicker-free, high-quality lighting with stable drivers and proper dimmer compatibility.
- Conduct short test recordings from different angles and intensities to identify flicker presence early.

Yochoice 12Pack A19 LED Light Bulbs 100 Watt Equivalent 5000K Daylight White, No Flicker E26 Medium Screw Base Bulbs, 1100Lumens, Non Dimmable
Save your money – Up to 90% energy saving, less heat output and extremely long life (around 25000…
As an affiliate, we earn on qualifying purchases.
As an affiliate, we earn on qualifying purchases.
What Is PWM Flicker and How Does It Affect Your Video?
PWM flicker, or pulse-width modulation flicker, occurs when your camera or lighting system adjusts brightness by rapidly turning on and off. This technique, rooted in historical lighting methods, was once used to save energy and control light intensity. When modern LED lights employ PWM, they flicker at high frequencies, often invisible to the naked eye but problematic for cameras. This flicker can cause inconsistent exposure and shimmering effects in your footage. The flickering’s visibility depends on the light’s color temperature and the camera’s shutter speed. If you’re shooting under lights with adjustable color temperature, mismatched settings can exacerbate flicker issues. Understanding color accuracy is crucial to achieving optimal video quality and minimizing the impact of flicker. Exploring new frontiers in digital content and research can also reveal innovative solutions to mitigate these challenges. Additionally, recognizing the horsepower of electric dirt bikes can provide insights into how different lighting conditions affect camera performance. Recognizing these subtle flickers early helps prevent footage from appearing unstable or unprofessional, especially in scenes with mixed lighting sources. Additionally, water-cooled mattress pads can help maintain a stable filming environment by reducing heat and humidity levels that may influence lighting performance.

FEELWORLD F5 Prox 5.5 Inch 1600nit Field Camera Monitor with Touch 4K HDMI 3D LUT Waveform for DSLR Mirrorless Camera Help Filmmakers Photographer Outdoor Accurate Focus and Expose
Professional External Camera Monitor – Designed to replace your camera’s small built-in screen, the FEELWORLD F5 PROX 5.5…
As an affiliate, we earn on qualifying purchases.
As an affiliate, we earn on qualifying purchases.
How to Recognize Flicker in Your Footage
Recognizing flicker in your footage starts with paying close attention to how the video looks during recording and playback. Flicker often manifests as inconsistent lighting or fluctuating brightness, disrupting the overall lighting consistency. Look for subtle shifts in color temperature—colors may appear to change or shift unexpectedly—indicating flickering. Flicker can sometimes be more obvious in scenes with steady lighting conditions, where sudden brightness or color shifts stand out.
- Notice if parts of your footage alternate between brighter and darker areas.
- Watch for color shifts that seem inconsistent with your lighting setup.
- Observe if the lighting appears uneven or fluctuates intermittently.
- Pay attention to scenes with constant lighting, where flicker becomes more apparent.
- Check if the flicker intensifies during specific camera angles or movements. Additionally, consider how eco-friendly natural pools can influence lighting conditions in your outdoor filming environment.
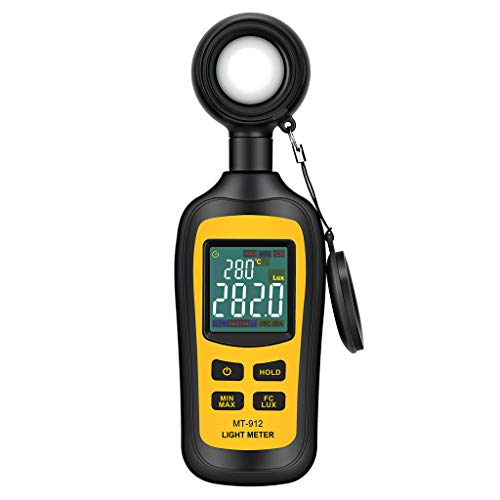
Light Meter Digital Illuminance Meter Handheld Ambient Temperature Measurer, Range up to 200,000 Lux, Luxmeter with 4 Digit Color LCD Screen
Measures luminosity from 0 to 200,000 Lux and ambient temperature
As an affiliate, we earn on qualifying purchases.
As an affiliate, we earn on qualifying purchases.
Why LED Lights Flicker and What Causes It?

LED flickering often happens because of the type of driver used, power supply fluctuations, or the dimming methods in place. If your lights use incompatible dimmers or unstable power, flicker becomes more likely. Understanding these causes helps you identify why your footage might be affected. Additionally, poor gear maintenance practices can also lead to inconsistencies in lighting performance. Maintaining supportive environments during filming can also help minimize issues related to flicker. Moreover, addressing heat buildup in your electrical systems can significantly enhance lighting stability, creating a more reliable production setup. Creating work-life harmony not only enhances your filming experience but also ensures a more stable production environment. Ensuring your lighting setup adheres to recommended practices for LED usage can further reduce flicker and improve overall quality.
LED Driver Types
Different types of LED drivers can considerably impact whether your lights flicker or stay steady. LED driver technology varies, and some are better at minimizing flicker than others. Certain drivers use switching power supplies that generate electrical noise, which can cause flickering. Others rely on constant-current drivers, providing stable output but still susceptible to poor design. Dimming-compatible drivers may flicker if not properly matched or if they emit PWM signals. Choosing the right driver is essential to avoid flicker issues.
- Constant-current vs. constant-voltage drivers
- Switching power supplies and electrical noise
- Dimmable drivers and PWM signals
- Quality and build of driver components
- Compatibility with dimmers and control systems
Power Supply Fluctuations
Power supply fluctuations are a common cause of flickering lights, often disrupting the steady illumination you expect from your LED fixtures. When voltage stability isn’t maintained, your lights can flicker or pulsate unexpectedly. Power surges, sudden increases in electrical current, can also cause flickering and even damage your LEDs over time. These fluctuations happen when the power grid experiences instability or when your electrical system isn’t properly regulated. Faulty wiring, overloaded circuits, or low-quality power supplies can exacerbate the problem, making flickering more frequent. To avoid these issues, guarantee your power supply provides consistent voltage and is protected against surges. Stable power sources help keep your LED lighting steady, preventing flickering and ensuring smooth footage.
Dimming Methods Used
Dimming methods play a significant role in causing LED flickering, especially when they aren’t compatible or properly implemented. Poorly designed dimming technology can lead to unstable light modulation, resulting in visible flicker. Some dimming techniques rapidly switch the LED on and off or adjust brightness through pulse-width modulation (PWM), which can cause flicker detectable by cameras. Non-uniform or incompatible dimmers often don’t coordinate well with LED drivers, creating inconsistent light output. To avoid flickering, look for dimming systems that use high-quality light modulation techniques.
- Pulse-width modulation (PWM) dimming
- Analog dimming
- 0-10V dimming
- DALI digital dimming
- Triac-based dimming
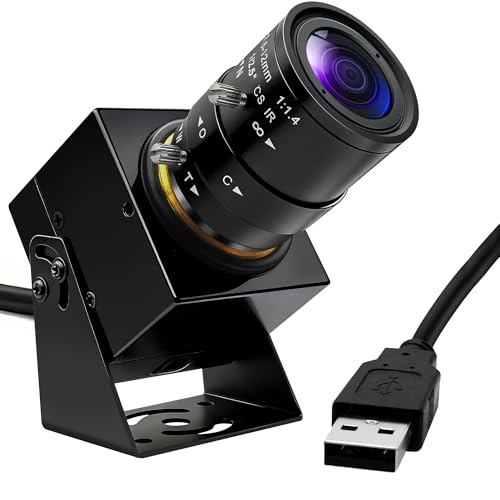
QILOVE Global Shutter USB Camera 1200P Manual Zoom Webcam HD 90fps High Speed USB Camera with 2.8-12mm Lens Plug & Play for Machine Vision/High-Speed Inspection/Motion Analysis
【Global Shutter, Eliminates Motion Blur】Utilizes Global Shutter technology where the entire sensor exposes simultaneously, completely eliminating shadow, smear,…
As an affiliate, we earn on qualifying purchases.
As an affiliate, we earn on qualifying purchases.
Testing Lights for Flicker Before Shooting

Before you start shooting, it’s crucial to test your lights for flicker, as even subtle fluctuations can ruin your footage. Check for lighting consistency by observing your lights over several seconds, ideally with a camera or smartphone set to a slow shutter speed. Look for any flickering or rapid shifts in brightness. Additionally, verify the color temperature remains stable; flickering often causes color shifts that can be distracting. Use a light meter or your camera’s waveform monitor to ensure consistent light output. If you notice flickering or color inconsistencies, consider adjusting the power source or switching to flicker-free lighting. Doing these quick tests helps guarantee your lighting remains steady and predictable, preventing unwanted flicker from ruining your shot. Additionally, remember that using essential DIY tools can enhance your overall setup and ensure a safer working environment. Understanding how to detect flicker is key to achieving professional-quality footage. The use of effective soundproofing techniques can also create a calm atmosphere that helps you focus better during your testing process.
Tips to Prevent PWM Flicker During Filming

To prevent PWM flicker during filming, you should start by checking your camera settings to verify compatibility with your lighting. Using proper lighting that minimizes flicker is also essential, so choose lights known for flicker-free operation. Always test your setup before recording to catch any issues early and make adjustments as needed. Additionally, investing in high-quality lighting equipment can significantly enhance your overall filming experience and reduce flicker-related issues. Consider exploring Gold IRAs as a potential investment strategy, as they can provide financial stability that allows for better production quality.
Check Camera Settings
Camera settings play a crucial role in preventing PWM flicker during filming. Start by adjusting your shutter speed to match your lighting source’s frequency, avoiding flicker-inducing settings. Check your camera’s ergonomics to guarantee easy access to relevant controls, so you can quickly tweak settings if needed. Confirm lens compatibility, as some lenses can contribute to flicker issues, especially older or incompatible models. Use manual mode to maintain consistent exposure and avoid auto adjustments that might cause flickering. Finally, ensure your camera’s frame rate aligns with lighting frequency, ideally 24 or 30 fps in regions with 50Hz or 60Hz power supplies.
- Match shutter speed to lighting frequency
- Optimize camera ergonomics for quick adjustments
- Verify lens compatibility with your camera
- Use manual exposure to prevent auto flicker shifts
- Align frame rate with power supply frequency
Use Proper Lighting
Choosing the right lighting setup can significantly reduce PWM flicker during filming. Start by selecting lights with a stable color temperature to prevent flickering caused by fluctuating hues. Consistent color temperature ensures your footage remains smooth and natural. Additionally, using light diffusion helps create a more even distribution of light, reducing harsh shadows and minimizing flicker. Diffused lighting also decreases the chances of encountering PWM-related issues, especially when filming under LED lights. Avoid direct, intense light sources that can amplify flickering. Instead, opt for soft, well-balanced illumination to maintain consistent brightness levels. Proper lighting not only enhances your footage’s visual quality but also plays a vital role in preventing PWM flicker, making your recordings clearer and more professional. Moreover, consider data storage solutions for securely archiving your footage, ensuring it remains accessible and safe from loss.
Test Before Recording
Before you start filming, it’s essential to test your setup to catch any flickering issues early. This step helps ensure your lighting placement and audio synchronization are solid, preventing PWM flicker from ruining your footage. To do this effectively, record a short test clip under your planned conditions, then review it closely for flickering signs. Check different lighting angles and intensities to identify potential PWM issues. Confirm your camera’s frame rate matches your lighting’s refresh rate. Use a waveform monitor if available. Make sure your audio stays synchronized throughout the test. Lastly, consider using flicker-free lighting or adjusting your camera settings before the actual shoot. This proactive testing saves time and guarantees smoother filming.
- Test lighting placement and angles
- Review footage for flickering signs
- Match frame rate with lighting refresh rate
- Check audio synchronization stability
- Use flicker-free lighting options
Choosing Flicker-Free Lighting for Your Videos

When selecting lighting for your videos, it’s essential to prioritize flicker-free options to guarantee smooth, professional-looking footage. Look for lights with adjustable color temperature, allowing you to match the lighting to your environment and avoid flickering caused by mismatched settings. Opt for fixtures that offer consistent output regardless of brightness adjustments. Light diffusion is also vital; it softens shadows and creates a more even illumination, reducing harsh spots that can highlight flicker. High-quality flicker-free lights typically use advanced driver technology or PWM-free designs, which eliminate flickering at all settings. By choosing lighting that emphasizes stable color temperature and effective light diffusion, you make certain your footage remains steady and visually appealing without flicker distractions. Additionally, understanding shipwreck preservation techniques can inspire innovative approaches to maintaining the longevity of your lighting setups in varied conditions. Implementing system monitoring tools can further help you track lighting performance and ensure optimal conditions during shoots. Furthermore, utilizing maintenance strategies can enhance the durability of your lighting equipment and extend its lifespan. For instance, adopting airless paint sprayers can streamline your project workflow, just as effective lighting can enhance your filming efficiency. The need for AI ethicist jobs emphasizes the importance of ethical considerations in technology, which can parallel the careful selection of lighting to avoid negative impacts on video quality.
How to Fix Flicker Issues in Post-Production

Even with flicker-free lighting, some footage may still show flickering due to camera settings or environmental factors. To fix flicker issues in post-production, you can use editing tools and techniques. Start by applying flicker reduction plugins or filters available in popular video editing software. Adjusting exposure and ISO during color grading strategies can help minimize flickering, especially in scenes with fluctuating light. Using historical film techniques like frame blending or motion interpolation can smooth out flickering artifacts. You can also manually correct flickering by isolating affected areas or frames. Always preview your edits carefully, as overcorrection may cause unnatural results. These methods help salvage footage and ensure your final video remains smooth and professional.
Frequently Asked Questions
Can PWM Flicker Be Completely Eliminated With Camera Settings?
PWM flicker can’t be completely eliminated through camera settings alone, but you can minimize it. By adjusting your camera’s sensor synchronization and choosing a shutter speed that avoids the flicker frequency, you reduce flicker visibility. Use flicker-free lighting, and test different settings to find the best match. Ultimately, understanding your lighting’s flicker frequency helps you optimize your camera setup for flicker-free footage.
Are Some Camera Brands More Prone to PWM Flicker Issues?
Yes, some camera brands are more prone to PWM flicker issues due to their camera compatibility and how they handle flicker frequency. Cameras with less advanced flicker mitigation tend to struggle more, especially when shooting under artificial lighting. To avoid problems, check your camera’s specifications for flicker reduction features and test it with your lighting setup. Being aware of the flicker frequency your camera can handle helps prevent unwanted flicker in your footage.
How Does Shutter Speed Influence Flicker Detection?
Shutter speed directly influences flicker detection because it interacts with the sensor behavior and PWM frequency. When you adjust exposure, setting a shutter speed that syncs with flicker frequency reduces flicker visibility. Faster shutter speeds often prevent flicker, but slower ones can cause it to become more noticeable. To avoid flicker, experiment with shutter speeds that minimize interference with PWM signals, ensuring smoother footage during recording.
Is It Possible to Shoot Flicker-Free With Smartphone Cameras?
You can shoot flicker-free with your smartphone camera by understanding lighting synchronization and avoiding lens flicker artifacts. Imagine your phone’s sensor harmonizing with flickering lights, like a dance partner matching every step. Use apps or camera settings that let you control shutter speed or frame rate. This helps you minimize flicker, creating smooth, stable footage. While challenging, careful adjustments make flicker-free videos possible even on smartphones.
What Are the Best Indicators of PWM Flicker in Real-Time?
You can spot PWM flicker in real-time by observing your sensor flicker and ambient lighting. If you notice flickering or flashing, especially under LED or fluorescent lights, it’s a sign of PWM. Use your camera’s preview to look for rapid changes, and keep an eye on areas with consistent lighting. Adjust your settings or change your environment if you detect PWM, ensuring flicker-free footage.
Conclusion
Knowing how to spot PWM flicker before you hit record is like having a secret map through a maze—you navigate smoother, avoid pitfalls, and craft clearer visuals. When you recognize flicker early, you’re steering your creative ship away from stormy waters. With the right lighting choices and testing, your footage will shine brighter than a lighthouse in the fog. Master this skill, and your videos will flow seamlessly, capturing the true essence of your story without distraction.