Field rotation happens because alt-az mounts don’t track Earth’s rotation during long exposures, causing stars to appear streaked or smeared across your images. Unlike equatorial mounts, which align with Earth’s axis to counteract rotation, alt-az mounts struggle to keep stars pinpoint sharp over time. If you want sharper, clearer astrophotos, understanding how to prevent or correct field rotation is key. Keep going to discover effective ways to improve your results and achieve stunning images.
Key Takeaways
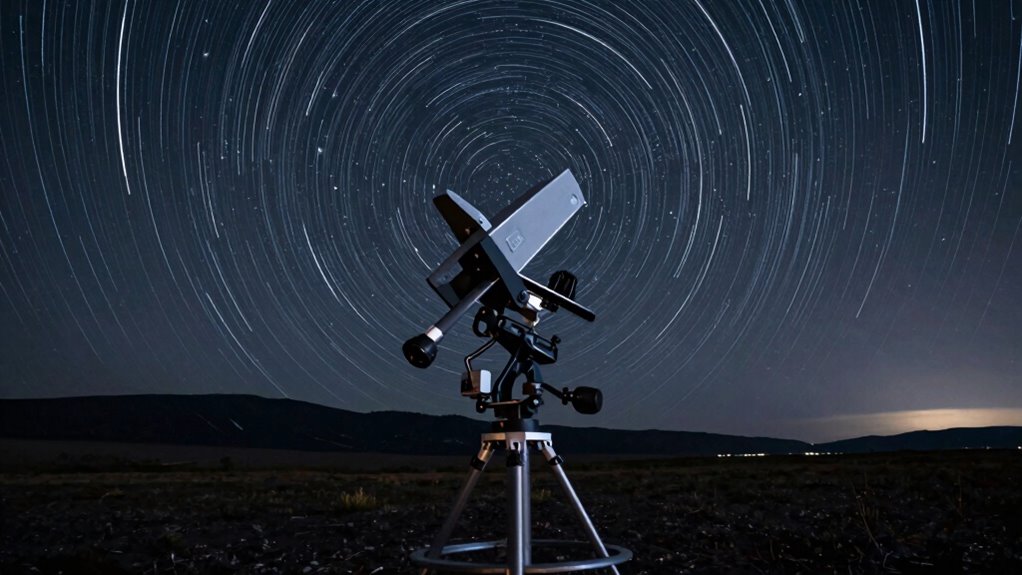
- Alt-Az mounts do not compensate for Earth’s rotation, causing star images to streak during long exposures.
- Field rotation occurs because Alt-Az mounts move objects via two perpendicular axes that don’t match celestial motion.
- Longer exposures on Alt-Az mounts result in star trails instead of pinpoint images, leading to smearing.
- Without tracking adjustments like field derotators, long exposures on Alt-Az mounts will show star elongation.
- Equatorial mounts are preferred for long exposures because they align with Earth’s rotational axis, preventing field rotation.

SVBONY SV225 Alt-Azimuth Mount, Adjustable Angle Alt-Azimuth Mount, Load-Bearing 10kg, CNC Hollow Structure, Telescope Altazimuth Fine Adjustment Shift, Telescope Accessories with Variable Speed Gear
CNC hollow structure; SV225 altazimuth mount adopts hollow structure; reduce the weight(2.34Kg); convenient for you to carry out;…
As an affiliate, we earn on qualifying purchases.
As an affiliate, we earn on qualifying purchases.
What Is Field Rotation and Why Does It Matter in Astrophotography?

Have you ever noticed how stars seem to drift across your images over time? That’s field rotation in action, and it can ruin long-exposure astrophotography. Field rotation occurs when your telescope’s mount doesn’t compensate for Earth’s rotation, causing stars to appear as streaks instead of points. Proper equipment calibration and star tracking are essential to prevent this. High refresh rates in your tracking system can enhance the accuracy of star following. Star tracking systems follow the stars’ apparent motion, keeping your target centered and sharp. Without precise calibration, even the best tracking can falter, leading to smearing and blurred images. Understanding what causes field rotation helps you choose the right mount and setup for your astrophotography goals. By mastering equipment calibration and star tracking, you can minimize field rotation and capture crisp, beautiful images of the night sky. Additionally, exploring digital concepts can further enhance your understanding of these challenges in astrophotography.
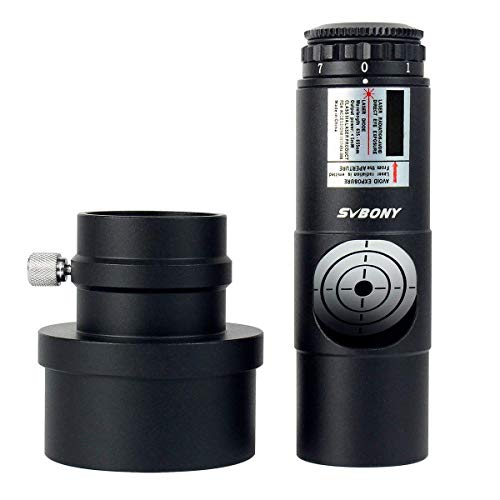
SVBONY Red Laser Collimator for Newtonian Marca Telescope Alignment 1.25 inches 7 Bright Levels Triple Cemented Lens with 2 inches Adapter
Designed for calibrating reflecting telescopes; SVBONY laser collimator allows anyone easily collimate 1.25'' and 2'' reflector telescopes; come…
As an affiliate, we earn on qualifying purchases.
As an affiliate, we earn on qualifying purchases.
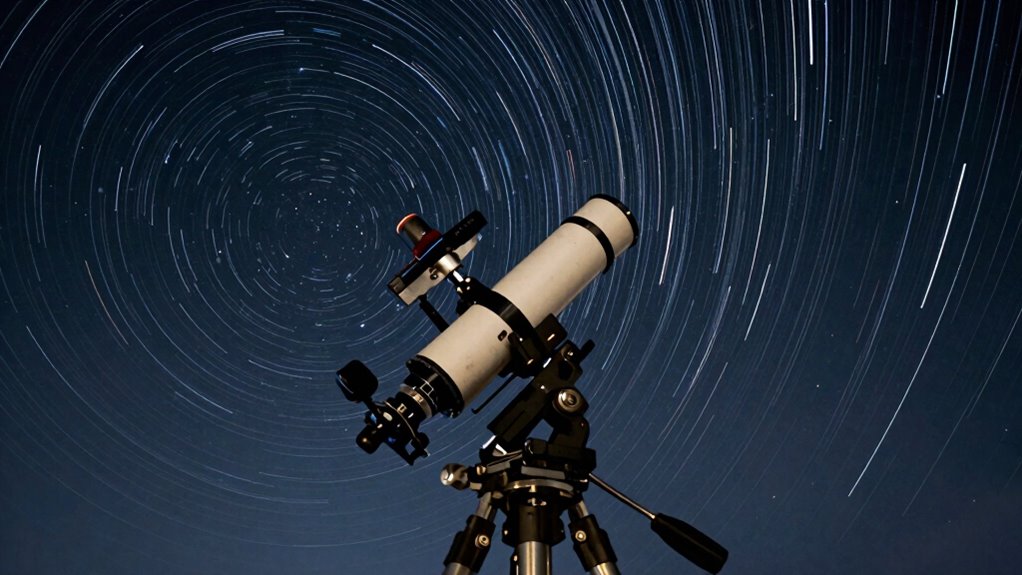
How Do Alt-Az Mounts Cause Field Rotation During Long Exposures?

Alt-azimuth (alt-az) mounts move objects across the sky by rotating on two perpendicular axes: altitude (up and down) and azimuth (side to side). This mount design is simple and stable for terrestrial use but causes field rotation during long exposures. Because alt-az mounts track objects by moving in both axes separately, their tracking accuracy isn’t perfect over extended periods. As your telescope follows a celestial object, the mount’s movements don’t perfectly match the sky’s rotation. Instead, the field appears to spin, resulting in smeared stars during long exposures. This rotational mismatch happens because alt-az mounts aren’t designed to compensate for the sky’s continuous rotation. So, even with precise tracking, the mount’s inherent design leads to field rotation that blurs your astrophotography images.

Sky-Watcher Star Adventurer 2i Pro Pack – Motorized DSLR Night Sky Tracker Equatorial Mount for Portable Nightscapes, Time-Lapse and Panoramas – Wi-Fi App Camera Control – Long Exposure (S20512)
Portable nightscape tracking platform: Motorized portable tracking platform perfect for capturing incredible detail of the Milky Way, eclipses…
As an affiliate, we earn on qualifying purchases.
As an affiliate, we earn on qualifying purchases.
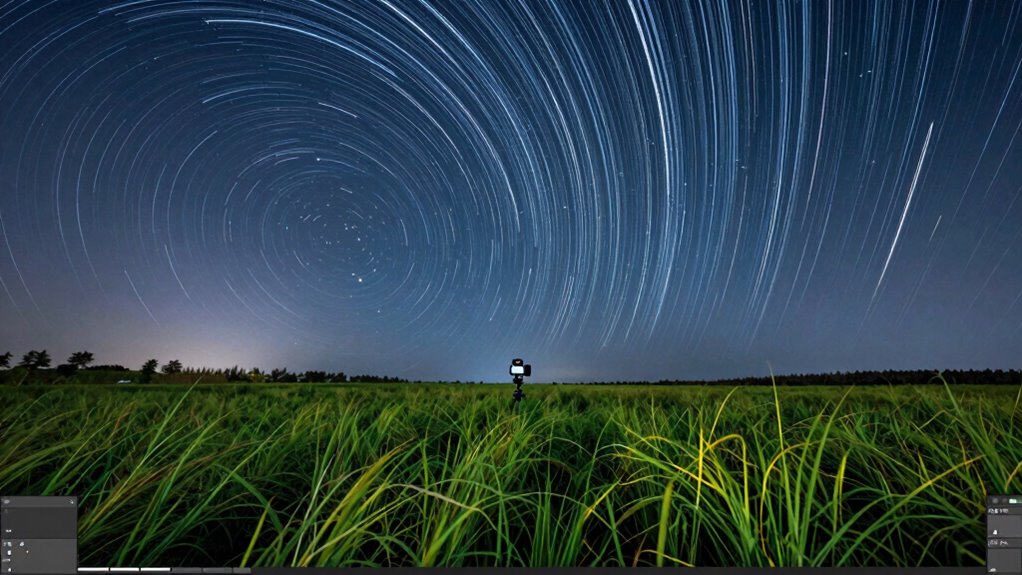
How Can You Tell If Field Rotation Is Blurring Your Photos?
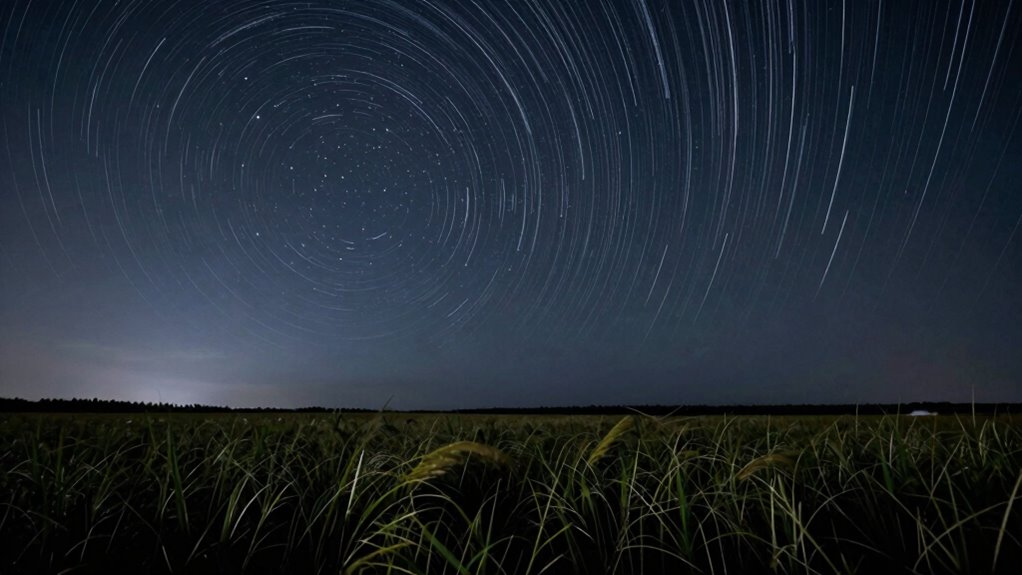
When field rotation occurs during astrophotography, you’ll notice stars that should appear as pinpoint sources instead look elongated or streaked across your images. To detect if this is happening, consider these signs:
- Star trails that form arcs instead of points, especially in long exposures.
- Inconsistent star positions when comparing sequential images, indicating rotation.
- Difficulty aligning images using star trail techniques or celestial navigation, which rely on stable star positions.
If you observe these issues, your images are likely affected by field rotation. Recognizing these signs early helps prevent wasted time. Adjusting your technique or equipment can mitigate this problem, ensuring sharper, more accurate astrophotos.
Sky-Watcher Star Adventurer 2i Pro Pack – Motorized DSLR Night Sky Tracker Equatorial Mount for Portable Nightscapes, Time-Lapse and Panoramas – Wi-Fi App Camera Control – Long Exposure (S20512)
Portable nightscape tracking platform: Motorized portable tracking platform perfect for capturing incredible detail of the Milky Way, eclipses…
As an affiliate, we earn on qualifying purchases.
As an affiliate, we earn on qualifying purchases.
Why Do Equatorial Mounts Fix Field Rotation and Improve Your Images?
Equatorial mounts are designed to counteract the Earth’s rotation by aligning their axes with the planet’s rotational axis. This alignment allows for precise star tracking, where the mount follows celestial objects’ apparent motion across the sky. When you set up your mount correctly and perform proper mount alignment, it can rotate smoothly with the stars rather than against them. This reduces the field rotation effect that causes star trails and smears during long exposures. By maintaining consistent tracking, your images stay sharp and well-focused. Equatorial mounts effectively eliminate the image smearing caused by the Earth’s rotation, making them ideal for astrophotography. This focused star tracking results in clearer, more detailed images, especially during extended exposures.
What Are Practical Ways to Reduce Field Rotation on Alt-Az Mounts?
To reduce field rotation on alt-az mounts, you can employ several practical techniques. First, verify your mount is properly aligned; precise mount alignment minimizes unnecessary movement and helps stabilize your images. Second, perform regular camera calibration, including flat frames and dark frames, to correct optical distortions that can exacerbate smearing. Third, consider using a field derotator or a software-based correction during post-processing, but initial mechanical adjustments are essential. Proper mount alignment and camera calibration are vital steps. These measures reduce the effects of rotation, allowing longer exposures without smearing. While they don’t eliminate field rotation entirely, they notably improve image quality and clarity, especially during extended imaging sessions on alt-az mounts.
How Can Software Help Fix Field Rotation in Your Images?
Software can automatically correct field rotation, saving you time and effort during processing. Real-time tools help you identify and adjust rotation issues as you capture images, ensuring better results. Post-processing adjustments allow you to fine-tune your images after shooting, fixing any residual rotation artifacts.
Automated Rotation Correction
When field rotation occurs during astrophotography, it can cause star trails and blurred images, making your shots less sharp. Automated rotation correction software can help fix this by analyzing your images and compensating for rotation artifacts. To do this effectively, the software often relies on:
- Camera calibration to accurately understand your camera’s sensor and orientation, ensuring precise adjustments.
- Lens distortion correction, which removes warping that can interfere with rotation calculations.
- Star pattern recognition to identify celestial objects and determine the degree of rotation needed for alignment. Additionally, understanding Milky Way photography techniques can enhance your overall astrophotography results.
Real-Time Processing Tools
Real-time processing tools are essential for correcting field rotation as you capture images, allowing you to adjust on the fly instead of waiting until post-processing. These tools leverage star tracking to monitor your position and rotation, providing immediate feedback. By integrating accurate camera calibration, they can compensate for distortions and misalignments, ensuring your images stay sharp and properly aligned. As you observe through your mount, the software continuously analyzes star patterns, detecting rotation and making real-time adjustments. This proactive approach minimizes smear and streaks caused by field rotation, especially during long exposures. With these tools, you gain greater control over your imaging session, reducing post-processing time and improving your chances of capturing crisp, well-aligned astrophotos.
Post-Processing Adjustments
Even after capturing your images, field rotation can still introduce misalignment and streaks that diminish their quality. Post-processing software offers solutions to correct these issues. First, you can use star tracking algorithms to align star patterns frame-by-frame, reducing rotation effects. Second, applying lens distortion correction helps straighten curved star trails caused by optical imperfections. Third, advanced stacking programs can register and align multiple exposures, compensating for residual rotation and streaks. These tools work together to restore sharpness and accuracy, ensuring your images reflect true celestial positions. By carefully analyzing star movement and distortions, software can effectively mitigate the effects of field rotation, even if your equipment doesn’t have an equatorial mount.
Should You Upgrade to an Equatorial Mount? When It’s Worth It?

Deciding whether to upgrade to an equatorial mount depends on how serious you are about astrophotography and your current setup’s limitations. If you find that your long exposures are consistently smeared due to field rotation, an equatorial mount can make a significant difference. The key is ensuring proper mount calibration and precise telescope alignment, which are essential for tracking celestial objects accurately. An equatorial mount naturally compensates for Earth’s rotation, reducing the need for constant adjustments. If your current Alt-Az setup struggles with long exposures, and you’re committed to improving image quality, upgrading is worth considering. However, if your astrophotography sessions are short or you’re still mastering basic techniques, you might want to hold off until you’re ready for the more involved setup.
Tips for Capturing Sharp, Clear Astrophotos With Your Current Setup

While your current setup may not be the most advanced, you can still achieve sharp, clear astrophotos by paying close attention to a few key factors. First, guarantee your mount is well polar aligned; this minimizes field rotation and keeps stars pinpoint. Second, regularly calibrate your camera lens to eliminate distortions and aberrations that can blur images. Third, keep your exposure times within limits that prevent star trailing—shorter exposures or stacking multiple frames can help. Additionally, double-check your focus before each shot, and use live view or autofocus if available. By optimizing these areas—polar alignment, lens calibration, and exposure control—you’ll substantially improve your image sharpness and clarity, even with a basic or alt-az mount.
Frequently Asked Questions
Can Field Rotation Affect Planetary Astrophotography or Only Deep-Sky Objects?
Field rotation can affect planetary imaging if your mount’s tracking isn’t precise. Since planets are bright and require detailed images, even slight rotation can cause streaking or blurring during long exposures. Alt-Az mounts tend to introduce field rotation because they don’t track celestial objects perfectly over time. To get sharp images, you need a mount with good tracking or use software to correct for rotation during processing.
How Does Altitude and Latitude Influence Field Rotation Severity?
You might not realize it, but altitude and latitude dramatically influence field rotation severity. As you polar align your mount, higher latitudes increase the rotation’s impact, while lower altitudes lessen it. Mount stability becomes essential here—if your setup isn’t steady, even minor rotations worsen. Keep your polar alignment precise, especially at extreme latitudes, and make certain your mount’s stability. Otherwise, long exposures could turn into frustrating smears, ruining your astrophotography.
Are There Affordable Accessories to Mitigate Field Rotation on Alt-Az Mounts?
Yes, affordable accessories can help mitigate field rotation on alt-az mounts. You can invest in counterweight solutions to improve stability, reducing smearing during long exposures. Additionally, electronic tracking systems are available at lower costs, which continuously adjust the mount’s position, minimizing rotation effects. Combining these tools offers a practical, budget-friendly way to enhance your astrophotography without needing expensive equatorial mounts.
What Are the Best Camera Settings to Minimize Motion Blur From Field Rotation?
Ironically, your best camera settings to beat motion blur involve keeping exposures short—think fast shutter speeds, around 1/500 sec or higher. Use a guide to star tracking if possible, and activate your camera’s stabilization techniques, like optical or in-body stabilization. Keep ISO moderate to avoid noise, and shoot wide-open. These tips help minimize field rotation effects, ensuring your images stay sharp despite the cosmic dance happening above.
How Quickly Does Field Rotation Become Noticeable During Long Exposures?
As you star track during long exposures, field rotation becomes noticeable after about 20-30 seconds on an Alt-Az mount. The rotation causes star trails and smearing, especially in exposures longer than this. To keep your images sharp, you need to limit exposure durations or use a tracking mount designed for astrophotography. Monitoring how quickly stars begin to streak helps you plan your shots for the clearest results.
Conclusion
Think of astrophotography like sailing a boat through a starry night. When you’re on an alt-az mount, it’s as if the stars are drifting off course, blurring your view. But with patience, software, or a better mount, you can steady your ship and keep the stars sharp. Remember, every great astronomer started with a simple telescope—your journey to stunning images begins with understanding and mastering field rotation. Keep gazing upward!