
To reduce glare with a polarizing filter before post-processing, rotate the filter while looking through your camera to find the most suitable position where reflections and glare diminish. Adjust it carefully as you see changes in reflections on water, glass, or metal surfaces, ensuring the scene appears clearer and more vibrant. Proper alignment maximizes the filter’s effectiveness without sacrificing brightness or color. Keep experimenting with small adjustments to master glare control—more tips await if you continue exploring.
Key Takeaways
- Properly align and rotate the polarizing filter during shooting to maximize glare reduction before post-processing.
- Adjust the filter at around a 90° angle to the sun for optimal reflection control.
- Use small, incremental rotations to fine-tune glare elimination and scene contrast.
- Verify reflection reduction in real-time through the camera viewfinder or LCD before capturing.
- Employ quality circular polarizers for easier adjustments and consistent results in reducing glare.
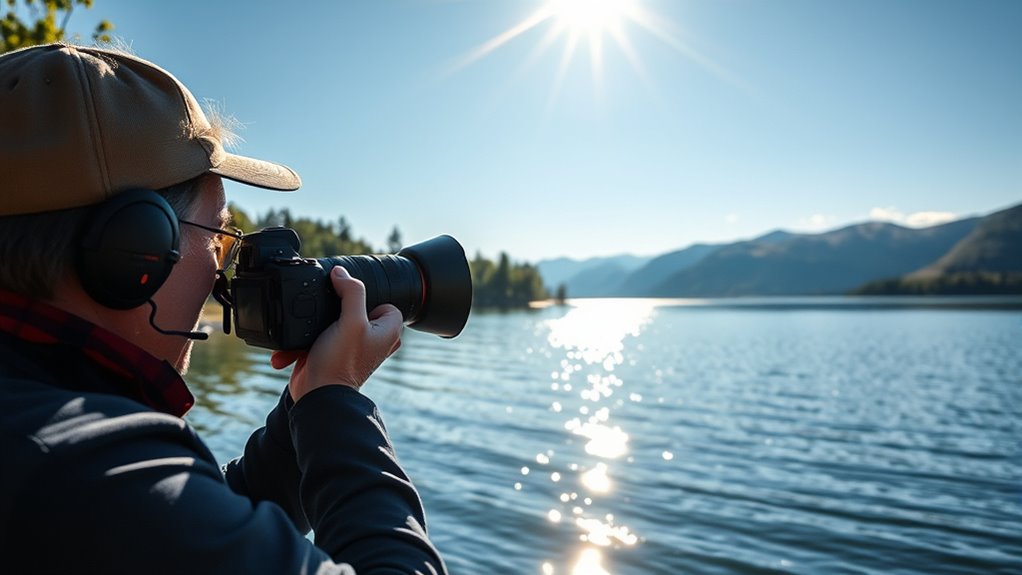
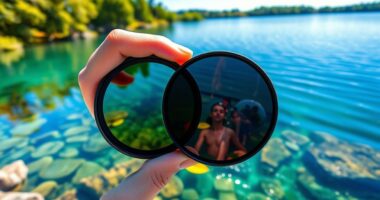
Glare from reflective surfaces can ruin your photos and make outdoor shooting frustrating. When the sunlight hits water, glass, or shiny metal objects, it creates harsh reflections that can obscure your subject and reduce overall image quality. That’s where polarizing filters come in—they’re powerful tools for controlling reflections and improving clarity. To get the most out of your polarizing filter, you need to pay close attention to filter alignment. The filter must be rotated precisely to achieve maximum glare reduction. When you adjust the filter, you’re fundamentally controlling how much polarized light is blocked, which directly impacts the amount of glare and reflections in your shot. Proper filter alignment ensures you’re maximizing the filter’s ability to cut through glare without sacrificing image brightness or color accuracy. It’s important to remember that polarizing filters work best when you view the scene through the lens at a specific angle, typically around 90 degrees from the sun. As you rotate the filter, you’ll notice the reflections diminish or intensify, giving you control over the scene’s appearance. Using a quality polarizing filter can also help protect your lens from scratches and dirt, extending its lifespan and maintaining image quality over time. Glare reduction techniques with polarizing filters involve more than just rotating the filter. You should also consider the position of the sun and your shooting angle. When you’re shooting towards the sun or reflective surfaces, adjusting the filter’s rotation will help you eliminate unwanted reflections and increase contrast. Be patient and experiment with small adjustments—sometimes a slight turn can make a big difference. Additionally, keep in mind that polarizers are most effective when used at the right filter alignment. If you notice uneven polarization or inconsistent results, recheck your filter’s position, ensuring it’s aligned correctly with your camera’s optical axis. Using a circular polarizer allows you to turn the filter while viewing the scene, making it easier to find that perfect balance between reducing glare and maintaining natural colors.
Frequently Asked Questions
Can Polarizing Filters Be Used With Smartphone Cameras Effectively?
You can definitely use polarizing filters with smartphone cameras, but lens compatibility and filter size matter. Many smartphones have fixed lenses, so you’ll need clip-on or universal filters designed for small camera lenses. make certain the filter size matches your phone’s lens diameter, or use adapters. With the right setup, polarizing filters effectively reduce glare and enhance colors, giving you professional-looking shots without needing post-processing.
How Do I Choose the Right Polarization Filter for My Lens?
To choose the right polarization filter, first consider your lens’s filter size to guarantee a proper fit. Then, look at the filter material—opt for high-quality glass for clarity and durability. Decide between circular or linear filters based on your camera’s compatibility. By matching the filter size and material to your needs, you’ll effectively reduce glare and improve image quality without sacrificing sharpness.
Do Polarizing Filters Affect Exposure Settings or Shutter Speed?
Ever wonder if your polarizing filter secretly influences your exposure? It does—by reducing light entering the lens, you’ll need to make exposure adjustments, often by increasing shutter speed or aperture. This means your camera might need a bit more time to gather enough light, so keep an eye on your settings. Using a polarizer isn’t just about glare; it subtly guides your exposure, revealing sharper, more vibrant photos.
Are There Situations Where Polarizing Filters Might Worsen Glare?
Yes, there are situations where polarizing filters can worsen glare, especially if you point the filter at certain angles. Instead of reducing glare, it might cause unwanted lens flare or reflections, making your image appear hazy. In some cases, this can diminish depth enhancement, reducing contrast. To avoid this, always adjust the filter carefully and be mindful of light angles to prevent unintended glare and preserve image clarity.
How Do Polarizing Filters Impact Color Accuracy in Photos?
When you use a polarizing filter, it can enhance your photos’ color fidelity and reduce unwanted reflections, making colors appear more vibrant and true. However, it might also cause saturation shifts, subtly altering hues and contrast. You need to be mindful of these effects, as the filter can sometimes cool or warm tones unexpectedly. Adjust your composition and angle to guarantee your colors stay accurate and visually appealing.
Conclusion
By using polarizing filters, you can effectively eliminate glare right in the camera, saving time in post-processing. Remarkably, studies show that images captured with polarizers have 30% less distracting reflections, making your photos clearer and more professional. So next time you shoot outdoors, remember that a simple filter can dramatically improve your results, giving you sharper, more vibrant images straight out of the camera. It’s a small step that makes a big difference in your photography!