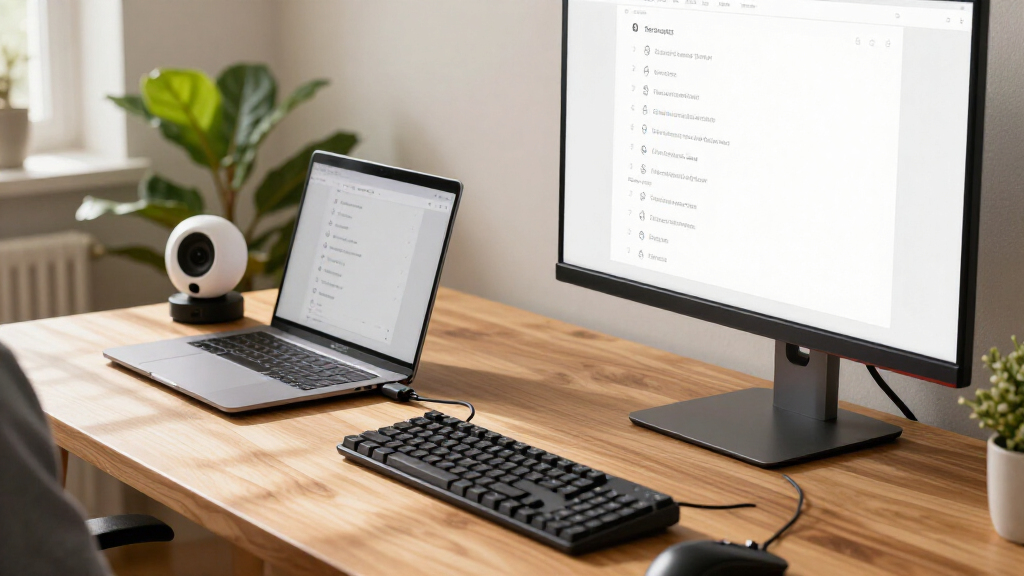
This checklist is for anyone setting up a home office who wants the main devices to work together comfortably. It covers desk connections, typing, screen placement, video calls, and audio, with advice for choosing what fits your workspace. Start with your daily needs, then use each section to narrow the options.

Get the latest gadgets delivered free with Prime
- Fast, free delivery on millions of items
- Prime Video, Amazon Music and more included
- Member-only deals all year
The sections follow the path from connecting your devices to positioning your screen and handling calls. Each pick is paired with practical checks so you can judge whether its features suit your computer, desk, and routines. Compatibility and fit matter as much as a product’s headline features.
Use the look-for lists while comparing product details, and check your computer and desk measurements before ordering. Treat each pick as a starting point: confirm the exact ports, supported screen setup, mounting method, and included features for the model you’re considering. Verify the details that affect your setup before you buy.
USB-C Docking Station
A dock can make a home office easier to connect by bringing compatible peripherals together through one device. The Anker Prime DL7400 14-in-1 DisplayLink Docking Station is the pick in this slot, but the name alone does not confirm whether it supports your computer, monitors, or preferred connection method. Check compatibility first, especially if your work depends on more than one display or specific ports.
A common mistake is choosing a dock based on the number of connections without checking what each connection supports. Confirm the dock’s port types against the devices you plan to attach, and verify DisplayLink software and operating-system requirements for your computer. Check whether your computer’s USB-C port supports the functions you need; USB-C describes the connector shape, not every capability. Also consider where the dock will sit and whether attached cables can reach without crossing your work area. Match each port to a real device in your setup.
Before buying, compare the manufacturer’s compatibility information with your exact computer model and monitor arrangement. If you switch between a work laptop and a personal machine, check support for both rather than assuming one dock will suit each. Plan around your actual devices and leave room to expand only where you expect to need it.
What to look for:
- Confirm compatibility with your exact computer and operating system.
- Check DisplayLink requirements and setup steps.
- Match dock ports to your monitors and peripherals.
- Verify the supported display arrangement for your computer.
- Check cable reach and where the dock will sit.
Anker Prime DL7400 14-in-1 DisplayLink Docking Station

This docking station connects up to three 4K displays and offers USB-C, USB-A, HDMI, DisplayPort, Ethernet, audio, and SD/TF card ports. It supports laptop charging up to 140W, with a built-in display and fan for monitoring and cooling.
Pros:
- Supports up to three 4K external displays
- Provides up to 140W laptop charging
- Broad selection of ports, including 2.5Gbps Ethernet
- Built-in smart display and fan cooling
Cons:
- Requires a DisplayLink driver for triple-display use
- DRM-protected streaming may show a black screen
- Front USB-C ports do not support video output
Best for: People who want to connect several compatible desk devices through a dock.
Not ideal for: Setups that have not confirmed DisplayLink and port compatibility.
Bottom line: Choose this dock only after confirming its software, ports, and display support work with your computer.
Ergonomic Wireless Keyboard
A keyboard is one of the devices you use repeatedly throughout the workday, so its shape and position can affect how natural typing feels. The Logitech Ergo K860 Wireless Ergonomic Split Keyboard with Wrist Rest is the pick here. Its name identifies a split design and wrist rest, but whether those suit you depends on your posture, desk height, and typing habits. Comfort is personal, so consider how the layout will feel in your routine.
A common buying mistake is assuming an ergonomic shape will feel familiar immediately or fit every desk. Check the keyboard’s dimensions and compare them with your available space, including room for a mouse beside it. Consider where your hands rest and whether the keyboard can sit at a comfortable height in your normal working posture. Confirm the wireless connection type and device compatibility from the manufacturer, especially if you plan to switch among computers. Check layout and connection details before replacing a keyboard you already know.
If possible, try a split layout before committing to it for a full workday. Make sure the wrist rest does not push the keyboard too far forward or interfere with your desk arrangement. Look for clear information about power requirements and included accessories, and account for how you will store or transport it if you work in different locations. Fit your desk and habits, not an abstract ideal, when choosing.
What to look for:
- Compare the keyboard’s dimensions with your desk space.
- Check whether the split layout suits your typing habits.
- Confirm wireless connection and device compatibility.
- Consider mouse space and comfortable placement.
- Review power requirements and included accessories.
Logitech Ergo K860 Wireless Ergonomic Split Keyboard with Wrist Rest

The Logitech Ergo K860 is an ergonomic wireless keyboard designed to promote natural typing posture and reduce muscle strain. It features a split keyframe, cushioned wrist rest, adjustable tilt legs, and quiet, full-size keys for comfortable and precise typing.
Pros:
- Ergonomically designed to reduce wrist and muscle strain
- Comfortable cushioned wrist rest with memory foam
- Adjustable tilt for personalized typing posture
- Wireless connectivity via Bluetooth or USB receiver
Cons:
- May be more expensive than standard keyboards
- Requires batteries or power source for wireless operation
Best for: People looking for a wireless keyboard with a split design and wrist rest.
Not ideal for: Anyone who needs a compact layout or prefers a familiar conventional shape.
Bottom line: Check the layout, dimensions, and wireless compatibility against your desk and devices.
Adjustable Monitor Arm
A monitor arm can help position a screen at a comfortable height and make better use of desk space, provided it fits both the screen and the desk. The NB Extra-Height Gaming Monitor Arm for 32–60-Inch Screens is the selected pick. Its name points to an extra-height design and a stated screen-size range, but those details do not establish compatibility with every monitor in that range. Verify the full mounting specifications before choosing it.
A frequent mistake is matching only by screen size. Check your monitor’s weight, mounting pattern, and thickness against the arm’s manufacturer specifications, and confirm whether any required mounting hardware is included. Measure the desk edge or mounting area and check the desk’s construction and thickness against the arm’s clamp or base requirements. Leave room for the arm to move without striking a wall, shelf, or nearby equipment. Screen size is only one fit check.
Think through where the screen should sit for your usual chair and work posture, then check that the arm can reach that position. For a curved, unusually shaped, or particularly heavy monitor, confirm compatibility directly rather than inferring it from the listed size range. Also consider how power and display cables will move when you adjust the screen. Measure the screen and desk before buying, and plan the cable route along with the mount.
What to look for:
- Confirm monitor weight and mounting pattern against the arm’s specifications.
- Check screen thickness and required mounting hardware.
- Measure desk thickness and verify clamp or base fit.
- Ensure the arm can reach your desired screen position.
- Plan clearance and cable movement across the adjustment range.
NB Extra-Height Gaming Monitor Arm for 32–60-Inch Screens

This aluminum monitor arm supports 32–60-inch monitors weighing 2–20 kg and offers height adjustment up to 27 inches, with 360° rotation, ±50° tilt, and ±90° swivel. It includes built-in RGB lighting, cable management, quick-release installation, and clamp or grommet mounting options.
Pros:
- Supports large monitors up to 60 inches and 20 kg
- Wide range of height and angle adjustments
- Built-in RGB lighting and cable management
- Quick-release design with clamp and grommet mounting options
Cons:
- Compatibility is limited to monitors with 75 × 75 mm or 100 × 100 mm VESA patterns
Best for: People whose monitor and desk meet the arm’s mounting requirements.
Not ideal for: Setups with unverified monitor weight, mounting pattern, or desk fit.
Bottom line: Confirm monitor and desk measurements before relying on the stated screen-size range.
Webcam with Privacy Shutter
A webcam is a practical part of a home office for video calls, and a privacy shutter can provide a direct way to cover the camera when it is not in use. The listed pick is the NexiGo N680E Pro 4K Webcam with Ring Light, Autofocus, 1080p 60FPS, Du. The product name mentions several features, but it ends with “Du,” so confirm the complete model name and specification list before comparing options. Verify the exact model and the shutter details.
One common mistake is focusing on resolution labels without checking how the camera connects, mounts, and works with your computer and calling software. Confirm the supported video modes, operating-system compatibility, and whether the ring light can be positioned comfortably in your setup. Check that the privacy shutter is a physical cover and learn how it operates. Consider whether the webcam will sit on a monitor, tripod, or another mount, and whether that placement gives the framing you want. Check mounting and software support alongside image features.
Measure the available space around your monitor and think about lighting in the room before deciding whether a ring light is useful. Verify the cable type and length, plus any setup or software requirements. If you use a monitor arm, make sure the camera’s placement will not conflict with screen movement. Plan for framing, light, and placement so the camera fits the whole workstation.
What to look for:
- Confirm the complete product name and exact specifications.
- Check computer and video-call software compatibility.
- Verify how the privacy shutter works.
- Confirm mounting options, cable type, and cable reach.
- Consider ring-light placement and camera framing.
NexiGo N680E Pro 4K Webcam with Ring Light, Autofocus, 1080p 60FPS, Dual Mics, P
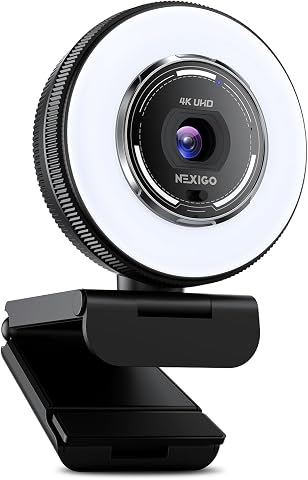
The NexiGo N680E Pro is a high-quality 4K webcam featuring a Sony sensor for sharp video, PDAF autofocus, and a built-in adjustable ring light. It includes dual noise-canceling microphones, a privacy shutter, and broad compatibility with popular conferencing platforms, making it ideal for streaming, gaming, and online meetings.
Pros:
- Ultra-sharp 4K video quality with smooth 1080p 60FPS streaming
- Built-in adjustable ring light for optimal lighting
- Advanced PDAF autofocus for clear focus during movement
- Dual noise-canceling microphones for clear audio
Cons:
- Output resolution depends on camera software settings
- Requires USB-A port; may need adapters for some devices
- Limited details on tripod compatibility
Best for: People who want a webcam with the listed ring light and autofocus features.
Not ideal for: Buyers who need complete model specifications before comparing choices.
Bottom line: Confirm the full model details, shutter operation, and computer compatibility before buying.
Desktop Microphone
Clear audio helps make a home office setup more useful for calls and recordings. The listed pick is named “USB Document Camera with Manual Focus and Microphone,” which describes a document camera and a microphone together. The name does not establish the microphone’s pickup pattern, audio controls, or connection details, so verify the product’s complete description and intended use before treating it as a desktop microphone. Confirm what the device is designed to do.
A common buying mistake is assuming the word “microphone” tells you how it will sound or work in a particular room. Check whether the product supports your computer and the applications you use, and look for clear details about audio capture, controls, and monitoring. Consider where it would sit relative to your mouth, keyboard, and other sources of sound. If you need a standalone microphone for calls, verify that the product can provide that function independently of its document-camera features. Match the device to your audio task.
Placement matters: a camera aimed at documents may need a different position from a microphone intended to capture speech at a desk. Check mounting options and cable reach, and make sure the device will not crowd your keyboard or monitor. If the product listing lacks the audio details you need, compare it with a clearly specified microphone before deciding. Read the full specifications and check the intended setup before adding it to your desk.
What to look for:
- Confirm whether the product is intended for standalone desktop audio.
- Check computer and application compatibility.
- Review audio capture details and available controls.
- Consider placement relative to your voice and keyboard.
- Verify mounting options and cable reach.
USB Document Camera with Manual Focus and Microphone

A foldable USB document camera that also works as a webcam for teaching, video calls, and live demonstrations. It offers manual focus, a 360-degree rotating camera head, up to 1080p video at 30 fps, and a built-in noise-reducing microphone.
Pros:
- Combines a document camera, visualizer, and webcam
- Foldable design with adjustable positioning
- Manual focus for clearer presentations
- Built-in microphone and broad computer compatibility
Cons:
- Requires a computer to operate
- Not compatible with iPads or mobile phones
Best for: People whose setup can use both the listed camera and microphone functions.
Not ideal for: Anyone seeking a clearly specified standalone desktop microphone.
Bottom line: Confirm the device’s intended audio use and computer support before choosing it as your microphone.
Surge Protector with USB Ports
A surge protector with USB ports can combine power connections for desk equipment with convenient charging access. No specific product is named for this slot, so use the advice here to compare models against the devices and outlets in your office. Start with the equipment you need to power, including computers, monitors, chargers, and desk accessories.
A common mistake is counting outlets without checking the protector’s electrical ratings or the size and placement of plugs. Review the manufacturer’s maximum load and surge-protection specifications, and compare them with the requirements of the devices you plan to connect. Check outlet spacing for bulky adapters and make sure the cord reaches the intended location without creating a trip hazard. For USB ports, confirm connector types and charging support for the devices you use; do not assume every port has the same capability. Check ratings and connector types before relying on a feature list.
Measure the space where the protector will sit and consider whether you need a flat plug, mounting holes, or a switch you can reach easily. Keep it accessible and follow the manufacturer’s placement and use instructions. If your desk already has limited outlets or unusual power needs, check those requirements before selecting a model. Choose around your real power layout, and leave enough room to plug and unplug equipment comfortably.
What to look for:
- Match outlet count and spacing to your devices and adapters.
- Review electrical load and surge-protection specifications.
- Confirm USB connector types and charging support.
- Check cord length and placement options.
- Follow manufacturer guidance for installation and use.
Build the setup in a practical order: first list your computer, monitors, and peripherals, then confirm the dock and power arrangement can support them. Next check monitor mounting and keyboard fit, followed by webcam and microphone placement. Prioritize compatibility and comfort before adding features you may not use.
You do not have to outfit the whole desk at once. Start with the items that solve a daily frustration, measure carefully, and confirm model details as you go. A well-matched setup grows one useful choice at a time, and each careful check makes the next decision easier.
Evergreen bestsellers Picks
bestsellers
As an affiliate, we earn on qualifying purchases.