To build a simple laser microscope at home, start by gathering a laser diode, a collimating lens, mirrors, and a small sample stage. Securely mount the laser and align it with the lens, ensuring the beam is focused and stable. Use adjustable mirrors to direct the laser through your sample and onto a viewing device, keeping safety measures like goggles in mind. If you continue exploring, you’ll discover how to fine-tune your setup for clearer, magnified images.
Key Takeaways
- Use a stable base, like cardboard or wood, to mount laser, lenses, and mirrors securely.
- Align the laser diode, collimating lens, and mirrors carefully for a clear, focused beam.
- Position the sample stage where the laser beam is directed for magnified observation.
- Ensure all optical components are precisely aligned to prevent image distortion.
- Follow safety measures: wear laser glasses, secure the setup, and avoid direct laser exposure.
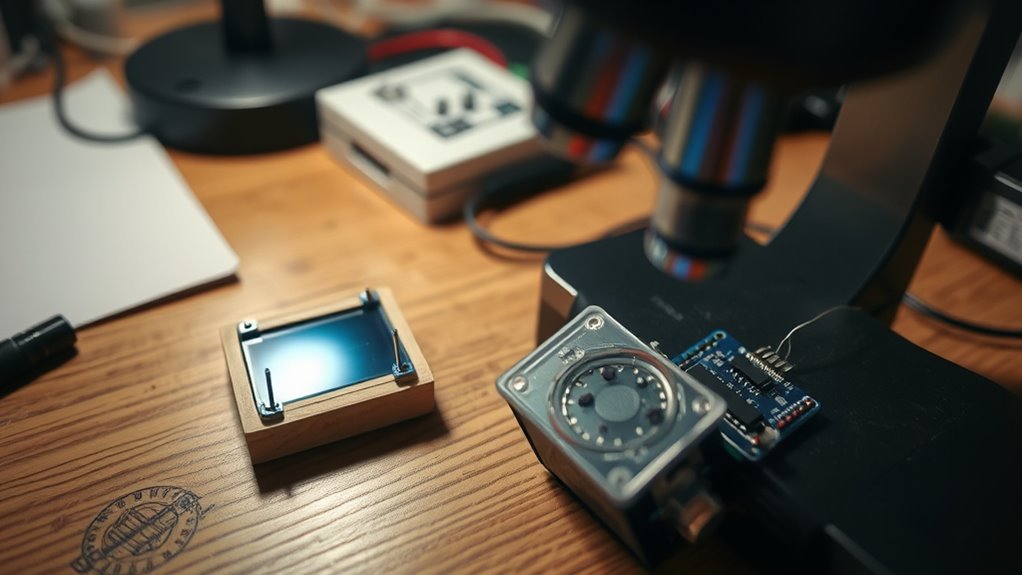
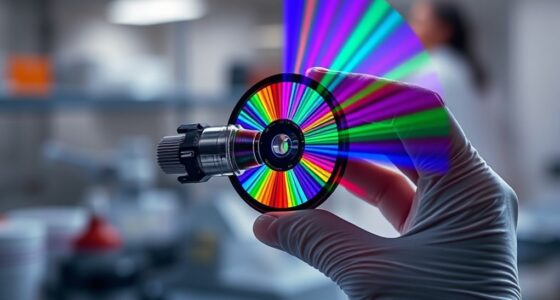
Building a simple laser microscope at home is an achievable project that can turn everyday materials into a powerful scientific tool. The key to creating a functional device lies in understanding optical alignment and prioritizing laser safety. When working with laser components, you need to carefully align the optical path to ensure the laser beam hits the intended targets and provides clear, magnified images. Proper optical alignment involves adjusting lenses and mirrors precisely so that the laser beam passes through the system smoothly, focusing onto your sample and then onto a viewing or recording device. You should start by setting up a stable base for your components, such as a sturdy cardboard or wooden frame. Mount the laser diode securely and ensure it points in the right direction. Next, position the collimating lens close to the laser to shape the beam, then use adjustable mirrors to direct the beam through the sample stage and onto the imaging system. Take your time aligning each element to ensure the beam remains focused and stable throughout the system, avoiding misalignment that can distort your images or reduce magnification quality. Additionally, understanding the importance of filtering and safety measures can significantly improve your setup’s effectiveness and safety.
Laser safety is paramount during this project. Even low-power laser diodes can cause eye damage, so you must never look directly into the beam or point it at anyone else. Always wear appropriate laser safety glasses that match the wavelength of your laser diode. Keep the laser confined within a closed or shielded setup whenever possible, and ensure that the beam pathway is secure to prevent accidental exposure. Use warning signs or labels on your DIY microscope to remind yourself and others of the potential hazards. When adjusting optical components, handle the laser with care, and turn it off immediately if you notice any misalignment or if something seems unsafe. Remember, safety isn’t just about protecting your eyes; it’s also about preventing damage to your skin or unintended reflections from surfaces that could redirect the laser beam.
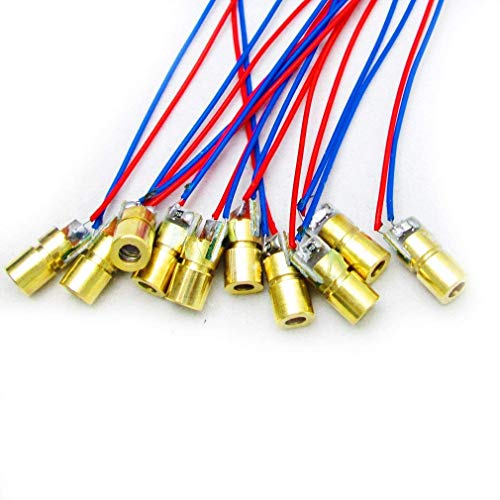
HiLetgo 10pcs 5V 650nm 5mW Red Dot Laser Head Red Laser Diode Laser Tube with Leads Head Outer Diameter 6mm
5V 650nm 5mW Red Dot Diode Laser Head Red Laser Diode 6mm Red Laser Diode Laser Head
As an affiliate, we earn on qualifying purchases.
As an affiliate, we earn on qualifying purchases.
Frequently Asked Questions
What Safety Precautions Should I Take When Building a Laser Microscope?
When building a laser microscope, prioritize laser safety by never looking directly into the laser beam and avoiding reflections. Always wear appropriate eye protection, such as laser safety goggles, to prevent eye injuries. Keep the laser enclosed or shielded, and work in a controlled environment away from children or pets. Following these precautions guarantees safe handling and minimizes risks associated with laser exposure.
Can I Use Everyday Household Items for the Main Components?
Can you really create a microscope with household materials? Yes, you can use items like plastic lenses, flashlight parts, or mirrors, but always prioritize safety gear like goggles and gloves. While some household items work, make sure they’re clean and appropriate. Do you want a safe, functional setup? Carefully select materials, handle everything with safety in mind, and double-check their suitability before assembling your homemade laser microscope.
How Do I Align the Laser Beam Accurately?
To align the laser beam accurately, start by adjusting the beam alignment components until the laser points straight through your setup. Use a target or screen to monitor the beam’s path, making small tweaks to keep it centered. Focus on laser stabilization by securing all mounts firmly, preventing any shifts. Consistent fine-tuning guarantees your laser maintains a precise, stable alignment, which is essential for clear microscopic images.
What Are the Limitations of a Homemade Laser Microscope?
Your homemade laser microscope faces limitations like resolution limits, which restrict how small details you can see. Optical aberrations, such as distortions or blurriness, also affect image quality. These issues stem from simple components and alignment challenges. While it’s great for basic observations, don’t expect the precision of professional microscopes. Improving quality involves better lenses and precise calibration, but some limitations will remain due to DIY construction constraints.
How Can I Improve the Image Quality of My DIY Setup?
You can improve your DIY laser microscope’s image quality by investigating optical enhancements like better lenses or adjustable focus to sharpen images. Additionally, using image processing software helps clarify details and reduce noise. Make certain your setup is stable, free from vibrations, and aligned properly. Experimenting with different laser intensities and lighting conditions also enhances clarity. Combining these approaches makes your observations more precise and detailed.

Laser Tube lens Collimating Coated Glass Lens for 400nm-700nm 520nm Violet/Blue Red Laser Diode Module 1PCS
Collimating lens for laser diode Moudle
As an affiliate, we earn on qualifying purchases.
As an affiliate, we earn on qualifying purchases.
Conclusion
Now, with your homemade laser microscope, you’re holding a tiny universe in your hands. Each laser beam acts as a guiding star, revealing secrets hidden in the smallest details. Just like a curious explorer, you’ve turned a simple setup into a vessel of discovery, proving that science is within reach. Remember, your microscope isn’t just a tool—it’s a symbol of your venture into the vast, mysterious cosmos of the microscopic world, waiting for your next discovery.

Maitys 2 Pcs Telescoping Inspection Mirrors Extend up to 28 Inch Eyelash Inspection 360 Rotation Adjustable Extension Detachable Telescoping Pocket Mirror for Technician Mechanic Vehicle Small Part
Thoughtful design: the detachable mirrors are practical tools for your different needs, work well in eyelash extension, the…
As an affiliate, we earn on qualifying purchases.
As an affiliate, we earn on qualifying purchases.

FreeMascot IPL 200nm-2000nm Laser Safety Glasses for Laser Hair Removal Treatment and Laser Cosmetology Operator Eye Protection with Case (Green)
Wavelength: 200nm-2000nm, broad spectrum protection, block UV, Blue, Red and Infrared Laser Light
As an affiliate, we earn on qualifying purchases.
As an affiliate, we earn on qualifying purchases.