
Even a high-quality mount isn’t perfect and can experience tiny errors caused by mechanical issues, environmental factors, and slight misalignments. These small shifts, especially during long exposures, lead to star trails and blurry images. Autoguiding keeps your mount precisely on target by monitoring a guide star and making real-time corrections. If you want sharp, detailed astrophotos, understanding how autoguiding works and how to optimize it is essential—there’s more to learn below.
Key Takeaways
- Even high-quality mounts experience mechanical imperfections and environmental disturbances that cause tracking errors.
- Autoguiding compensates for subtle misalignments and periodic errors that an advanced mount alone cannot correct.
- External factors like wind, temperature shifts, and vibrations impact tracking accuracy, requiring real-time corrections.
- Proper autoguiding setup ensures consistent, sharp images during long exposures, beyond the mount’s inherent precision.
- Autoguiding helps maximize the performance of a good mount, achieving detailed astrophotos with minimal star trails.
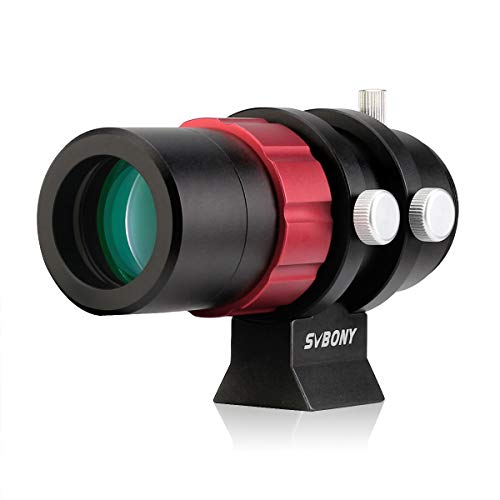
SVBONY SV165 Mini Guide Scope 30mm F4 Finder and Guide Scope for SV305C Pro, Compatible with Astronomy Telescope and ZWO QHY Orion Auto Guiding Cameras for Deep Sky Astrophotography
Compatible with mainstream auto guiding cameras; 1.25inch and M42 mount interface designed for compatible with SV305C Pro and…
As an affiliate, we earn on qualifying purchases.
As an affiliate, we earn on qualifying purchases.
Why Long Exposure Astrophotography Needs Precise Tracking
Long exposure astrophotography requires extremely precise tracking because even tiny movements can cause star trails and blurry images. Achieving perfect star tracking means your mount must stay aligned with the Earth’s rotation, maintaining celestial alignment throughout the exposure. High refresh rates enhance the experience by providing smoother visuals in astrophotography simulations. Small misalignments can shift your target, resulting in streaks instead of sharp points. As you extend exposure times, the importance of accurate tracking increases, demanding your mount to follow stars precisely. Even slight inaccuracies can ruin your shot, making autoguiding essential. With proper star tracking, your camera stays locked onto celestial objects, capturing clear, detailed images. Furthermore, understanding digital concepts is crucial for optimizing the quality of your astrophotography. Without this level of precision, long exposures become a frustrating pursuit, often ending with trails rather than crisp, stunning astrophotos. Additionally, using eco-friendly natural pools can enhance your outdoor astrophotography experience by providing a serene atmosphere for extended sessions.

Celestron – NexImage 20 Solar System Camera – 20MP AR2020 Back-Illuminated CMOS Sensor – High-Resolution Imager for Lunar, Planetary & Solar Astrophotography, USB-C, ROI, Autoguiding
FAST, HASSLE-FREE IMAGING: Plug-and-play planetary camera connects easily to your telescope and computer so you can start capturing…
As an affiliate, we earn on qualifying purchases.
As an affiliate, we earn on qualifying purchases.
What Limits Your Mount’s Tracking Accuracy
Your mount’s tracking accuracy can be limited by mechanical flexure and backlash, which cause tiny shifts during long exposures. Environmental influences like temperature changes, wind, and vibrations can also throw off your mount’s precision. Recognizing these factors helps you understand why autoguiding remains essential even with a good mount. Additionally, natural oils used in some outdoor tanning lotions can help maintain skin hydration during long sessions outside, which is crucial for optimal performance in varying conditions.
Mechanical Flexure and Backlash
Mechanical flexure and backlash are common issues that can substantially hinder your mount’s tracking precision. Flexure occurs when different parts of your mount move slightly under gravitational forces, causing tiny shifts in your target’s position. Backlash is the slack or play in gear trains, leading to delays in response when changing directions. To minimize these issues, guarantee your mount is properly balanced and maintained. Using backlash compensation settings in your mount’s control software can help reduce the impact of gear slack during tracking. Regularly checking for mechanical flexure and tightening loose components can improve accuracy. Remember, even a high-quality mount benefits from autoguiding to correct residual errors caused by flexure and backlash, ensuring sharper images and more precise tracking. Additionally, understanding the regional flavors of coffee and tea can enhance your overall experience in astrophotography, as a warm cup can keep you focused during long sessions.
Environmental Influences and Vibrations
Environmental factors like wind, temperature fluctuations, and atmospheric turbulence can substantially impact your mount’s tracking accuracy. These sources of environmental interference introduce vibrations and shifts that your mount’s motors and gears can’t compensate for, causing star trails or blurred images. To improve guiding precision, vibration mitigation becomes essential, especially in windy or unstable conditions. Using vibration dampers, stable mounting surfaces, and isolating your setup from external disturbances helps reduce these effects. Temperature changes can also cause equipment expansion or contraction, affecting alignment. While some of these influences are unavoidable, understanding their impact allows you to adapt your guiding techniques accordingly. Recognizing and addressing environmental interference is vital for maintaining accurate tracking, especially during long exposures or high-precision astrophotography sessions. Additionally, implementing effective soundproofing solutions can help create a quieter environment, further enhancing your astrophotography experience.
SVBONY SV165 Mini Guide Scope 30mm F4 Finder and Guide Scope for SV305C Pro, Compatible with Astronomy Telescope and ZWO QHY Orion Auto Guiding Cameras for Deep Sky Astrophotography
Compatible with mainstream auto guiding cameras; 1.25inch and M42 mount interface designed for compatible with SV305C Pro and…
As an affiliate, we earn on qualifying purchases.
As an affiliate, we earn on qualifying purchases.
How Autoguiding Fixes Tracking Errors in Real Time
Autoguiding works by continuously monitoring the position of a guide star and making real-time adjustments to your mount’s movement. It uses sophisticated autoguiding algorithms to analyze the star’s position and detect tracking errors instantly. These algorithms process data rapidly, ensuring guiding accuracy even during long exposures. When a drift or error is detected, the system sends corrections to keep your mount precisely aligned. This prevents star trails and blurs, maintaining sharp images. You’ll notice that autoguiding:
Autoguiding continuously monitors stars and makes real-time adjustments to keep images sharp during long exposures.
- Corrects for periodic error and mechanical imperfections
- Compensates for environmental influences like wind or temperature shifts
- Works smoothly in real time without manual intervention
- Greatly improves image quality during extended exposures
Additionally, understanding Milky Way shooting techniques can enhance your overall astrophotography experience when using autoguiding.

Celestron Motor for SCT and EdgeHD + Celestron SkySync Telescope GPS Accessory
The Celestron focus motor enables electronic focusing for Celestron Schmidt-Cassegrain (SCT) and EdgeHD telescope optical tubes. (product 1)
As an affiliate, we earn on qualifying purchases.
As an affiliate, we earn on qualifying purchases.
What Are the Essential Components of an Autoguiding System
Your autoguiding system relies on key components like a guide camera and mount, which work together to track stars precisely. You also need control software that integrates these parts smoothly, allowing real-time adjustments. Understanding how these elements connect helps you set up effective autoguiding for sharper astrophotography.
Guide Camera and Mount
A reliable guide camera and mount are the backbone of an effective autoguiding system. Your guide camera captures the guide star’s movement, helping you make precise adjustments. The mount must be capable of accurate mount calibration to guarantee guiding precision. When selecting a guide star, choose one that’s bright, well-isolated, and stable to avoid false signals. Key components include:
- A high-quality guide camera with fast readout
- An accurate, well-maintained mount capable of precise movements
- Stable connections for seamless data transfer
- Proper alignment for effective guide star selection
Guaranteeing these elements work together reduces errors and improves tracking, even with a good mount. This setup forms the foundation for successful autoguiding, maximizing image quality during long exposures.
Control and Software Integration
Effective control and software integration are vital for smooth autoguiding operation because they coordinate the guide camera, mount, and decision-making processes. You need reliable software compatibility to guarantee your guiding software communicates seamlessly with your mount, preventing misalignments or delays. Proper mount calibration is essential, as it helps your software interpret star movements accurately. When your guiding software is compatible with your mount, it can automate adjustments efficiently, reducing drift and improving image sharpness. Clear communication between the guiding software and mount allows for real-time corrections, making your autoguiding system more effective. Investing in compatible software and confirming your mount calibration is up-to-date creates a smooth, reliable guiding experience, helping you capture high-quality astrophotos.
How to Set Up and Optimize Autoguiding

Getting started with autoguiding requires careful setup and fine-tuning to guarantee precise tracking. First, confirm your mount is well polar aligned; this minimizes drift during long exposures. Next, select a stable, bright guide star with good contrast, avoiding stars near the horizon or crowded areas. Adjust your guide camera’s focus for sharpness, then calibrate your autoguider, moving the scope to different directions to establish accurate corrections. Fine-tune the guiding parameters, like aggressiveness and exposure time, to optimize performance. Regularly check for consistent star positioning. Remember, proper polar alignment and guide star selection are critical for smooth, accurate guiding, reducing the need for post-processing corrections. Proper setup ensures your imaging sessions stay steady and sharp.
What Are the Benefits of Using Autoguiding

Autoguiding considerably enhances astrophotography by ensuring your telescope’s precise tracking during long exposures. This process markedly boosts autoguiding efficiency, allowing you to capture sharper images without star trails or blurring. With accurate guiding, you can extend exposure times confidently, revealing more detail in faint objects. The guiding accuracy provided by autoguiding systems compensates for minor mount imperfections and atmospheric disturbances, which might otherwise degrade your images. By maintaining consistent, pinpoint star positions, autoguiding helps you achieve professional-quality results. Overall, autoguiding transforms your imaging experience, making it easier to produce clear, detailed astrophotos, even with mounts that aren’t perfectly calibrated. It’s an essential tool for maximizing the potential of your astrophotography setup.
Troubleshooting Common Autoguiding Problems
When autoguiding systems encounter issues, identifying the root cause can often feel like troubleshooting a complex puzzle. Common problems often relate to polar alignment, focal length, or calibration. To troubleshoot effectively:
- Ensure your polar alignment is precise; even slight misalignments can cause guiding drifts.
- Check if your focal length matches your guiding setup; longer focal lengths demand more accurate guiding.
- Recalibrate your autoguider to account for any slight shifts or mount flexure.
- Inspect your mount’s backlash and stability, as vibrations or loose gears can interfere with guiding accuracy.
Addressing these factors helps pinpoint issues and improves guiding performance. Regularly verifying your polar alignment and understanding your focal length’s impact are key to maintaining accurate autoguiding and sharp astrophotos.
Frequently Asked Questions
Can Autoguiding Be Used With All Types of Telescopes?
Autoguiding can be used with most telescope types, but mount compatibility is key. You’ll need a mount that supports guiding ports or has built-in guiding capabilities. Autoguiding greatly improves guiding accuracy, especially for long exposures, regardless of your telescope’s quality. However, always check your mount’s compatibility to guarantee seamless integration, as some older or specialized mounts may require additional adapters or upgrades for effective autoguiding.
How Often Should Autoguiding Calibration Be Performed?
You should calibrate your autoguiding system regularly, ideally every few sessions or whenever mount stability seems questionable. Think of calibration as a spa day for your mount—necessary to keep it in top shape. Frequent calibration ensures your guiding remains precise, preventing drift and star trails. Skipping it might save time, but it’ll cost you sharp images, so err on the side of caution and calibrate often enough to keep your mount happy.
What Is the Impact of Atmospheric Conditions on Autoguiding?
Atmospheric conditions, like turbulence and seeing, profoundly impact autoguiding accuracy. When turbulence is high, rapid, unpredictable air currents cause stars to twinkle and shift, making precise guiding harder. Poor seeing conditions reduce image stability, leading to difficulty in tracking celestial objects precisely. As a result, you might experience increased guiding errors or drift, and may need to adjust calibration more frequently to maintain peak autoguiding performance.
Is Autoguiding Necessary for Beginner Astrophotographers?
Autoguiding is essential even for beginner astrophotographers, as it helps overcome common challenges like mount vibrations or slight misalignments. For example, a new astrophotographer might find their images blurry after long exposures, but autoguiding can correct small errors in real-time. While there are some autoguiding limitations, it markedly improves image quality, making it a valuable tool for beginners aiming for sharp, stunning astrophotos.
How Do I Choose the Right Autoguiding Software?
To choose the right autoguiding software, consider your mount’s stability and software compatibility. Look for programs that work seamlessly with your mount’s brand and control system, ensuring smooth operation. Prioritize software with user-friendly interfaces and reliable tracking features to minimize drift. Research reviews and tutorials to find what others recommend for your setup. Ultimately, the best choice helps keep your images sharp without adding unnecessary complexity.
Conclusion
Even your trusty mount, like a steady ship, can drift off course during long exposures. Autoguiding acts as your vigilant navigator, keeping your astrophotography on the exact celestial path. By fine-tuning your setup and troubleshooting issues, you’ll turn blurry starlight into crisp, breathtaking images. Remember, with autoguiding, you’re not just capturing stars—you’re capturing the universe’s story with precision and clarity, making every shot a stellar masterpiece.